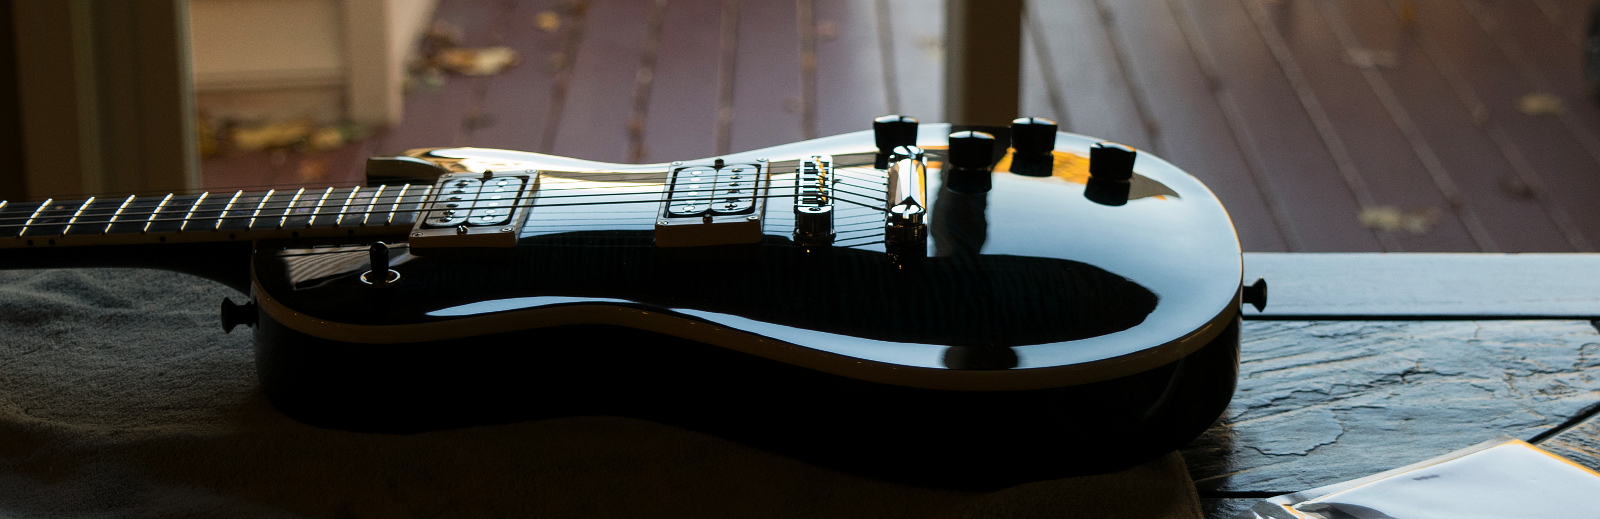
Finishing the top is a multi-step process.
Because the maple top has a natural light brown coloring that gets even darker when lacquer is applied, and because the desired color is blue, we first need to bleach the top using 2-part wood bleach. This is considerably stronger and more caustic than household bleach. Its half sodium hydroxide (lye), and half hydrogen peroxide 30% solution. For reference, household peroxide is a 3% solution. Either of these chemicals could eat a hole through your skin and together they are really caustic. They take the color right out of the wood and leave it white, which is key when you want a blue finish. the natural wood color would combine with blue and make it a murky greenish tint. No good 🙂
I used 3 applications of wood bleach allowing it to dry completely between applications.
After bleaching I seal the “faux binding” area with water-thin CA glue. This keeps any color from soaking in if I accidentally get some in this area.
Next we stain the entire top black. This might seem an odd thing to do considering the trouble we went to to bleach it. This is Transtint black mixed with denatured alcohol. It works well but I’ve discovered since then that water based aniline black gives me better results.
Next, after allowing the top to dry completely, I sand that black right back off again and you can see that it causes the quilt figure in the wood to be revealed much more prominently. This is called “popping” the figure. The reason is shows up the figure is because black penetrates the wood much more deeply where the figure is in the wood, so when you sand the top layer off it take all the black and only leaves the part that was in the figure.
At this point I re-seal the faux binding with more CA because my sanding will have cleaned it off some spots. This is no time to cut corners or skip steps to save time. A mistake now can ruin everyone’s entire day. Well, not everyones. Just mine really 🙂

Next, the whole top is wiped with aniline dye.
This is LMII water based aniline dye with a ratio of 12.5:1 blue and yellow. My “wiper” was fairly wet.
( 0.5 g. of blue and 0.04 g. of yellow precisely) mixed into about 1/2 – 3/4 cup (approx) of boiling water.
At that strength only one application was needed to get the intensity I wanted

The final step, the burst, is shot with an HVLP gun with lacquer. Again, this should be obvious, but I’ll state it again anyway. the dyed top must be 100% dry before proceeding. Trapping water under the lacquer will completely wreck the finish. I allowed 24 hours. It was dry to the touch long before that, but I dont believe in taking chances. Water soaks in and it can still be damp beneatht the surface and feel dry to the touch.
For the blue gradient I used straight blue Transtint liquid stain mixed directly into the lacquer and spray a wide path around the perimeter leaving the center un-touched, followed by a much narrower burst shot with black lacquer at the edge. The “natural” edge is masked off with tape while the color coats are being shot. The tape is removed after. Once the color coats are done, front, back, and sides, the whole body will be shot with 7 or 8 coats of clear gloss lacquer.

The back is shot in a similar way but just the transtint blue and black.
I use engraving tools to imprint the serial number in the rear spring cavity.
Addict logo decal. I love the metallic gold. Dont mind the orange peel. There are still several coats of clear to go over this, then it’ll be wet-sanded flat, and a final coat of satin sheen lacquer over all… 

 Next Page