Addict  Guitars

  • Home
  • Store
    • Services
    • Products
    • Shopping Cart
    • Checkout
  • Customer Builds
    • Mikes Strat
      • Rough cutting the neck
      • The body
      • The body 2
      • Neck part 2
      • Neck do-over
      • Fretboard inlays
      • neck – continued
      • Body Routing
      • Body home stretch
      • Pre-finish assembly
      • Finishing
      • The End
      • Refinish
    • Plum Monster
      • Plum Monster 1
      • Plum Monster 2
      • Plum Monster 3
      • Plum Monster 4
      • Plum Monster 5
      • Plum Monster 6
      • Plum Monster 7
      • Plum Monster 8
      • Plum Monster 9
      • Plum Monster 10
      • Plum Monster 11
      • Plum Monster 12
      • Plum Monster 13
      • Plum Monster 14
      • Plum Monster 15
  • My builds
    • 24 Magnum – Phoenix
      • Phoenix1
      • Phoenix2
      • Phoenix3
      • Phoenix4
      • Phoenix5
      • Phoenix6
      • Phoenix7
      • Phoenix8
      • Phoenix9
      • Phoenix10
      • Phoenix11
    • Root beer float
      • 22 Magnum HT – 1
      • 22 Magnum HT – 2
      • 22 Magnum HT – 3
      • 22 Magnum HT – 4
      • 22 Magnum HT – 5
      • 22 Magnum HT – 6
      • 22 Magnum HT – 7
      • 22 Magnum HT – 8
    • The Bass
      • Bass 1
      • Bass 2
      • Bass 3
      • Bass 4
      • Bass 5
    • Angel step Strat
      • The quilted body
      • The damascus neck plate
      • The finish
      • Complete
    • “Bushido” Les Paul
      • Bushido LP1
      • Bushido LP2
      • Bushido LP3
      • Bushido LP4
      • Bushido LP5
      • Bushido LP6
      • Bushido LP7
      • Bushido LP8
      • Bushido LP9
      • Bushido LP10
      • Bushido LP11
      • Bushido LP 12
    • 22 Special “Traditional”
      • Parts and materials
      • Body Part 1
      • Body part 2
      • Body Part 3
      • Body Part 4
      • Body Part 5
      • Body Part 6
      • Neck Part 1
    • Fuego Strat
      • Fuego neck
    • 22 Magnum Traditional
  • Things
    • Gallery
    • Contact Us
    • Odds and ends
      • Goof
    • About
    • Song
      • Back story
      • Cumbersome
      • Chris and Jake

Soooo this is where we make this thing look awesome. The finish 🙂


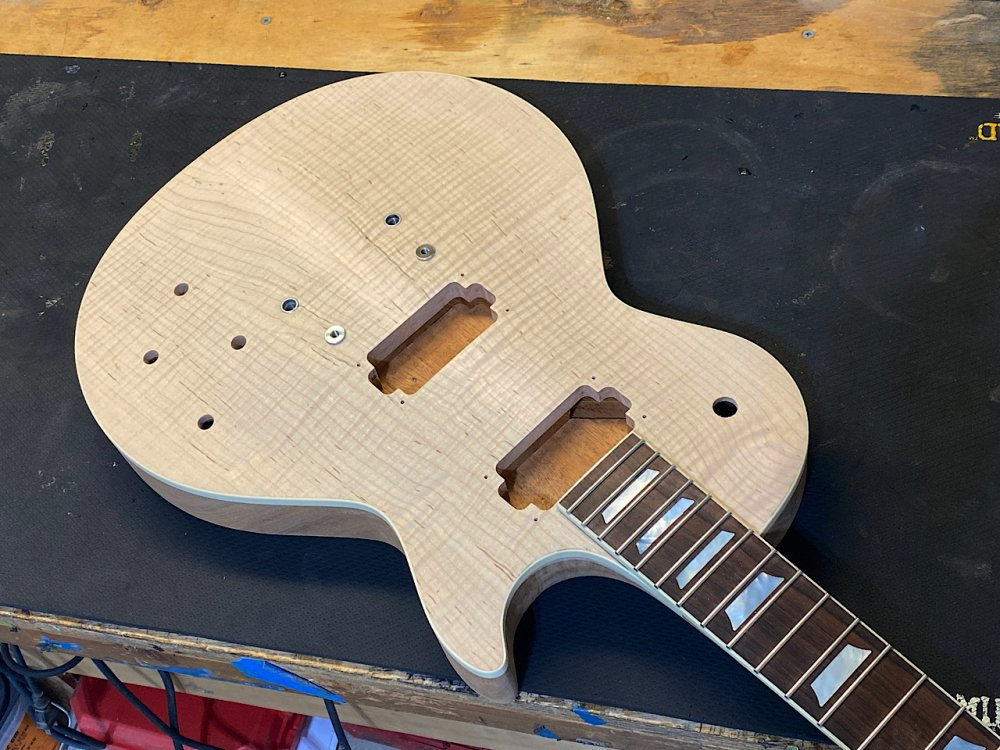
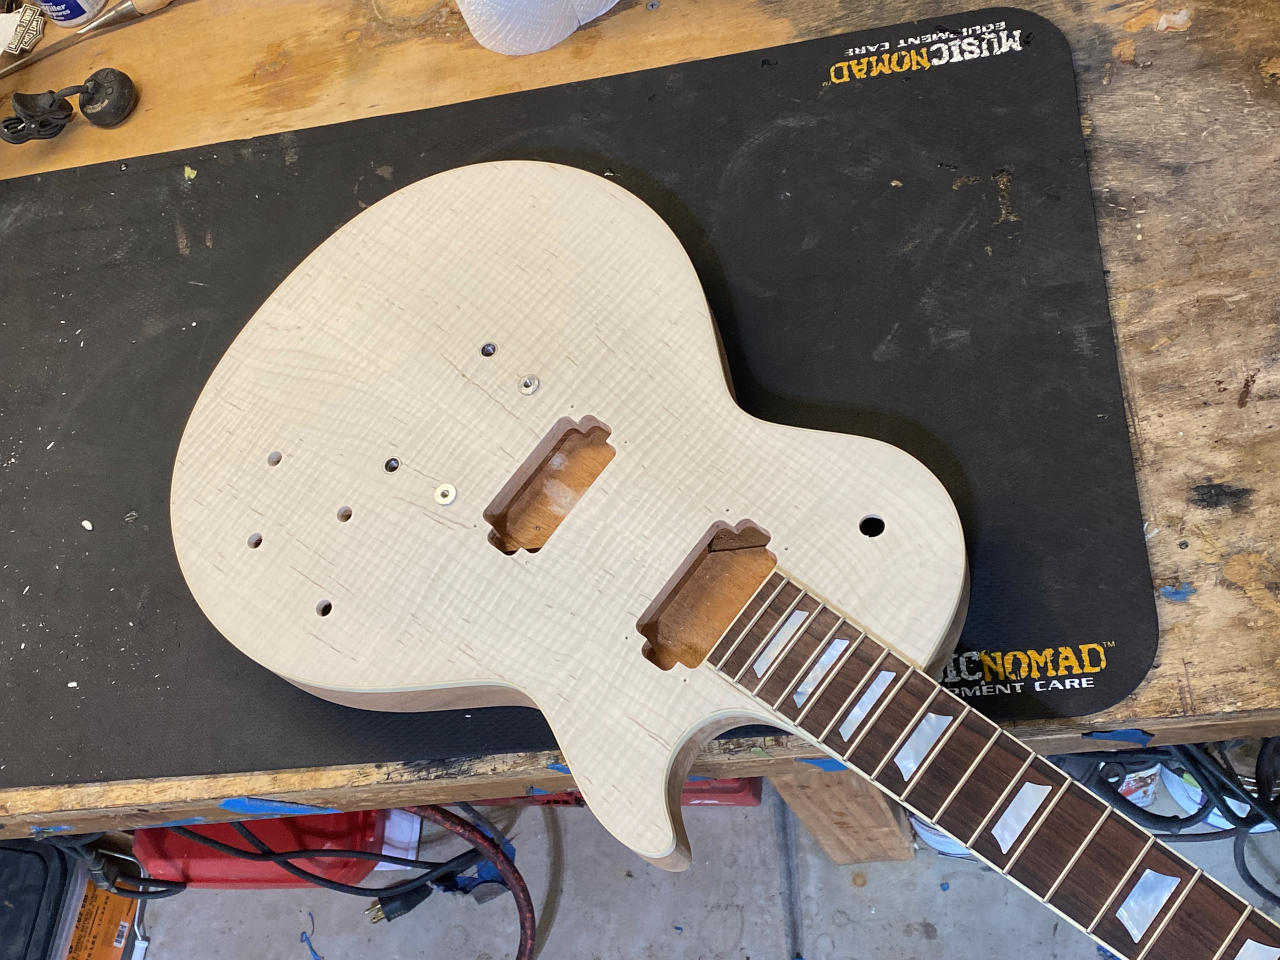
First thing that needs to happen is to bleach the top. As you can see here theres a pale streak up the center line, and the rest has a natural tan color, especially with lacquer, that will mess up the blue I plan for the top. It doesn’t look too bad here, but with lacquer applied more of that natural brown is going to show, and it would really screw up the blue I want.


This is a two part wood bleach composed to half sodium hydroxide, and half hydrogen peroxide 30%. This stuff will straight up melt your head so care is needed

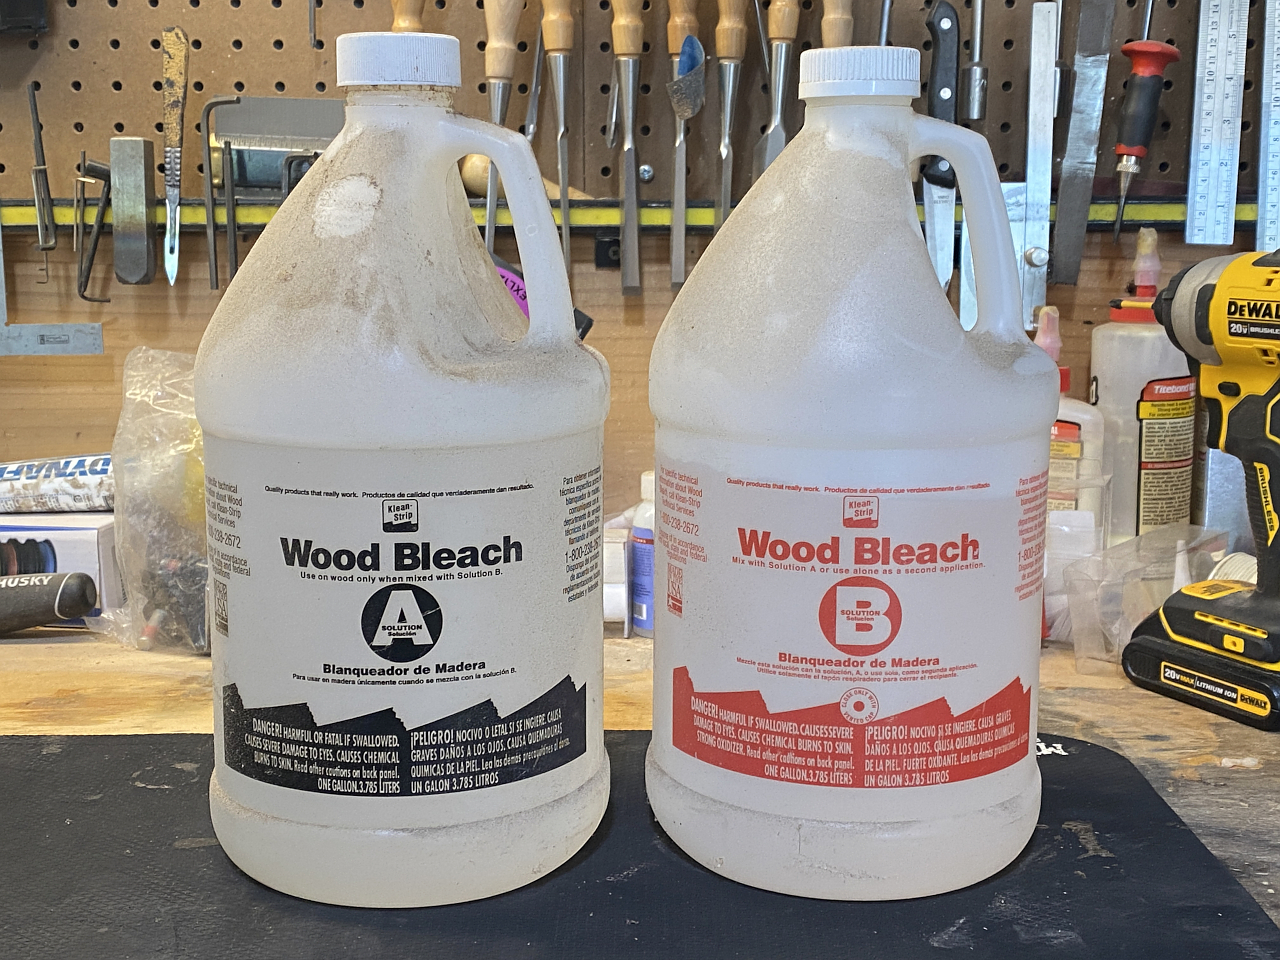
I mix this stuff 50/50 using all proper safety gear. Gloves and eye protection are a must.

I apply it to the entire top getting it more or less evenly wet, and then allow it to dry completely. I repeat this process 3 times. When finished the top is a much more even tone and most of the tan tint gone.

I finish up by wiping on a weak solution of vinegar and distilled water to neutralize any remaining caustic substances, let it dry and you are all set.

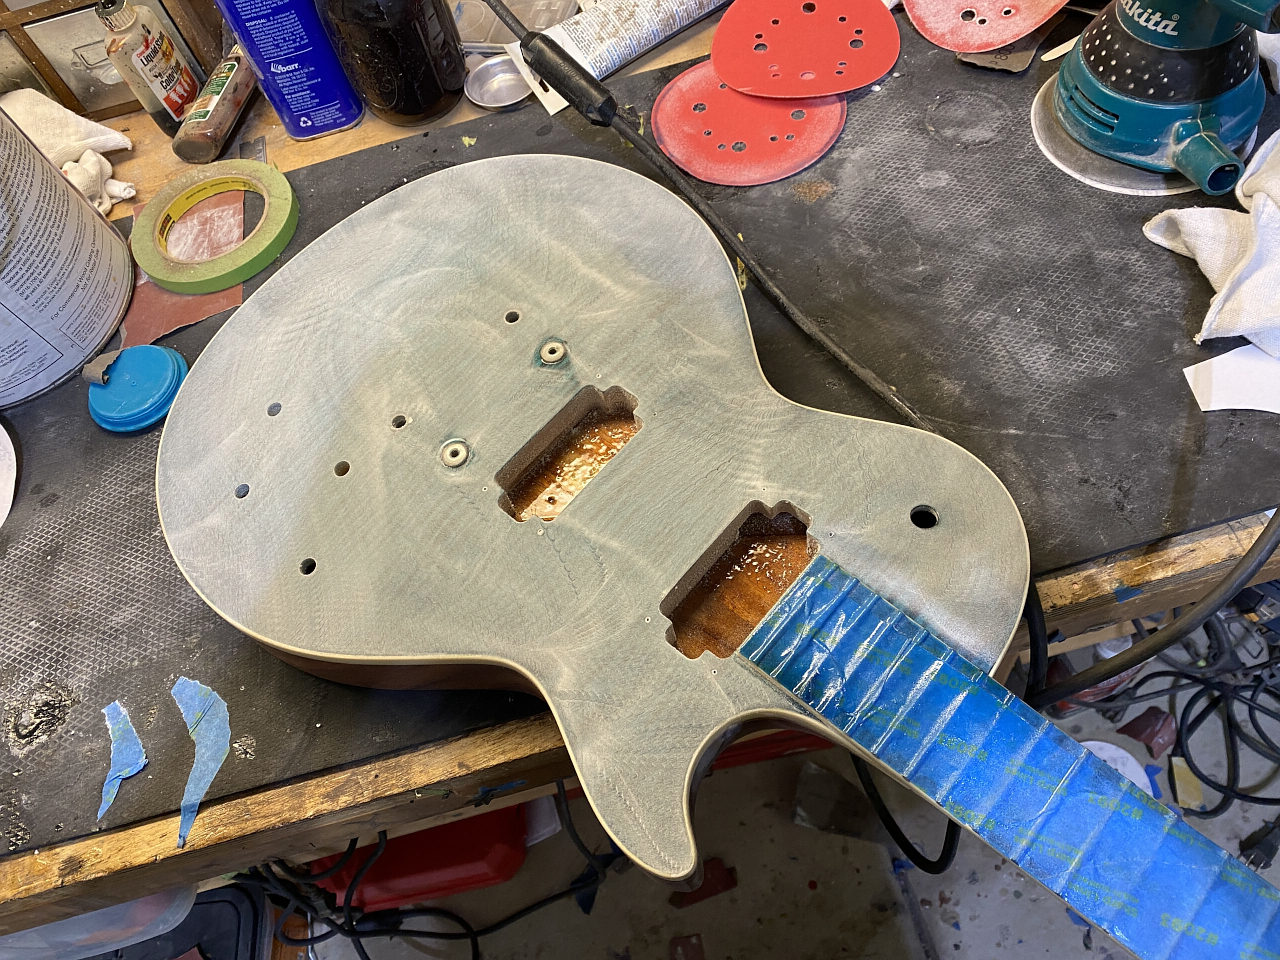
At this point you dont want to do a lot of sanding as the bleached wood goes only just below the surface. If you sand it much you’ll need to re-bleach as you’ll expose the darker wood again.

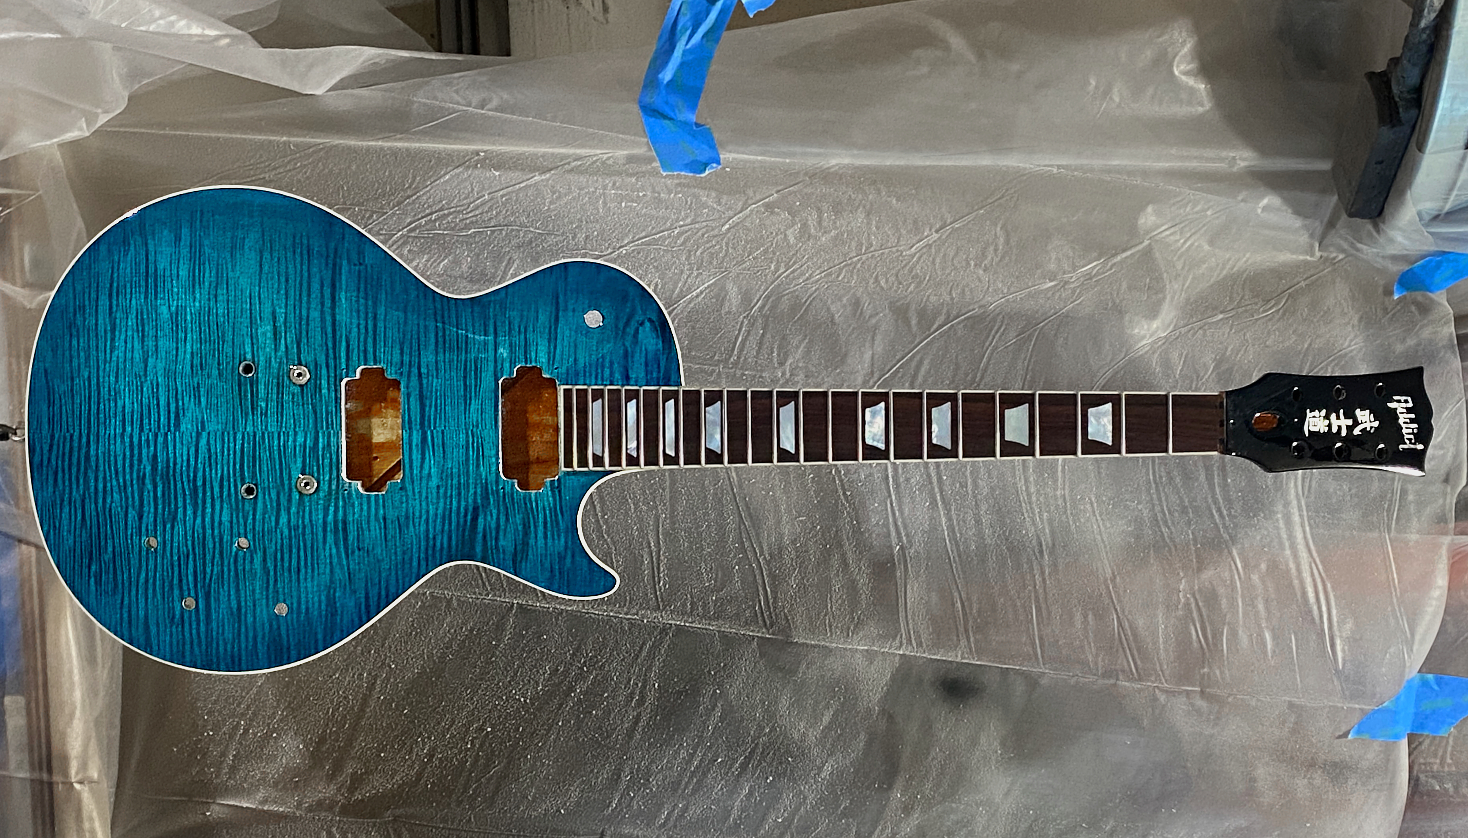
Next up, dye the entire top black, and allow it to dry completely

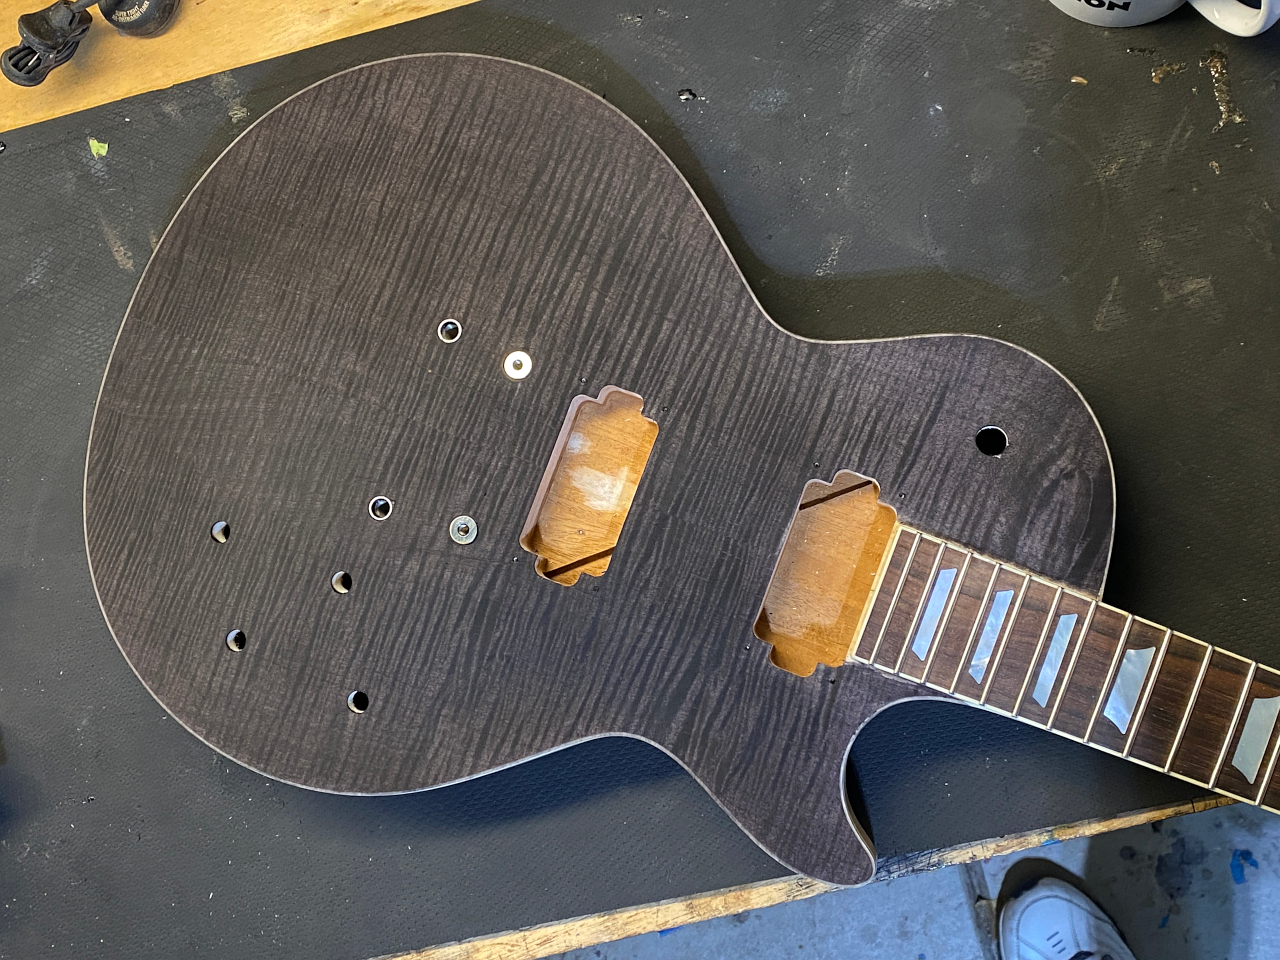
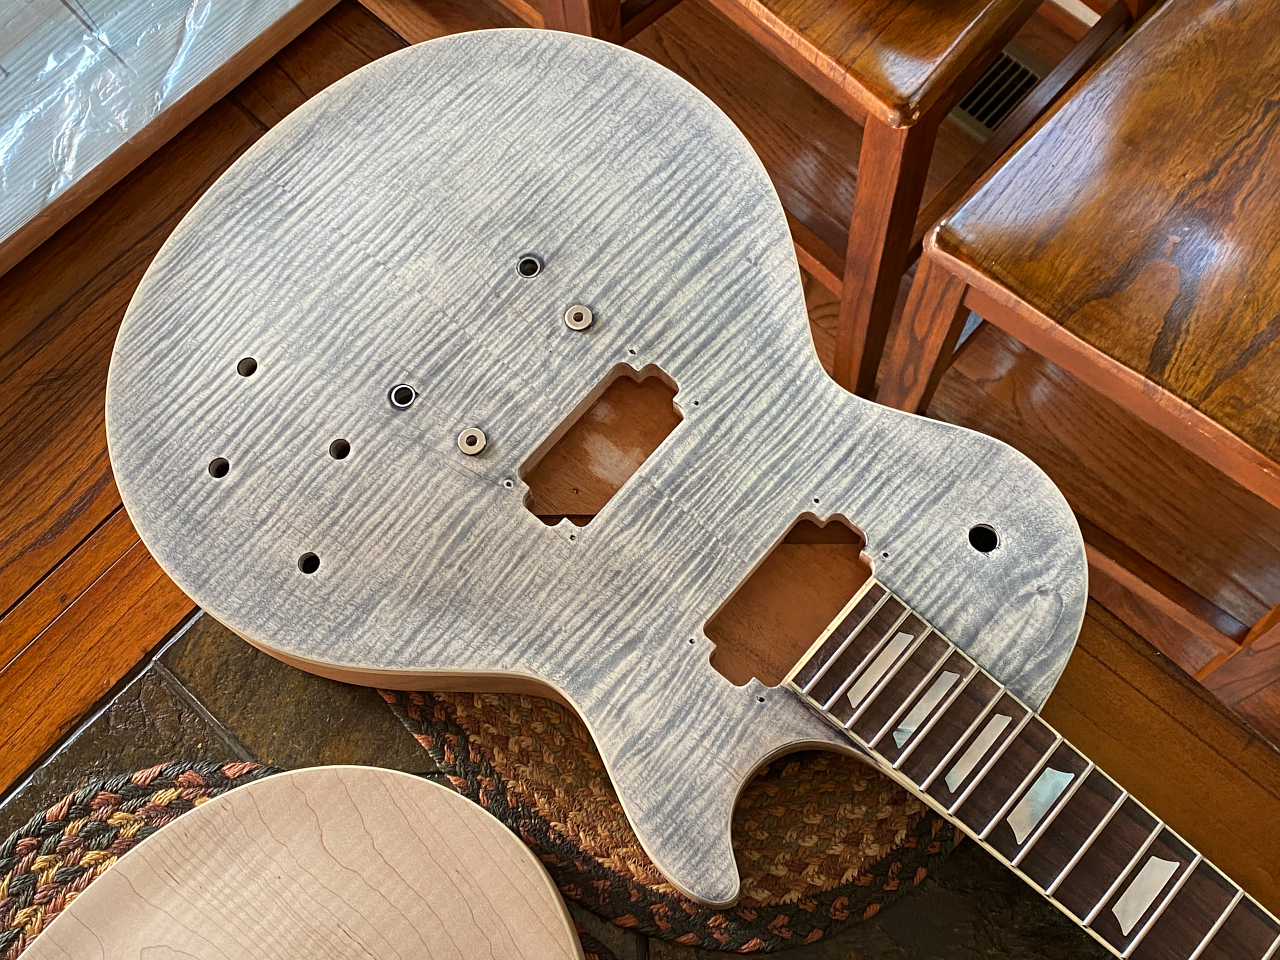
then sand it all off again, except where the black penetrated more deeply into the wood because of the figure,

the the entire top gets the blue dye wiped directly onto the wood. This mix is about 10:1 blue to yellow which gives it that turquoise hue without looking green. This is done using water based aniline dye


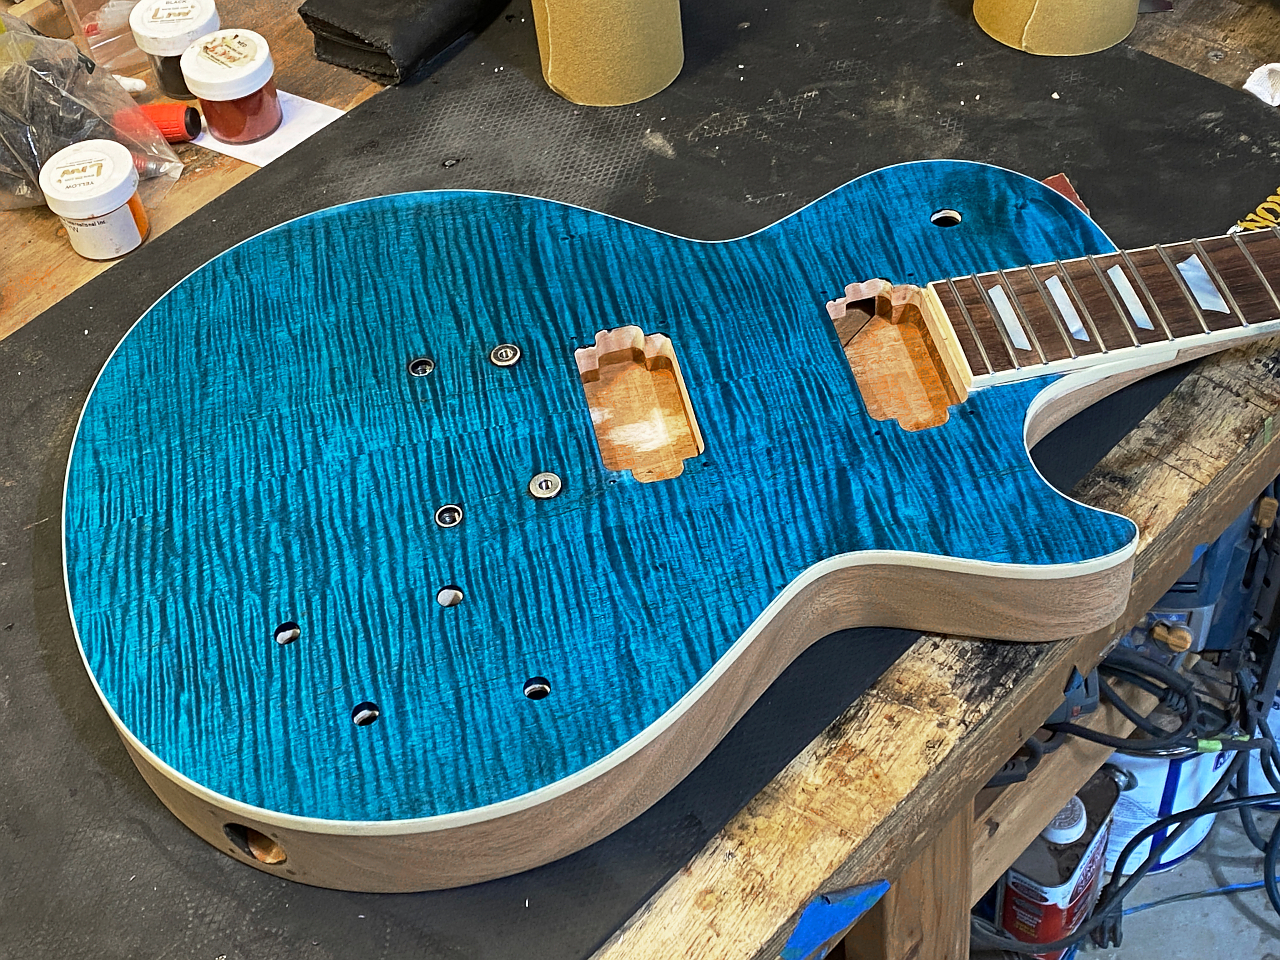
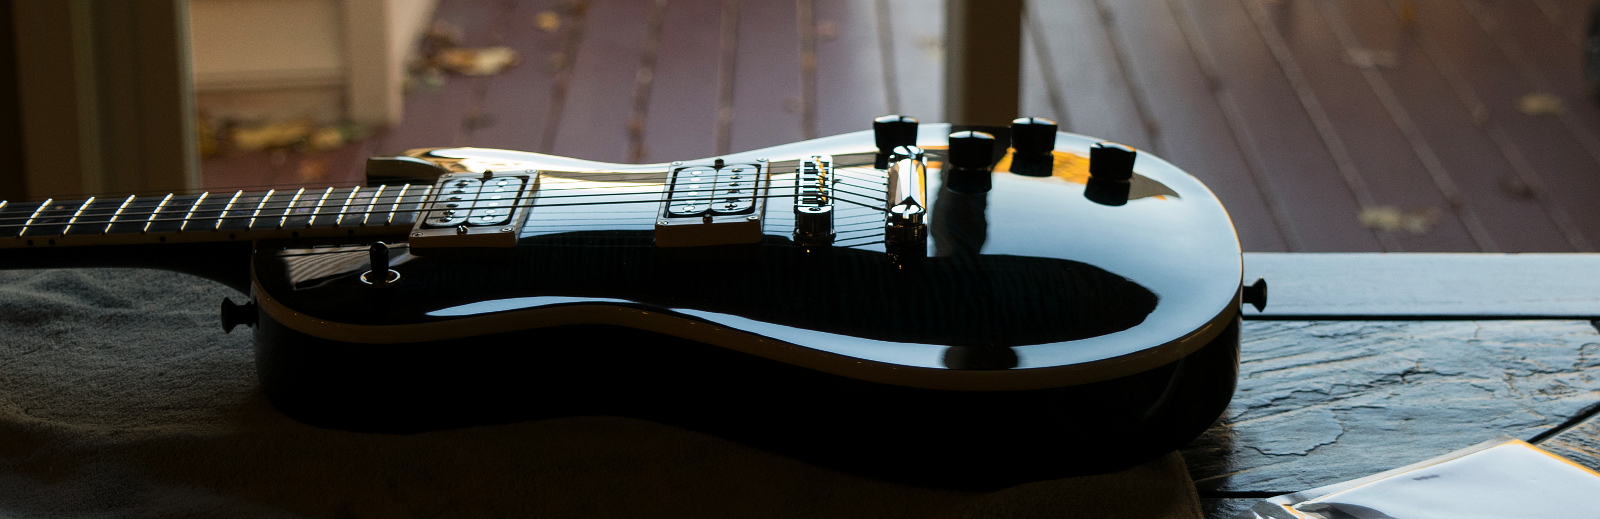
Next the entire top is overshot with a coat of clear lacquer, followed by a “burst” of clear mixed with blue to faintly darken around the perimeter.

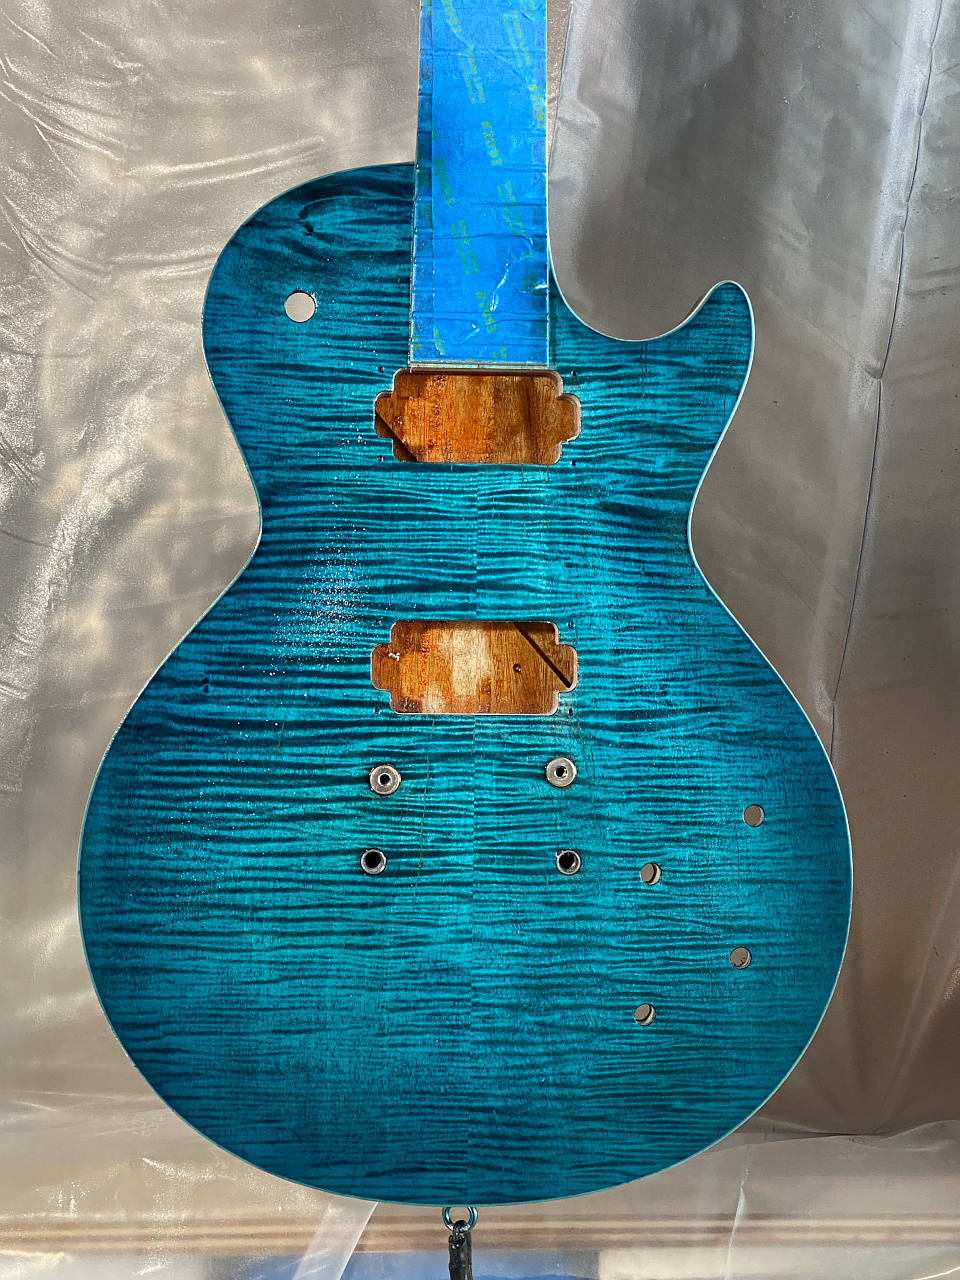
then finished with 5 coats of straight clear.

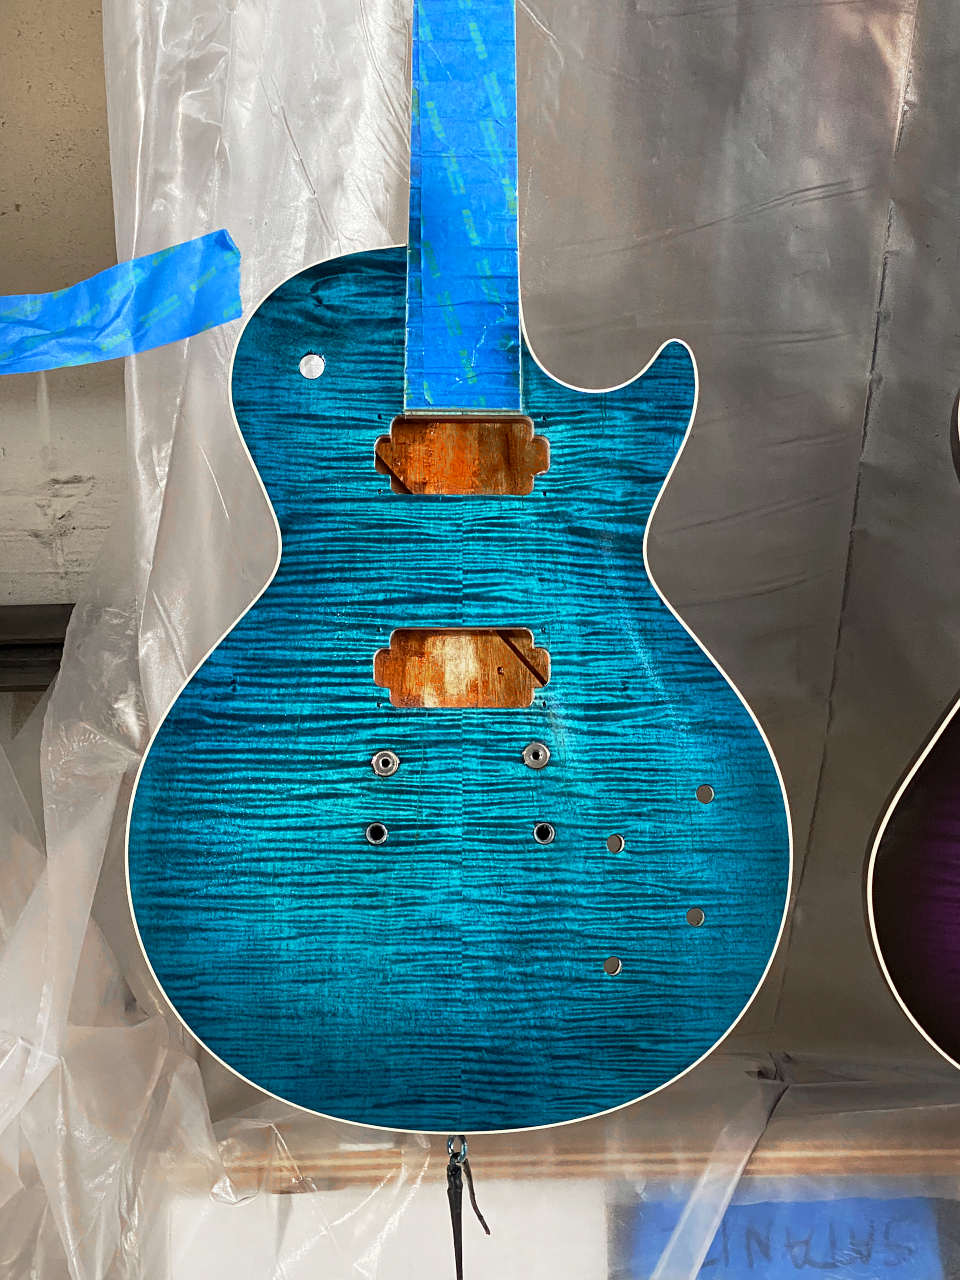
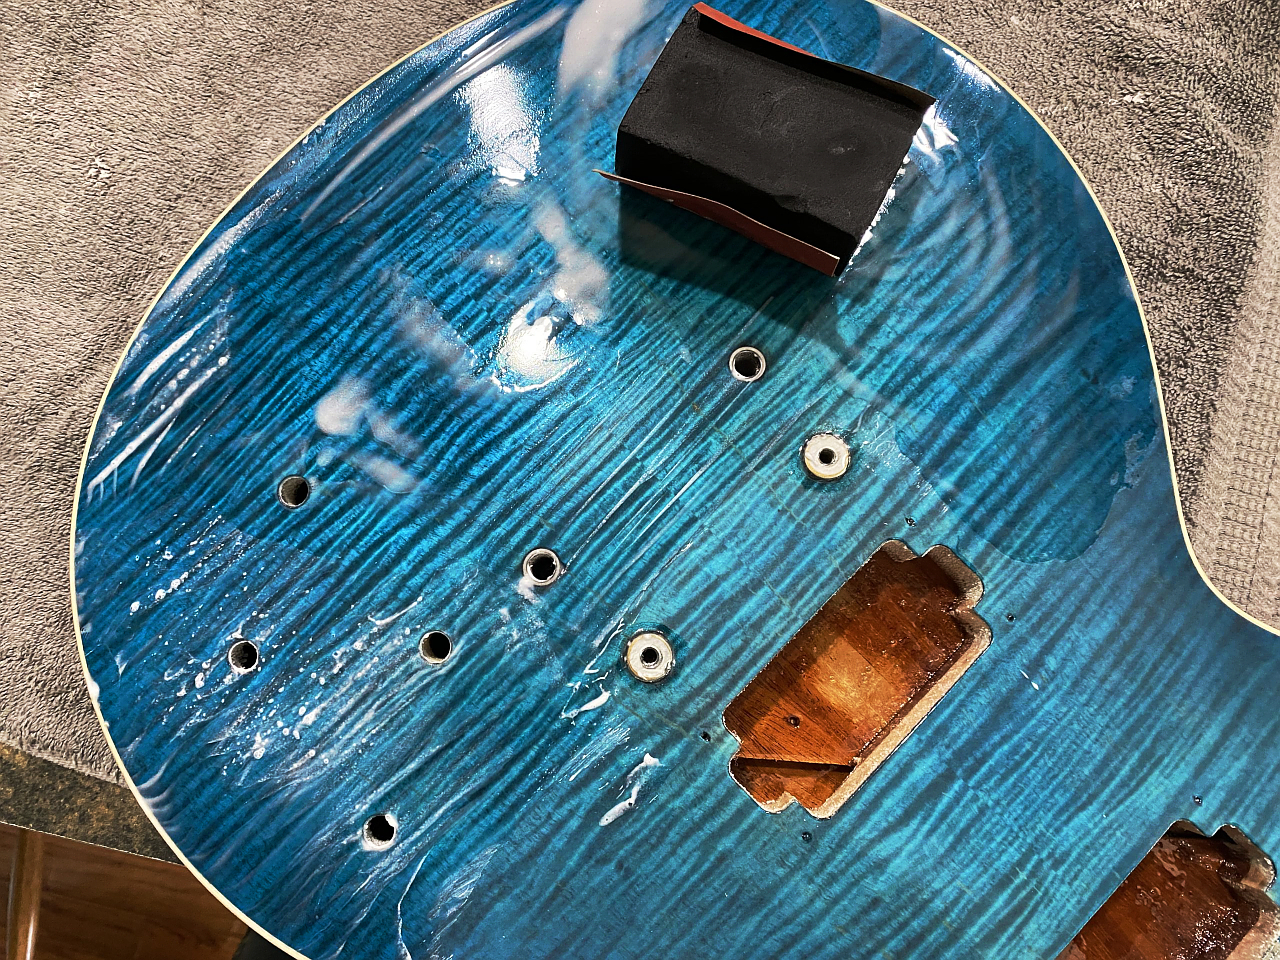
After a couple days of drying and hardening, the clear is level sanded with a random orbital sander and a 320 grit disk to get rid of any major “orange peel” or ripples


and a final flowout coat of clear that has been thinned about 50:50 with reducer, and then about 5% retarder to just slow down the flash over just a little bit so it flows out nice and flat


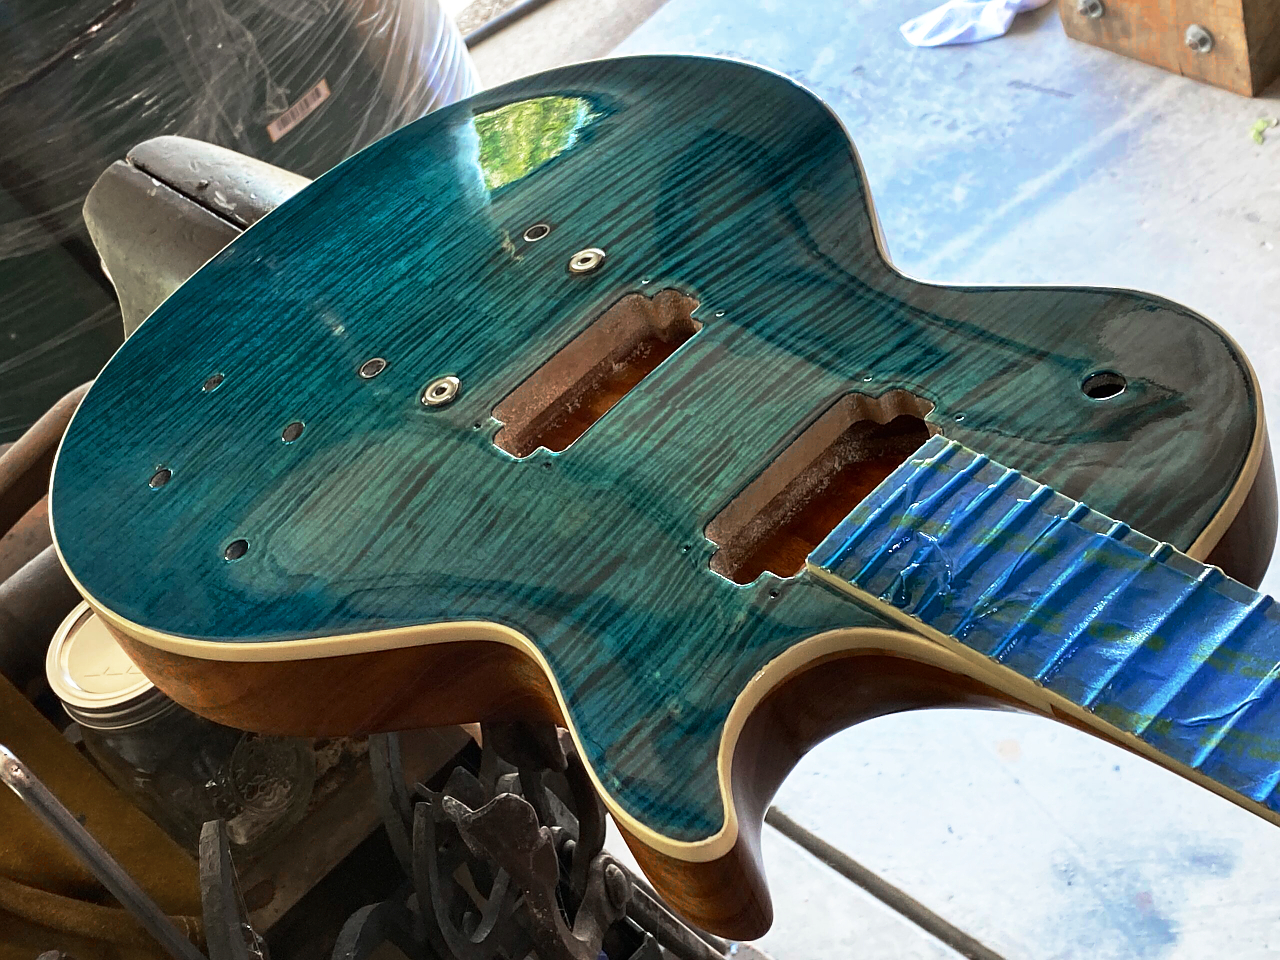
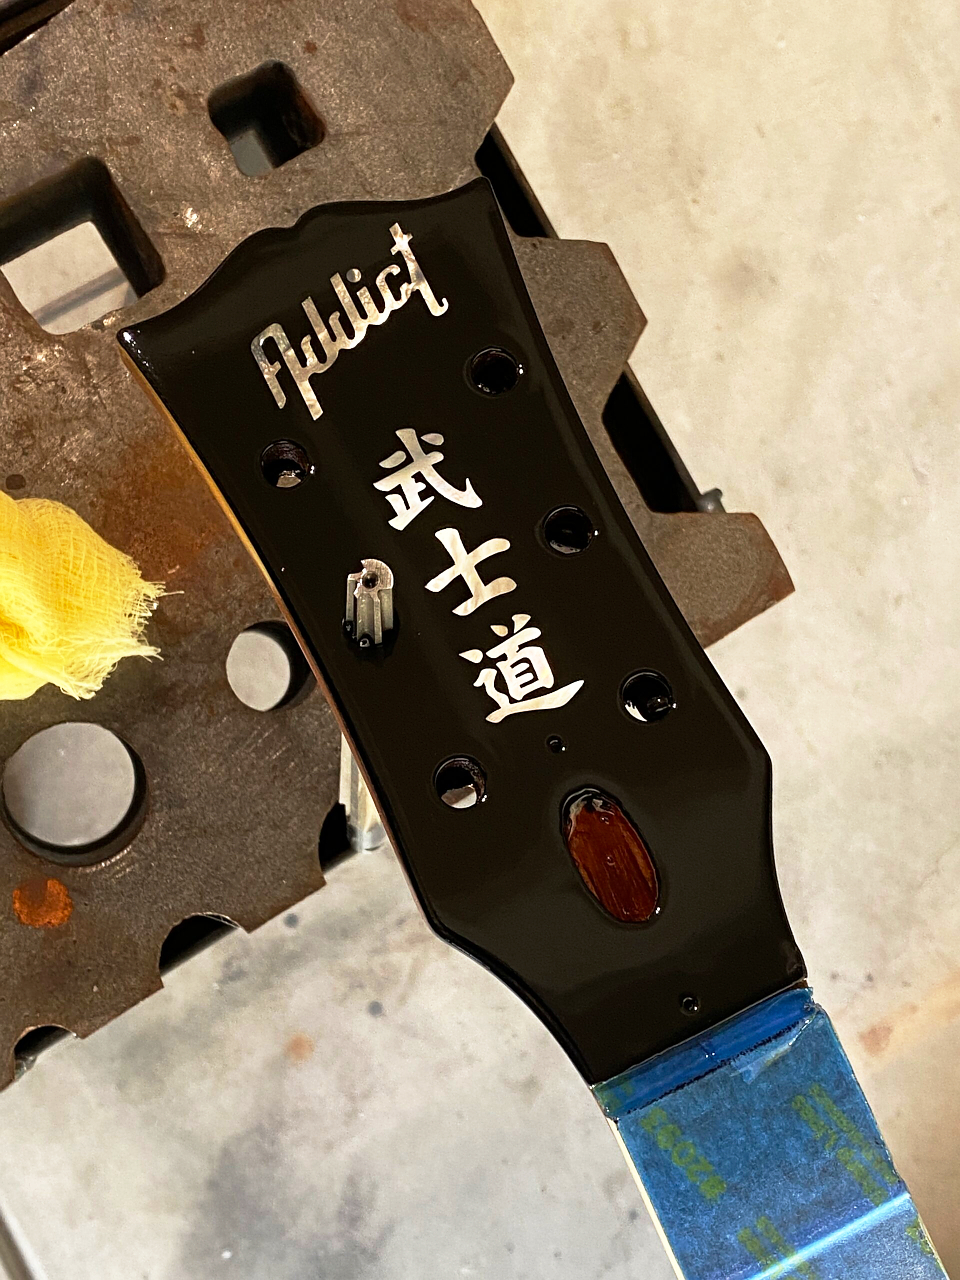
Same treatment to the headstock face


the back, sides, and neck also get level sanded, but in their case the final coat of clear is mixed with about 5% of flattener. This gives the final coat a nice satin sheen as opposed to the hard gloss of the top and headstock face


Oh what fun….


Wet sanding sucks 🙂

Bushido LP10

Recent Posts

  • Strat Porn
  • Getting closer…
  • Fret slots and tuner holes
  • More progress on the double-Strat build.
  • Mikes Custom Strat

Recent Comments

    Archives

    • March 2018
    • January 2018
    • December 2017
    • September 2015

    Categories

    • Uncategorized

    Meta

    • Log in
    • Entries feed
    • Comments feed
    • WordPress.org
    © Powered by Wordpress