This is a description of one way of building a guitar. Its not the only way its done, by any means. In the world of Luthery there are many ways to skin a cat. Not that I would ever skin a cat. That would be horrible! I dont want anyone thinking that I'd ever...I...I digress.
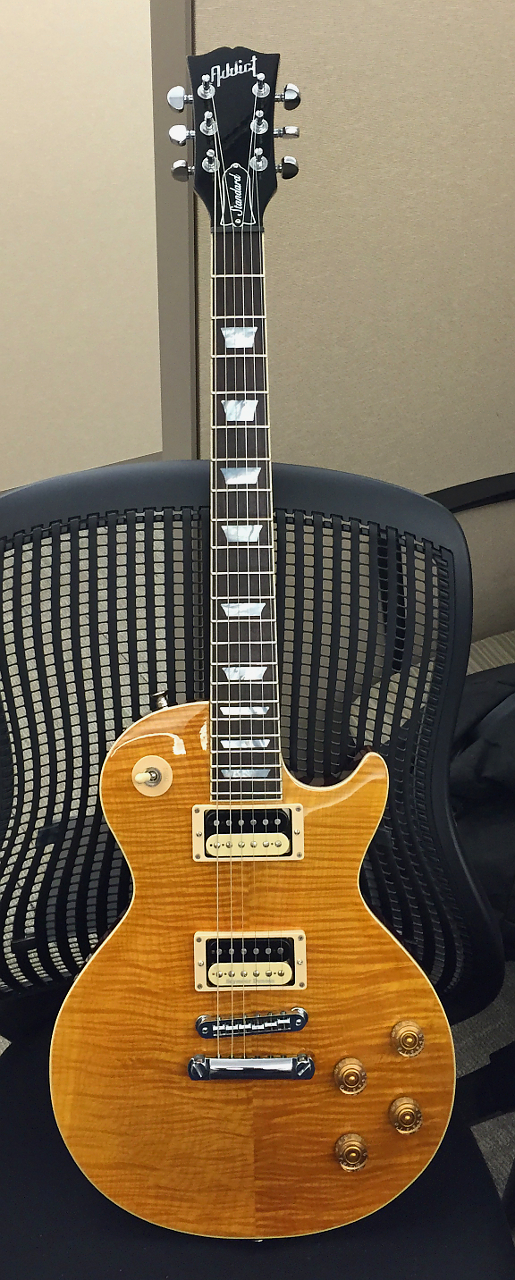
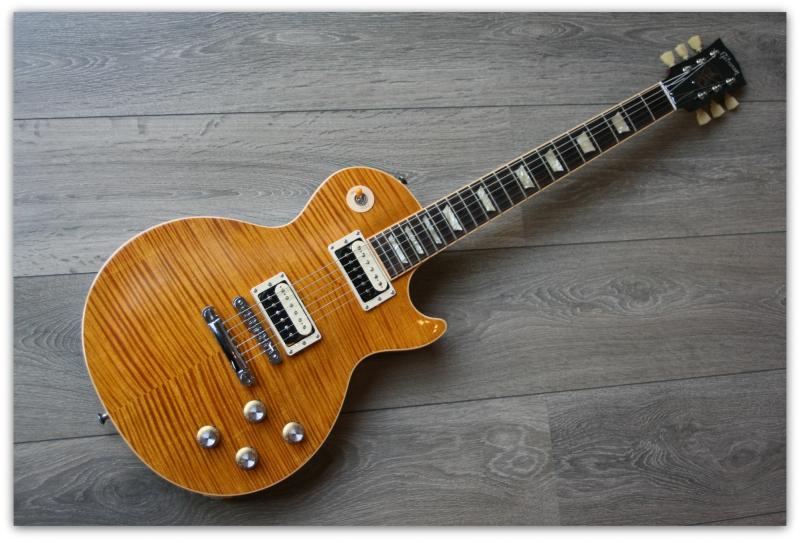
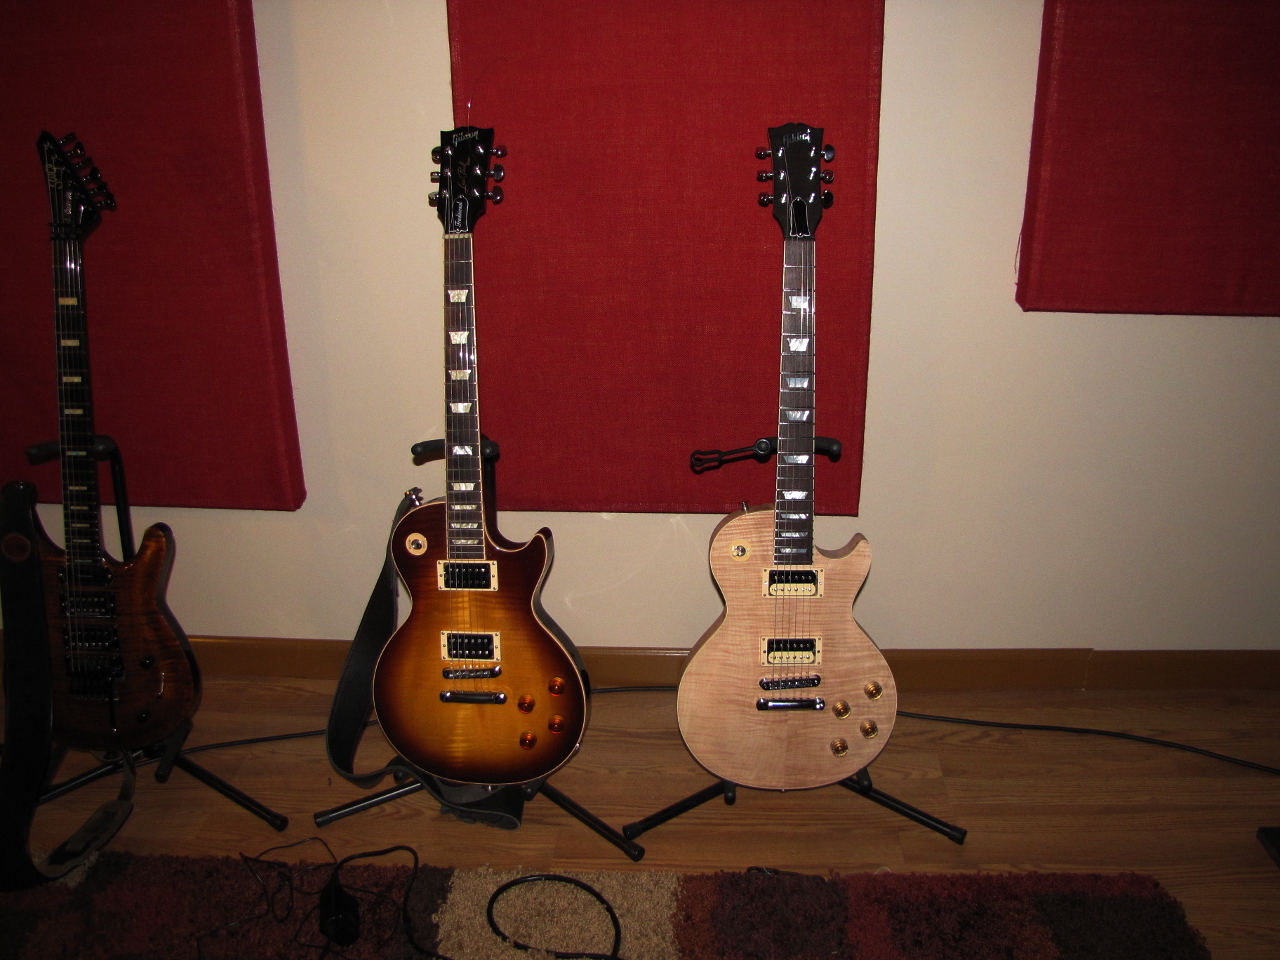
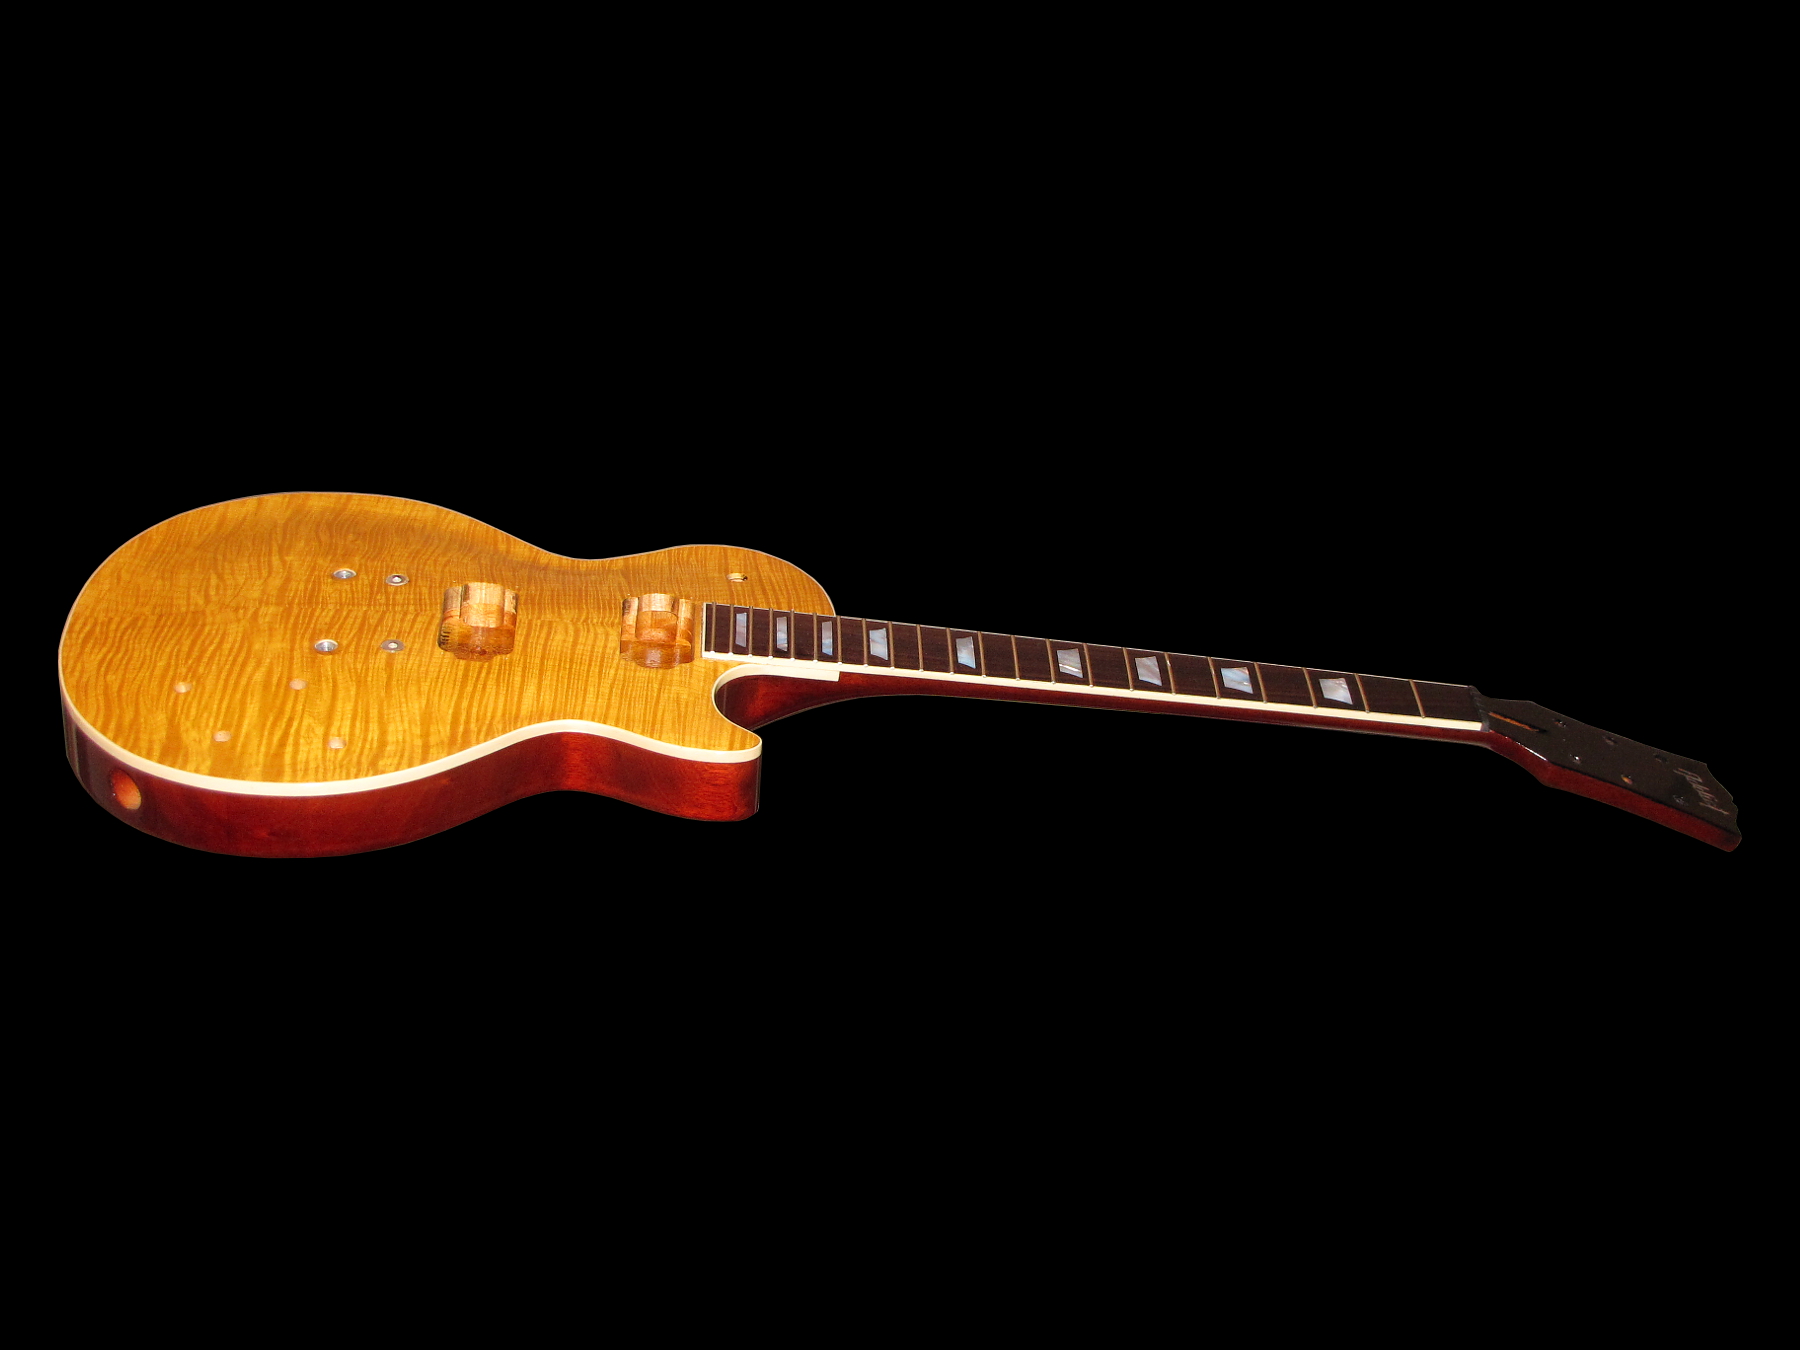
First off so there is no misunderstanding, the first photo just below here is NOT the guitar I'm building. Its an example of what I'm shooting for in the finish dept.
Moving along, first you have to have a plan. We'll start there and see how close we come to acheiving the goal once we have a finished product. The design is based on a traditional 1959 Gibson Les Paul Standard with some design modifications. Ideally it will look very much like the photograph below.
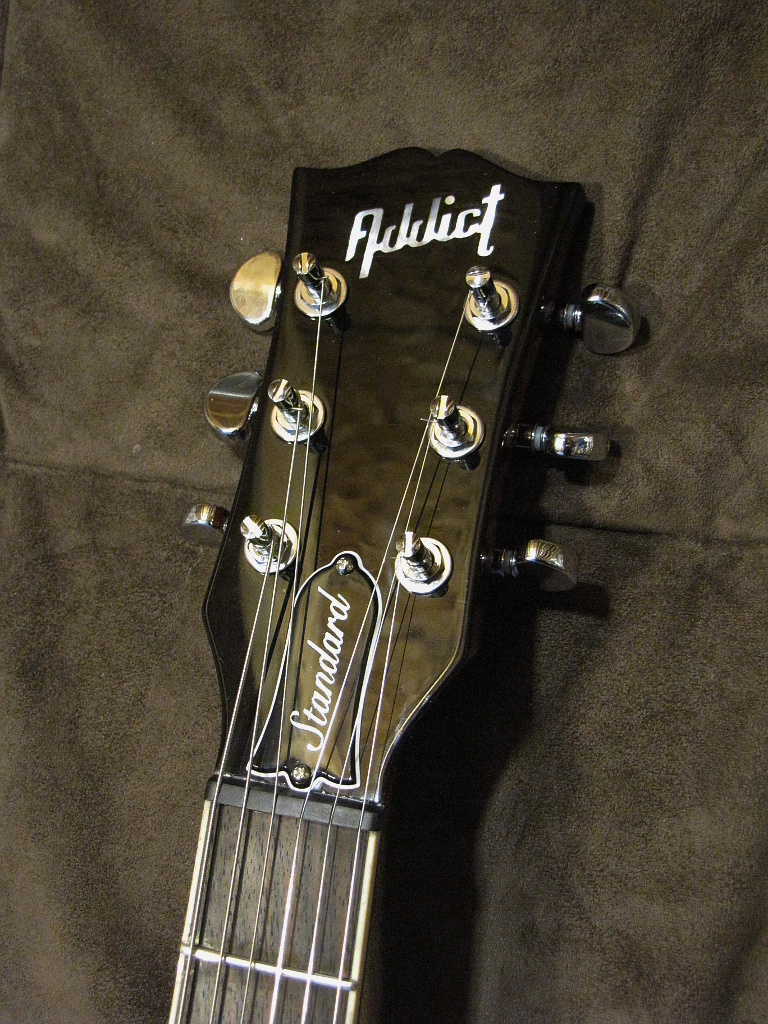
Also the Gibson headstock logo will be replaced with my own "company" logo "Addict" (I dont actually have a company) although the font and placement of the logo will be deliberately designed to resemble the Gibson logo. This guitar will not be for sale, but for my own personal use, so any resemblance to existing products is not an infrigement of any patents, trademarks, or copyrights.
This is in fact my very first attempt to ever build a guitar, so in the end there may be some imperfections but I'm confident that they will all be aesthetic in nature and hopefully will be imperfections that only I will ever know about ;)
What I will show here are photo's and descriptions of each completed step as opposed to the nitty gritty of how I did each step. If anyone reading this has any questions about how I did something, ("why, for gods sake, would you do it that way?!" etc) and you make it that far, you can feel free to e-mail me at the address at the bottom and I'll be happy to answer.
Here is photo of what I'm shooting for. This is not an actual 59, its a replica of a guitar used by Slash, which is supposed to be of the same dimensions and specs as the 59. This is also the color and look and finish I'll be trying to replicate with my own, so for our purposes its good enough. It just to show you my "target"
Outwardly (from the front) there should be no glaring visible differences between the pictured guitar and my creation with just a couple minor exceptions, one of which I've already mentioned above, and I'll detail those others further into this document. Its apprearance, shape, dimensions, and the wood that its made from are the same that were used in 1959 although the top wood will be much more highly figured. My hope is that the changes I'm making to the design of the guitar will yield a better, more resonant instrument with greater sustain as well as slight improvements in comfort, ergonomics, and visual appeal.
Back, body, and neck wood: Honduran or big-leaf mahogany (Swietenia macrophylla), In the 60's Gibson switched to "African Mahogany" which isnt actually Mahogany at all (yay marketing!), but a cheaper, more readily accessible substitute which most discerning people will agree doesnt sound as good. I wanted the real deal, so thats what I used
Top plate: White curly maply, flame figure
Fretboard: East Indian Rosewood.
Bridge, tailpiece, covers, and knobs: Genuine Gibson parts.
Tuners: Grover Roto-Grip Locking rotomatics.
Pickups: Seymour Duncan JB and 59 Zebra's
Fretboard and headstock inlay: White Mother of Pearl
It will have 22 frets and will be a 24 3/4inch scale.
The areas where I diverged from the original design are as follows:
Scale: In 1959, the scale of the Les Paul model was not actually 24 3/4. I believe it was 24 5/8. They went to 24 9/16 in 1969 although they called it 24 3/4 no matter what it really was. Mine will be an actual 24 3/4 scale and so the scale length will actually be 1/8 inch longer (or 3/16 depending on what it really was in 1959) than that of a 59 Les Paul.
A quick note on scale. The scale length of a guitar is the length of the vibrating string, from the nut to the bridge saddle. Different guitars use different scales. A Fender Stratocaster, for instance, has a 25 1/2 inch scale. Paul Reed Smith uses an even 25 inch scale. Scale length can affect the tone and feel of an instrument, but it cant be said with confidence that one is better than another. Its a subjective, personal preference thing all the way :)
Neck: The actual Gibson Les Paul model has the neck glued to the body via a mortice and tenon joint with the neck angling away from the plane of the body at 4.4 degrees.
The Gibson neck is carved from a single piece of mahogany (sometimes quarter sawn) with an older style, single action truss rod inside.
The Addict neck will be a neck-through-body construction with the neck being a 3 piece laminate, a modern double action truss rod, and a pair of graphite stiffening rods embedded in the neck under the fingerboard. These changes are designed to increase the stiffness of the guitar and improve the overall vibration transmission by eliminating the mortice and tenon joint all together. the goal being to improve sustain and resonance. Additionally, the lack of a joint there allows me to eliminate the heel and then some which allows easier access to the upper frets while playing.
I also will be reducing the neck angle from 4.4 degrees to 3.6 degrees. This is because I find that the strings and pickups are a touch higher over the body than I like from both an aestetic and ergonomic perspective. Reducing the neck angle will allow me to keep the pickups, strings, bridge, etc just a little closer to the body.
Fingerboard inlay: Gibson uses plastic inlays, which they call "Pearloid". I'm using actual Mother of Pearl.
Tuners: Also I will be replacing the vintage Kluson tuning machines with Grover tuners. The reason is simply that I think (not everyone agrees with this sentiment) that the traditional tuners look like crap and I dont like them. Just my opinion. Dont like em. As with the omission of the traditional pick guard, its my guitar and I can do this if I damn well please :)
So, without further ado, here we go. Thumbnails can be expanded to view full size images, and a description of what the photo details is next to the thumbnail image. I wont go into the minute details of how each step is performed. that will quickly get very tedious and time consuming. This is more of a high level overview of each step in the process.
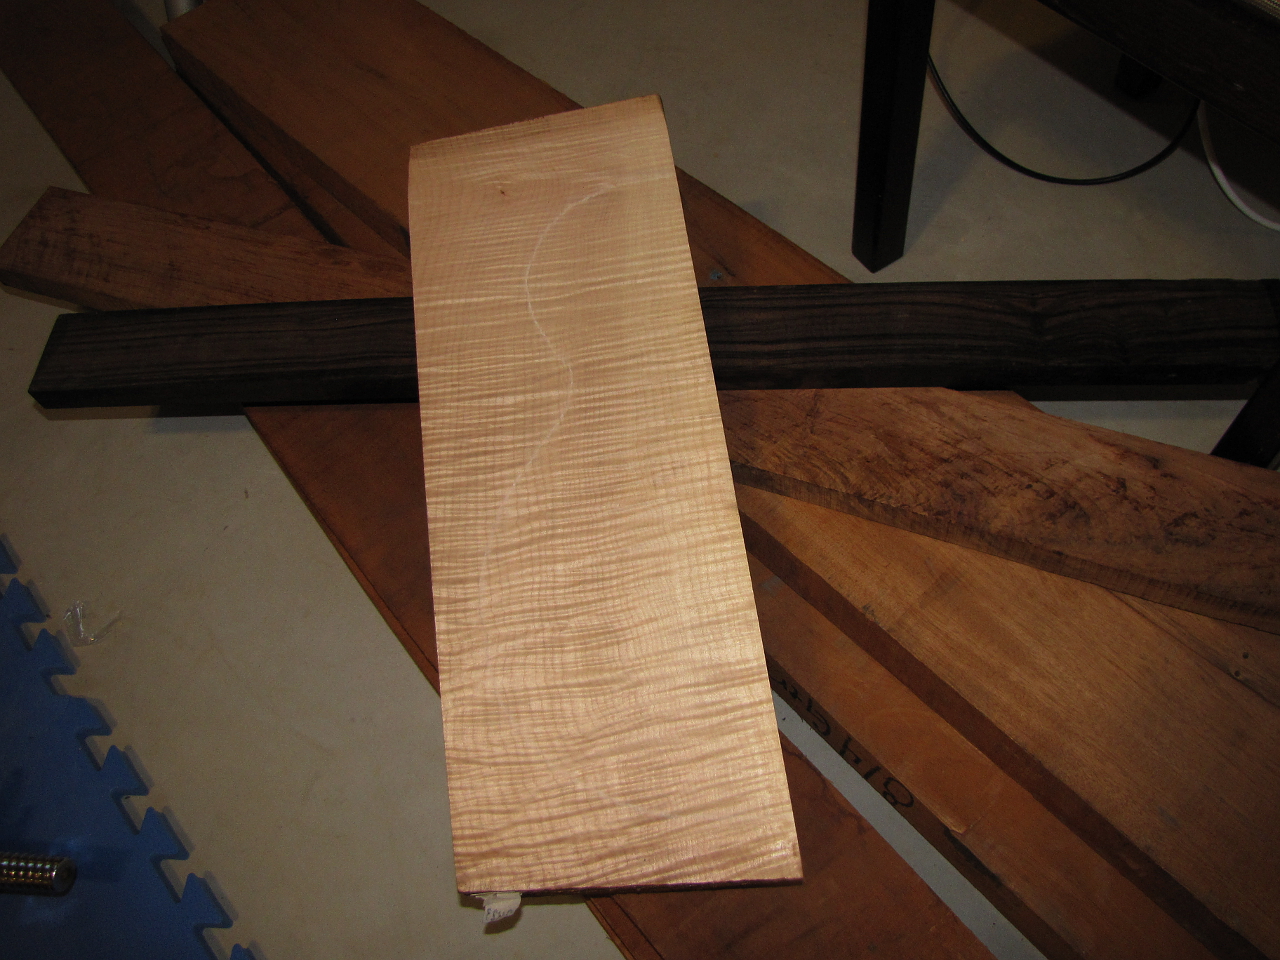 |
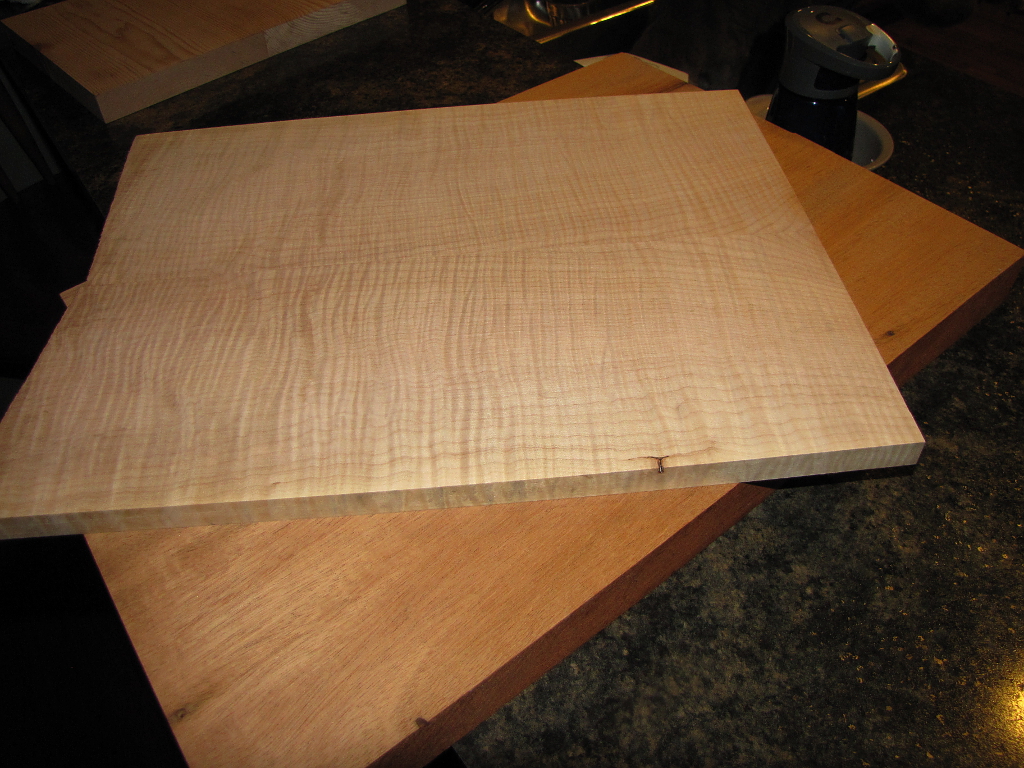
Here are my Raw materials. On top is a billet of heavily flame figured white curly maple. Underneath is a piece of East Indian Rosewood, and under that are the body and neck woods, a couple 8/4 boards of mahogany. |
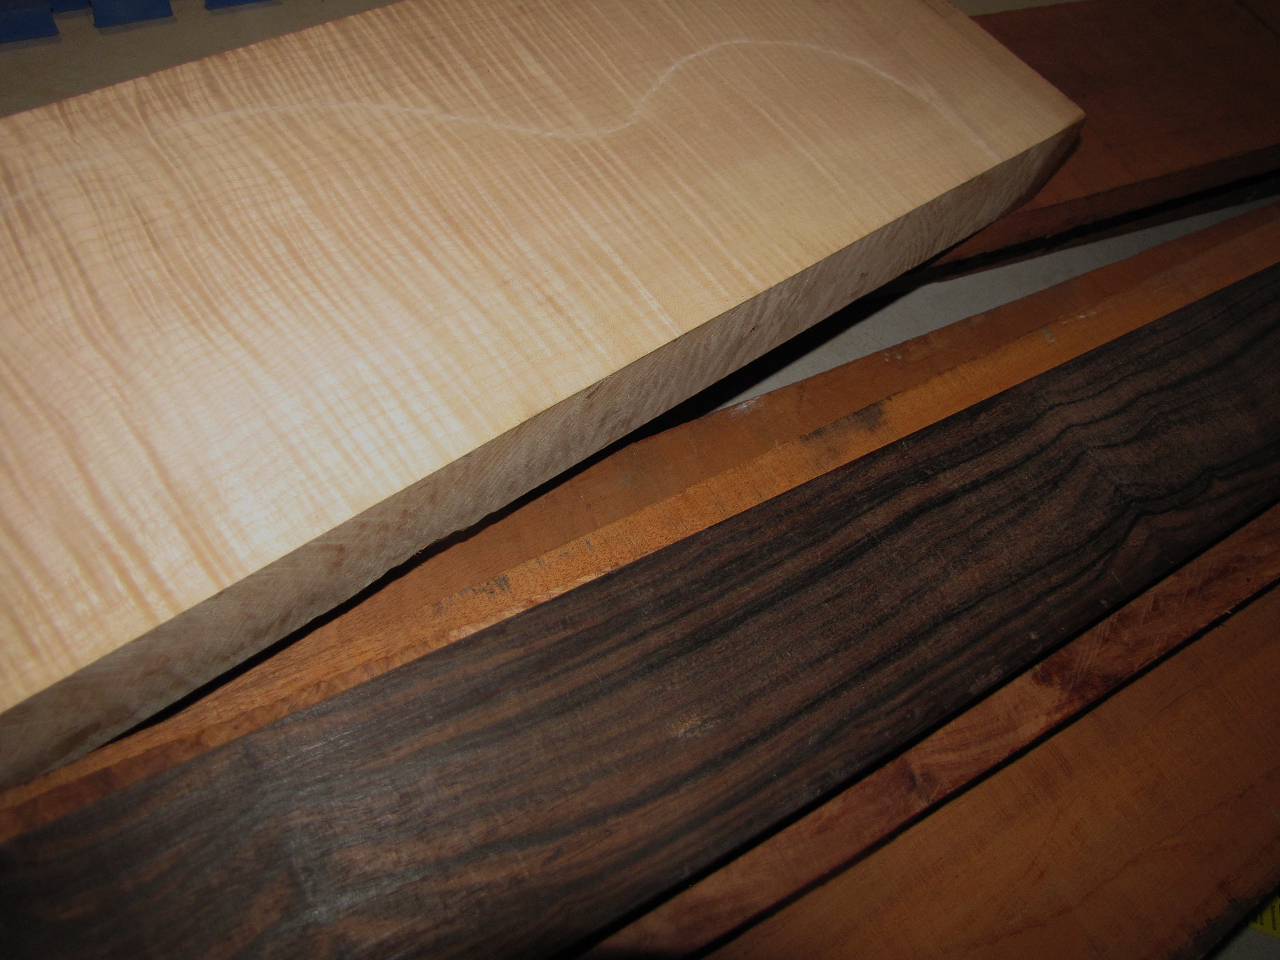 |
More of the same here. the maple block will be flattened on the jointer, planed on the thickness planer, and then resawed on the band saw. the two halves are then jointed along one edge, and glued to form a bookmatched board that will be used as the guitars top. the most highly visible (and expensive) piece of wood. |
 |
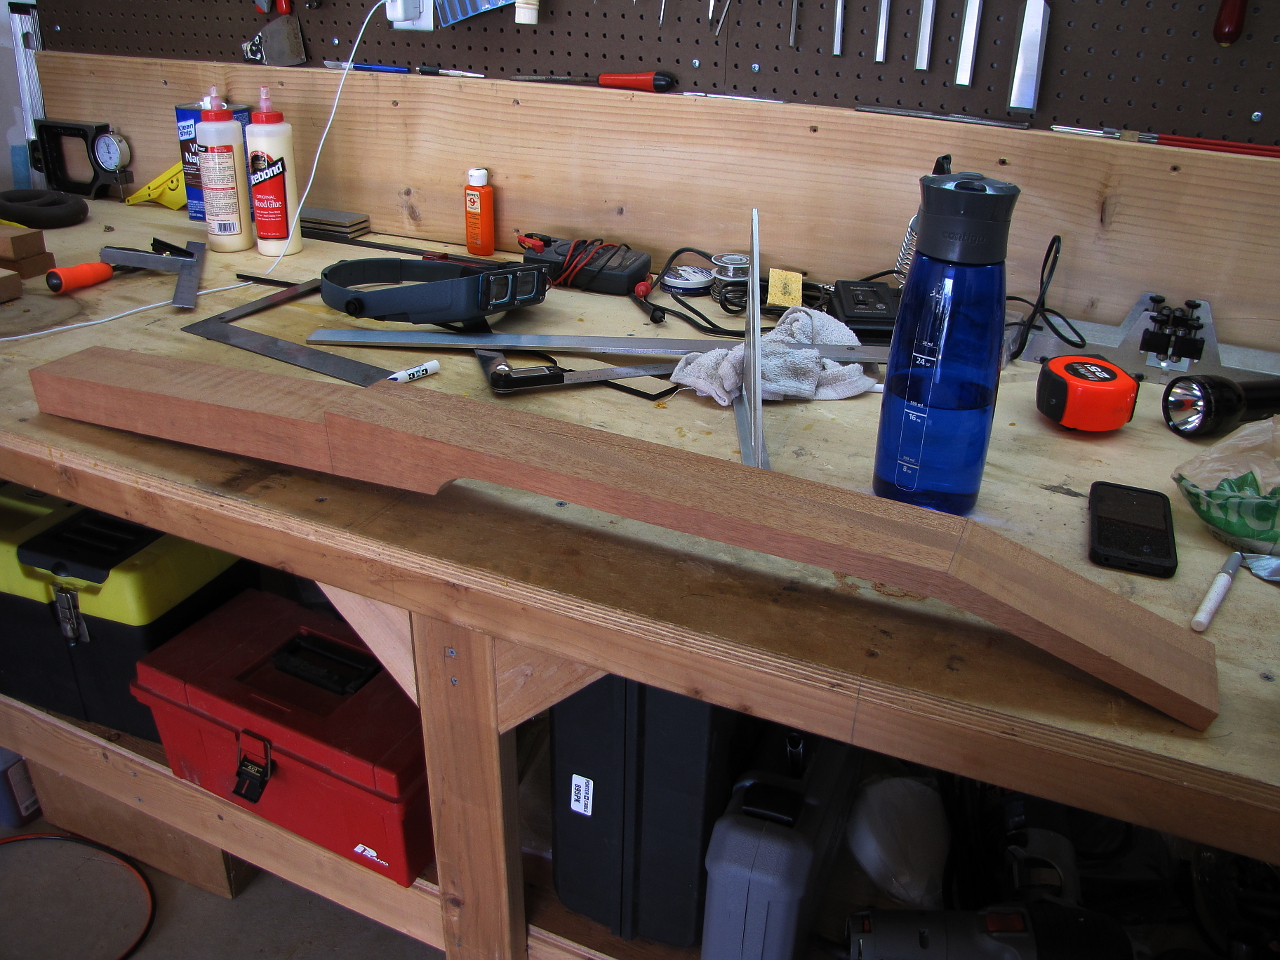
This is my 3 piece neck glue-up. The mahogany has been cut, jointed, and planed into 3 boards approximately 1 inch thick, 5 inches wide, and 41 inches long. These are glued up and then clamped under high pressure to form the laminate that will become the core of the entire guitar. In the neck through body design the neck extends the entire length of the guitar and the "wings" of the body are glued to the neck rather than the neck being a separate piece attached via glue joint or bolted on. |
 |
Here is the neck laminate after the glue has cured and its been planed. It is sitting in the orientation it will have in the guitar body if the guitar were laying flat on the bench. |
 |
Turning the neck on its side I draw the profile of the neck, which I then cut on the band saw. |
 |
Thar she blows! This is a bit wider than the neck right now and will then be planed to the right width before proceeding. |
 |
Since the headstock is wider than the neck we attach "ears" to the headstock to meet the required width. This is how its done with "real" Les Pauls as well. |
 |
Here is our finished neck blank, having been routed for the truss rod. |
 |
Here I am attaching the headstock veneer. This is done with a light colored wood (cut from the same piece of maple as the top in this case) that takes up black dye much more readily than the mahogany will. |
 |
After the veneer, I attach a template I made from MDF and use it to rout the headstock shape. I also drilled the peg holes at this time and dye the headstock veneer black using Fiebings oil dye. |
 |
Here are the completed top and body blanks. The piece on top is the block of figured maple shown in the first photo after being planed, resawed down the center, bookmatched, and glued. Its called bookmatching because when you split it down the middle and open it up like a book, each half will have grain that matches the grain on the other half giving it a nice balanced look. |
 |
Once the body is rough cut I remove the middle where the neck will be to create the wings. The rest of the blank that these were cut from is saved to be used later to help with clamping the wings to the neck. |
 |
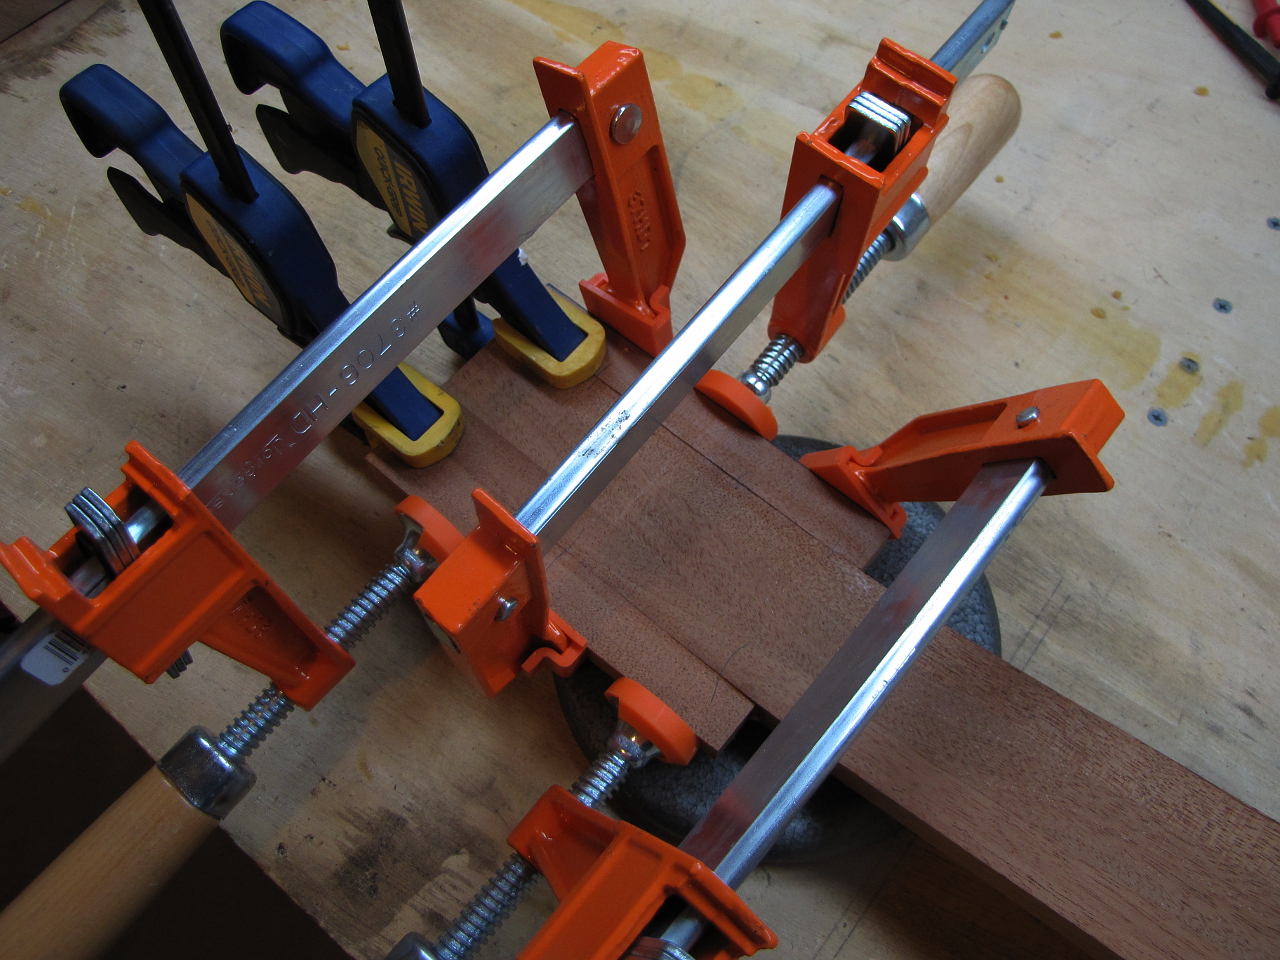
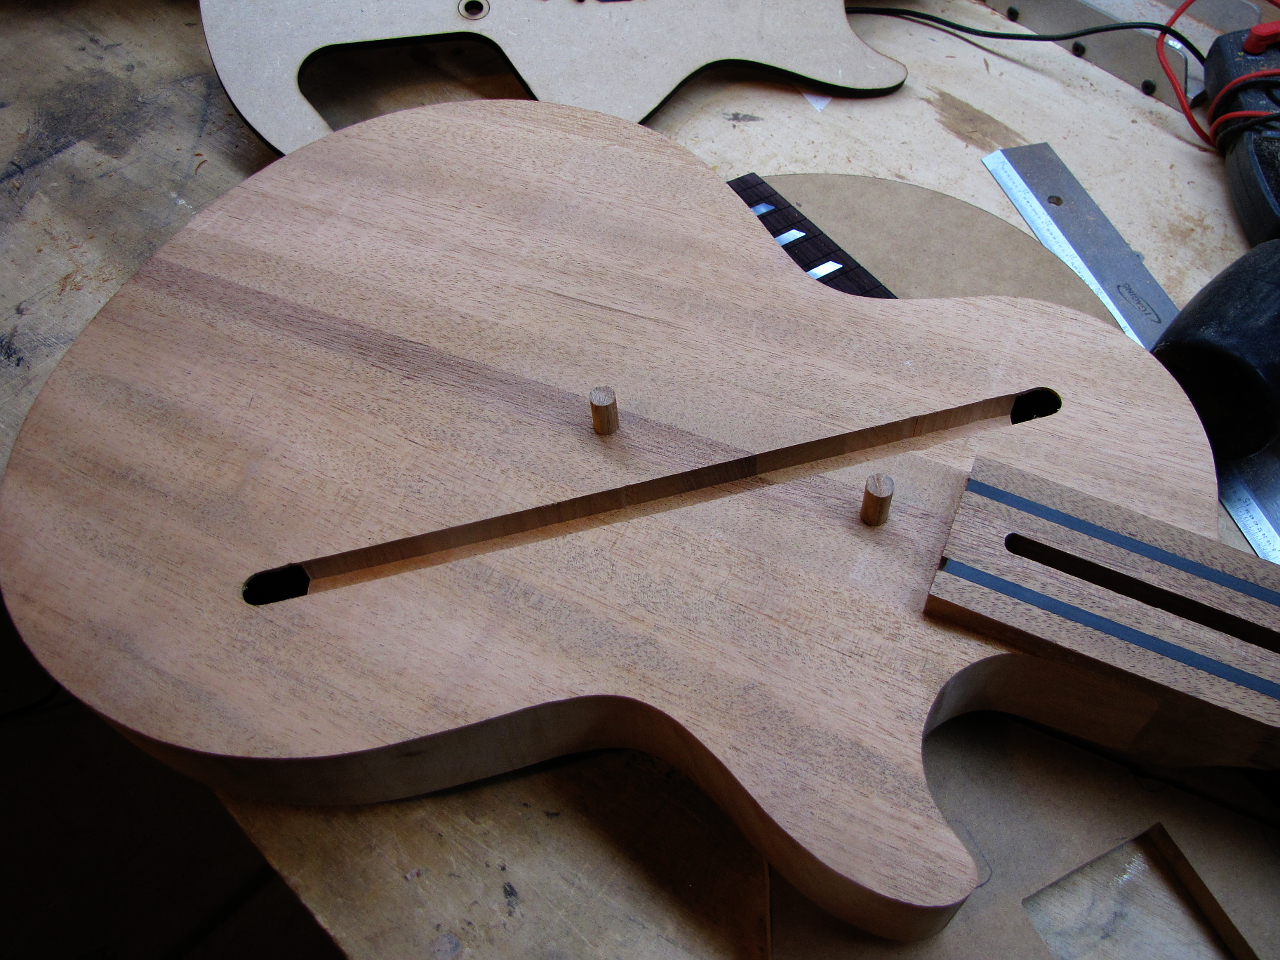
The wings are then glued and clamped to the neck. Alignment is secured using dowel pegs so that the pieces dont creep when the pressure is applied. The dowels are placed where the pickup cavities will be routed out. Once this is done the dowels and the wood they were embedded in will be gone. Since the wings are curved it would be difficult to securely clamp them, so here is where I use the off cuts from the wings. It gives a flat clamping surface and applies the clamping pressure evenly to the wings. Here also you can see another modification I made to the traditional construction method. I routed two channels the length of the neck and epoxied in two graphite rods. These will give additional strength, rigidity, and stability to the neck. |
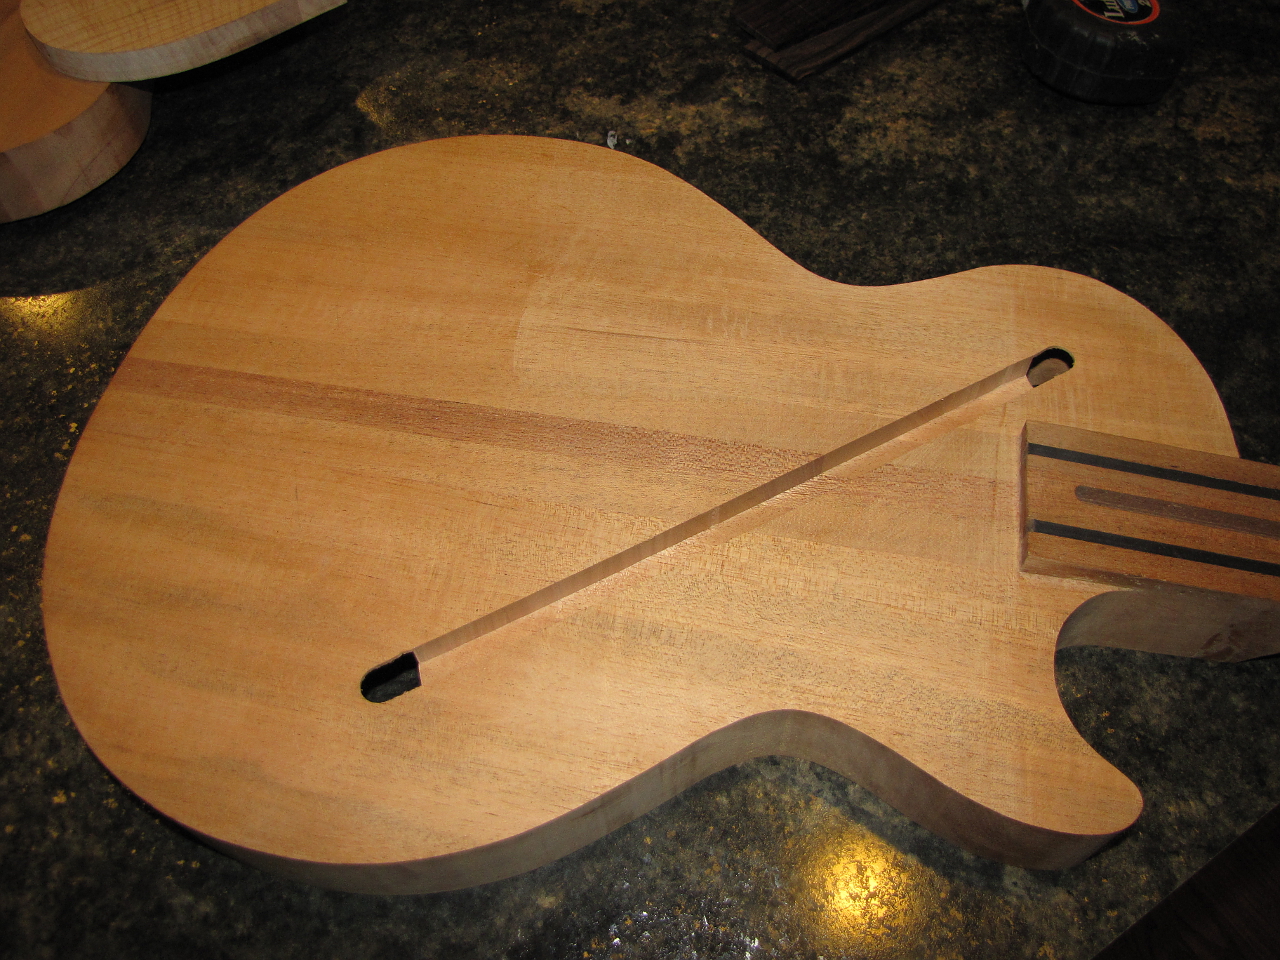 |
Once the glue has cured the top is sanded and the channel that connects the toggle cavity and pickups with the control cavity is routed. This is where the wiring that connects the pickup selector switch and the pickups will run into the control cavity to connect with the volume and tone pots, and the output jack. |
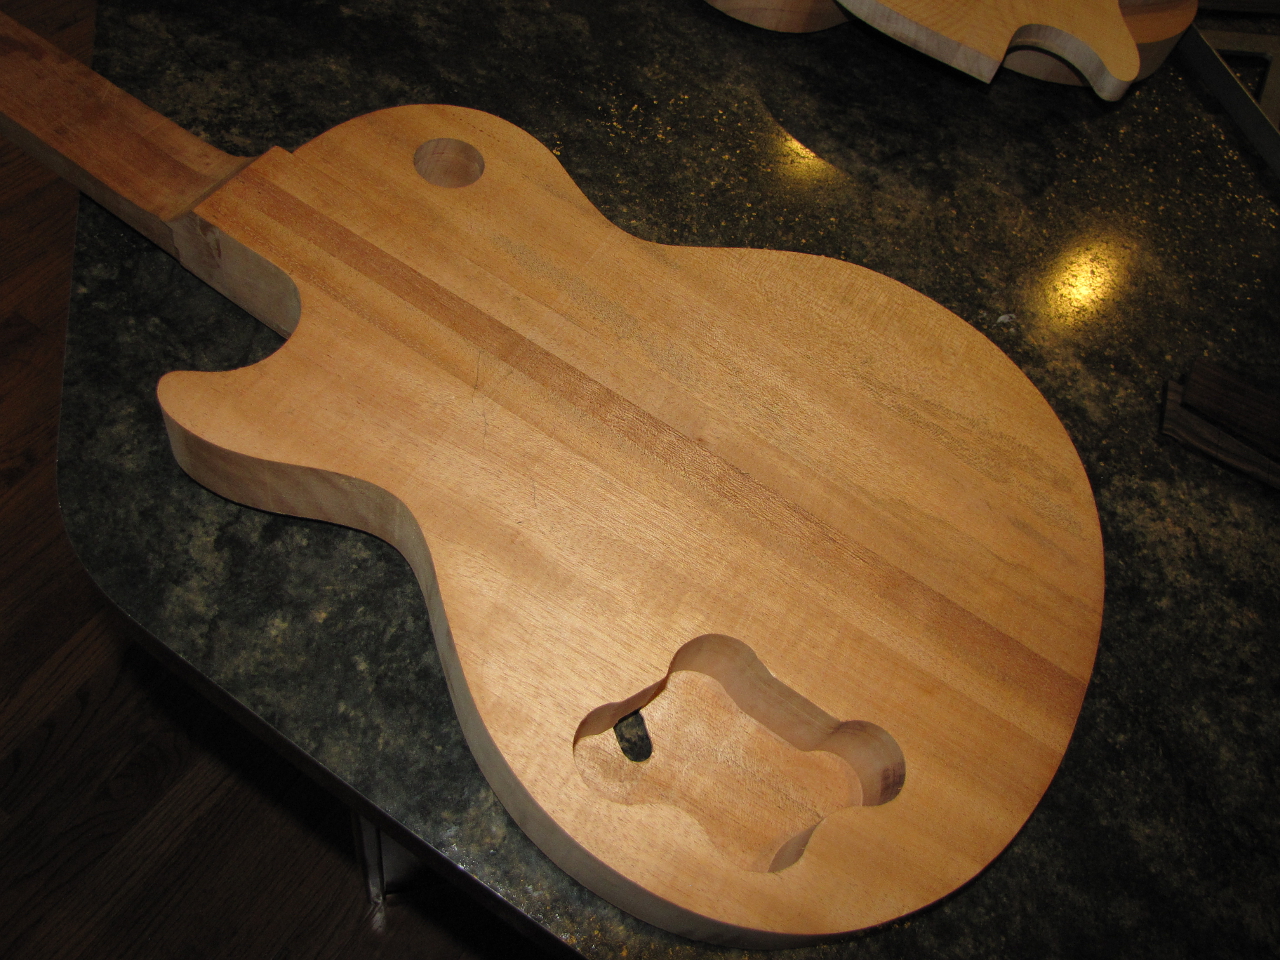 |
The control cavity and toggle cavity are routed on the back at the same time. |
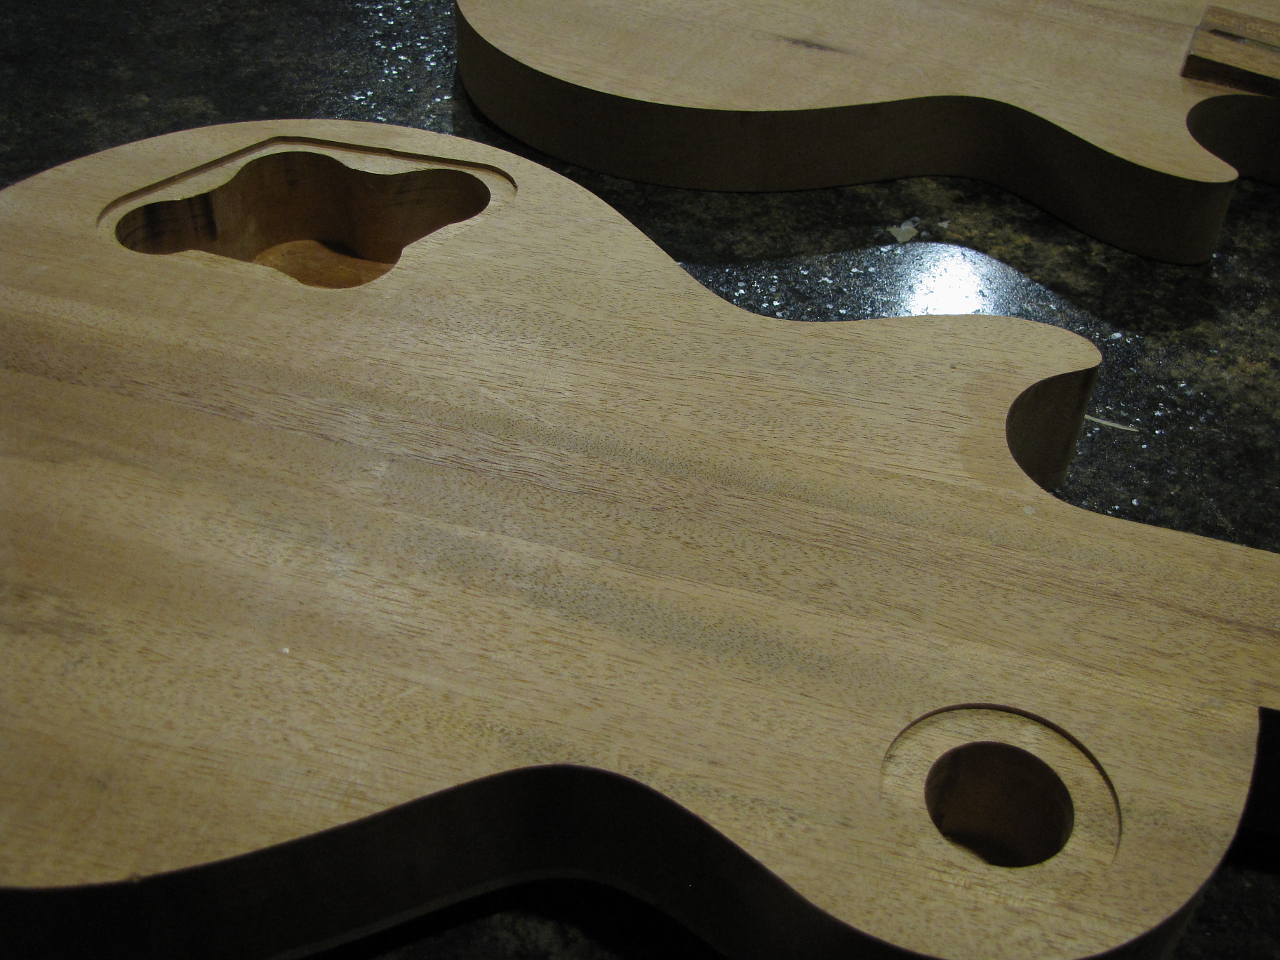 |
Recesses for the covers are routed |
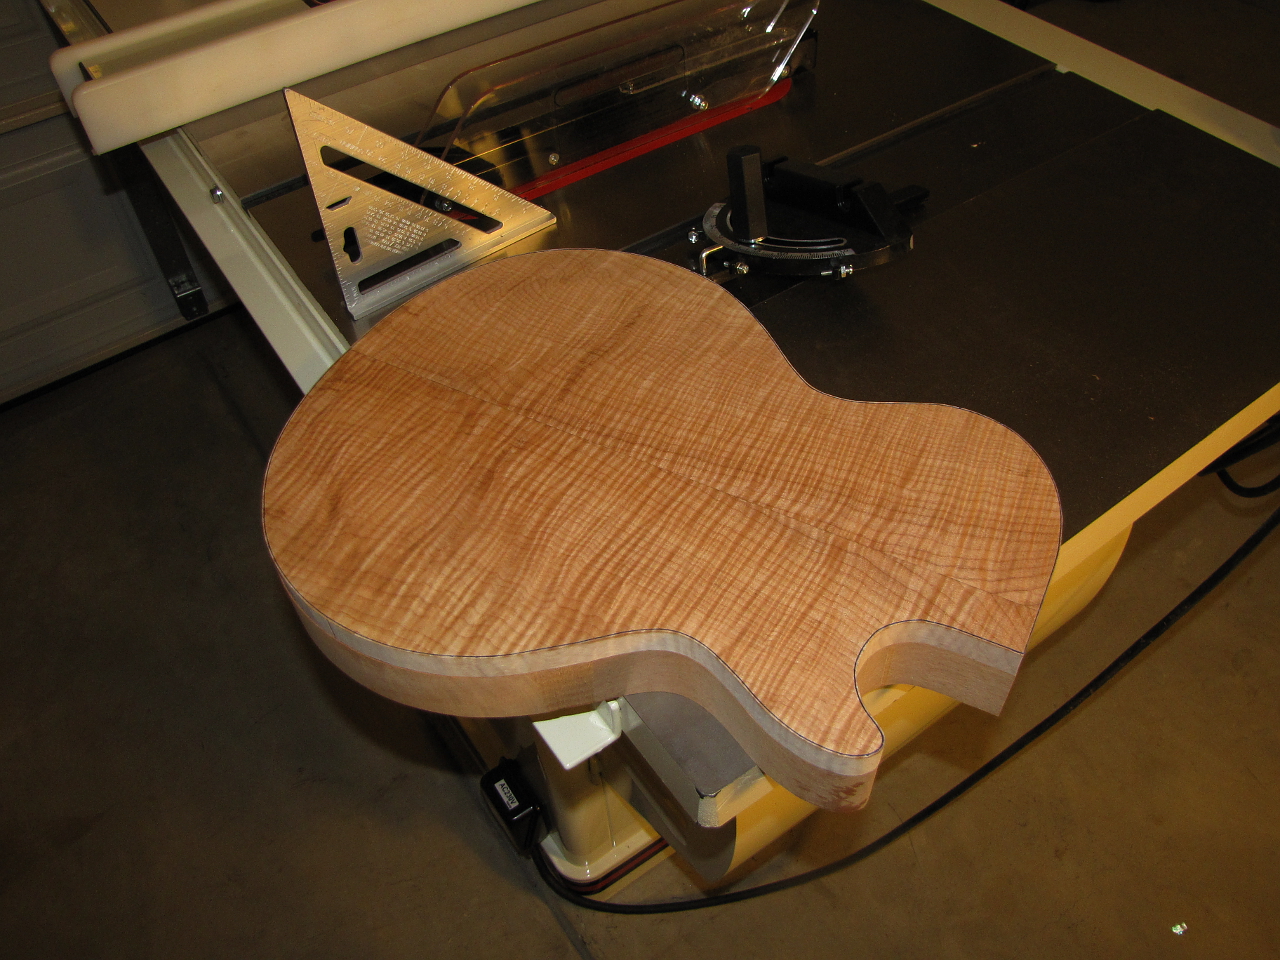 |
The maple top is cut to shape using a pattern bit on the router. This picture is a bit out of sequence. Its actually from before I cut the wings from the blank, but it makes more sense to me to show it here ;) |
 |
Pegs are embedded into the body, also where the pickups will be routed later. |
 |
Holes are drilled in the maple top for the pegs. This will help with alignment of the top and will keep it from sliding around when pressure is applied during gluing. |
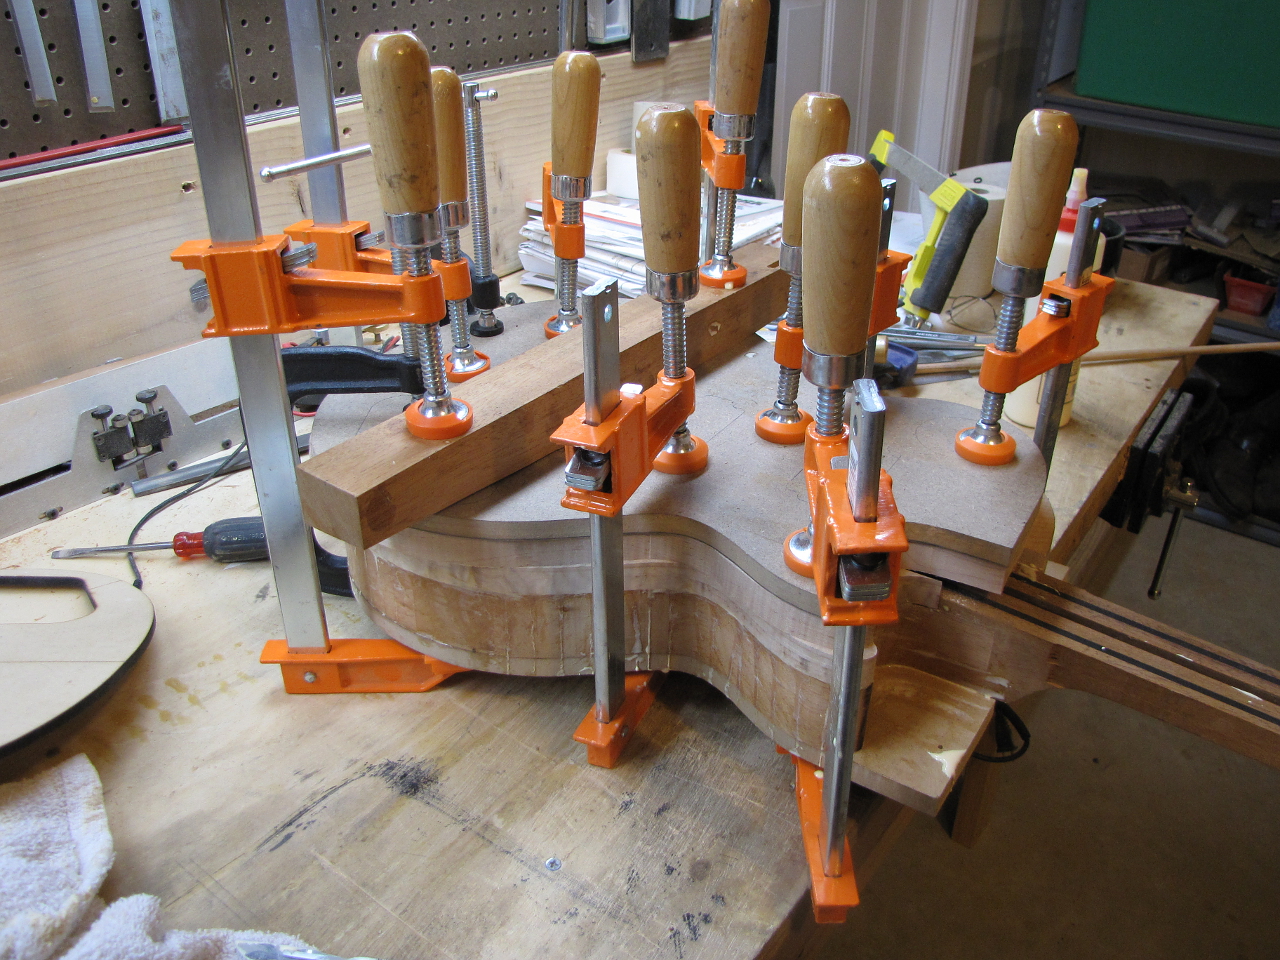 |
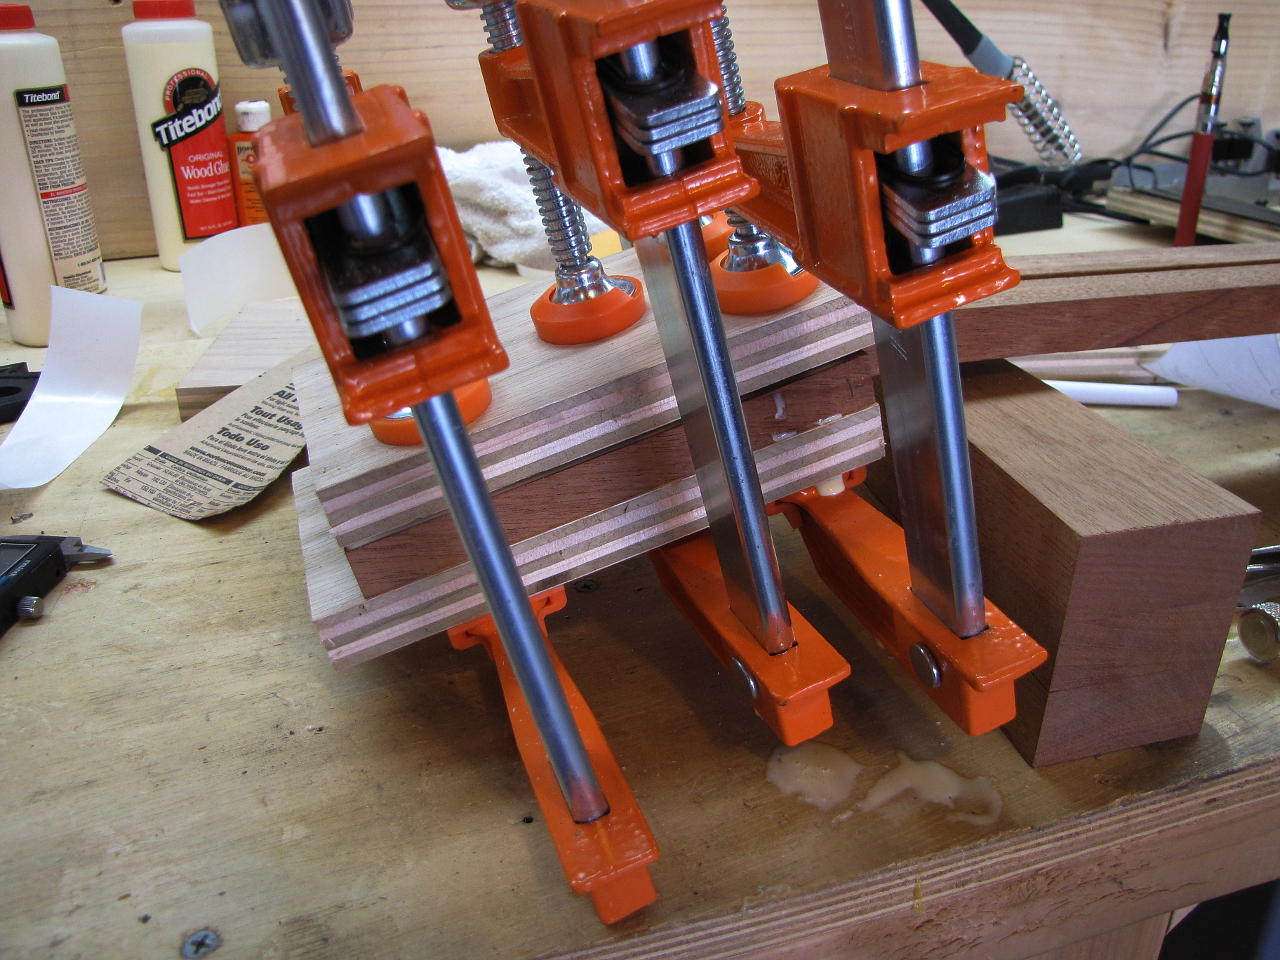
The top is glued and securely clamped. I use multiple layers of wood as clamping cauls to distribute the clamping pressure more evenly, and also to prevent the clamps from making dents in the top or back of the guitar. |
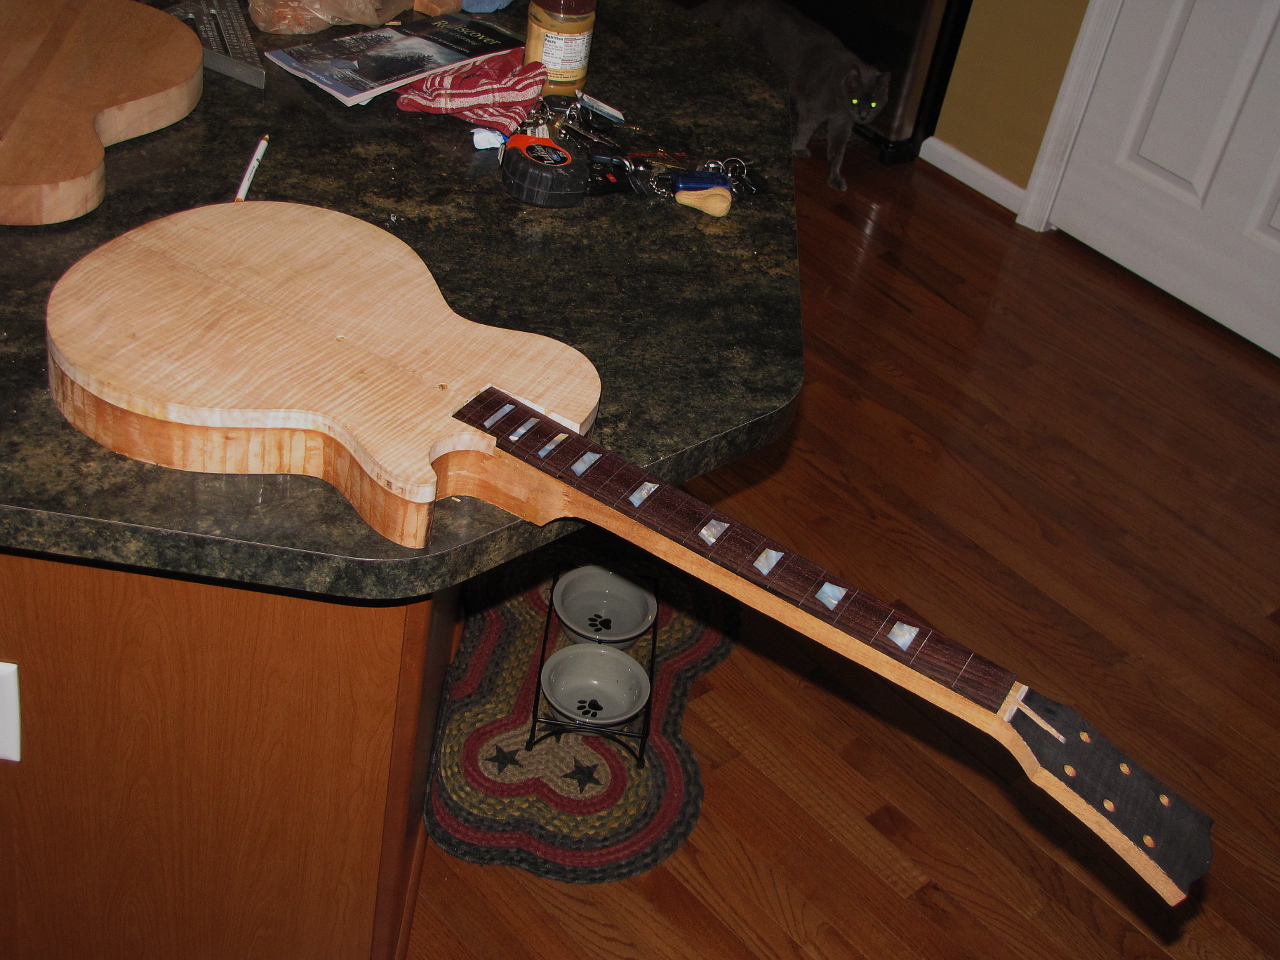 |
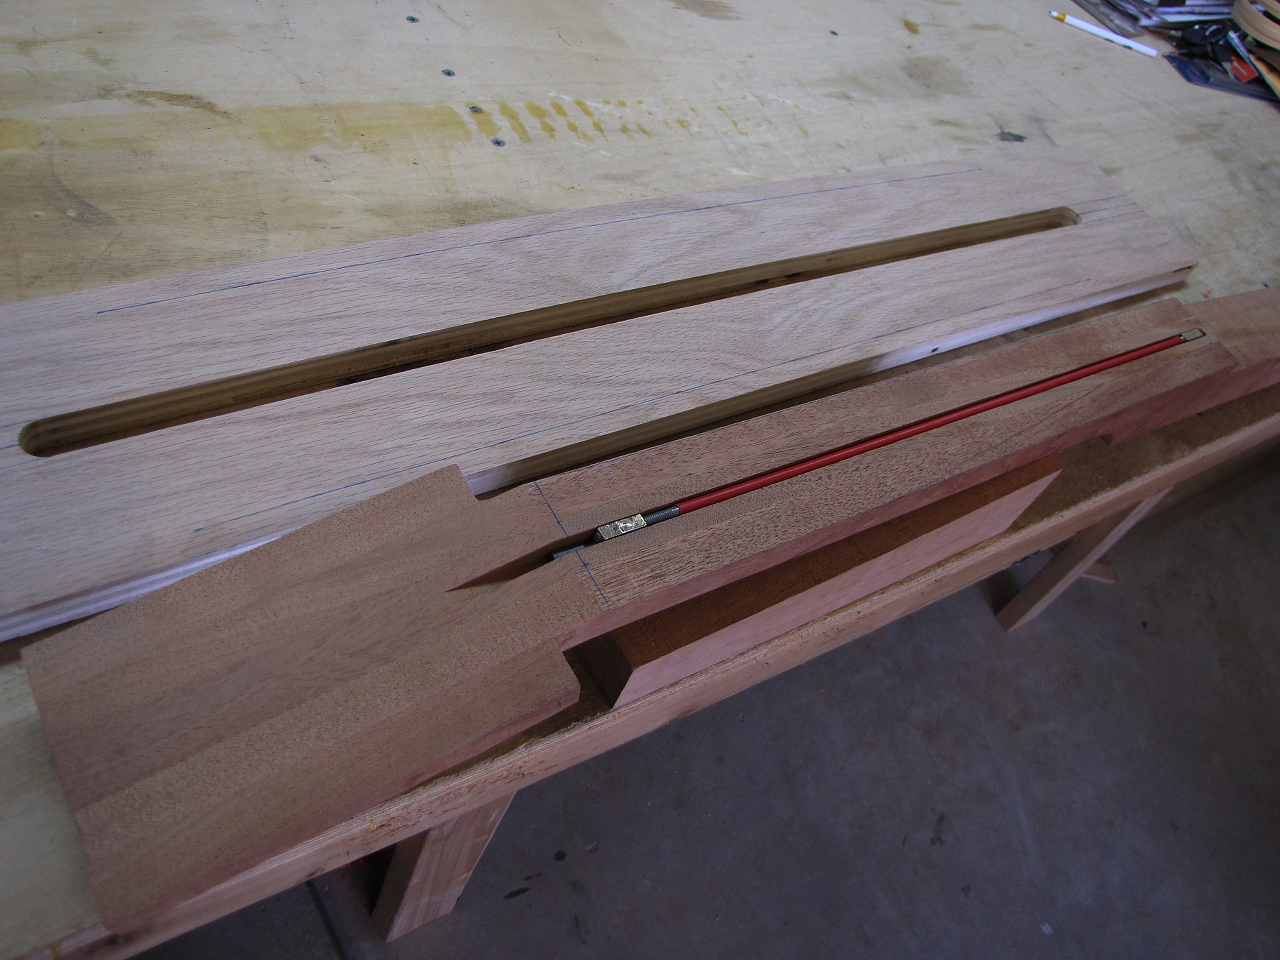
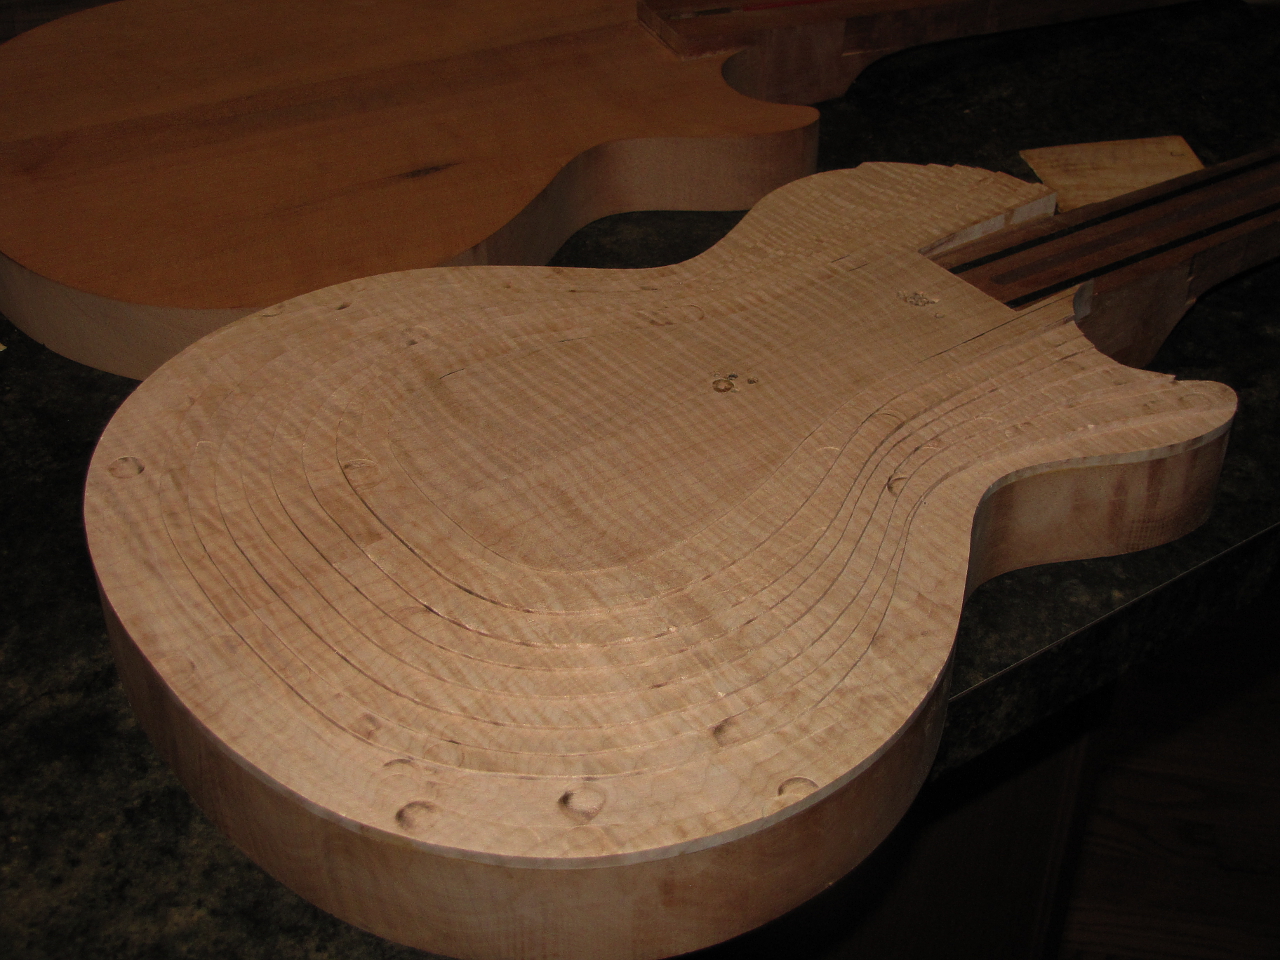
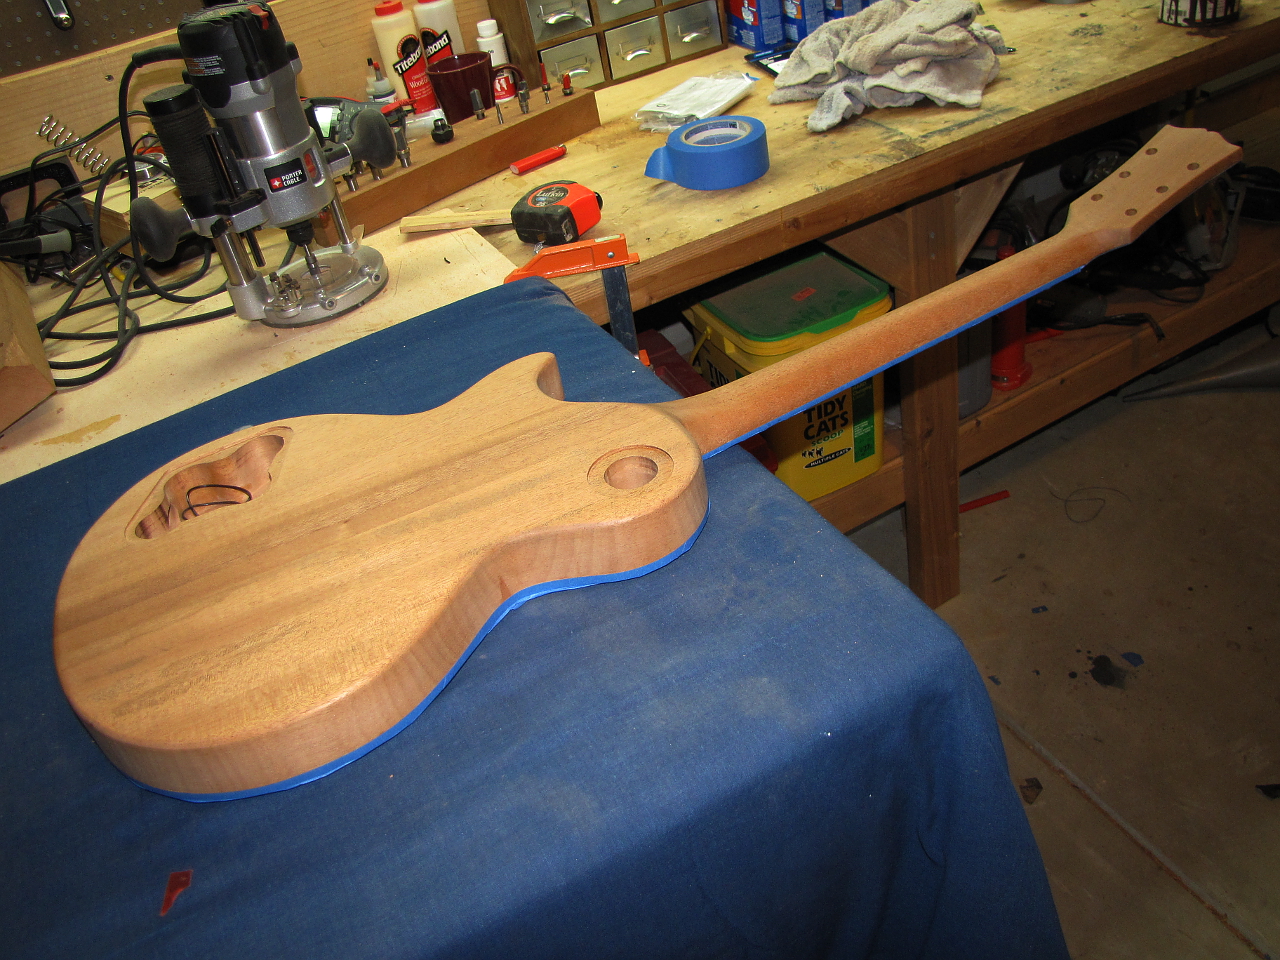
And here it is with all the clamps and cauls removed. Pretty thick and clunky looking, eh? Well the next step with this is to carve the top to a nice smooth curved archtop shape, but first we need to spend some time making the fretboard. we'll return to the body later. OK I know you see the fretboard laying there for the photo op (its not glued on yet), so you know I already made it but since I havent discussed that yet I'm pretending I'm gonna go do that now :) |
 |
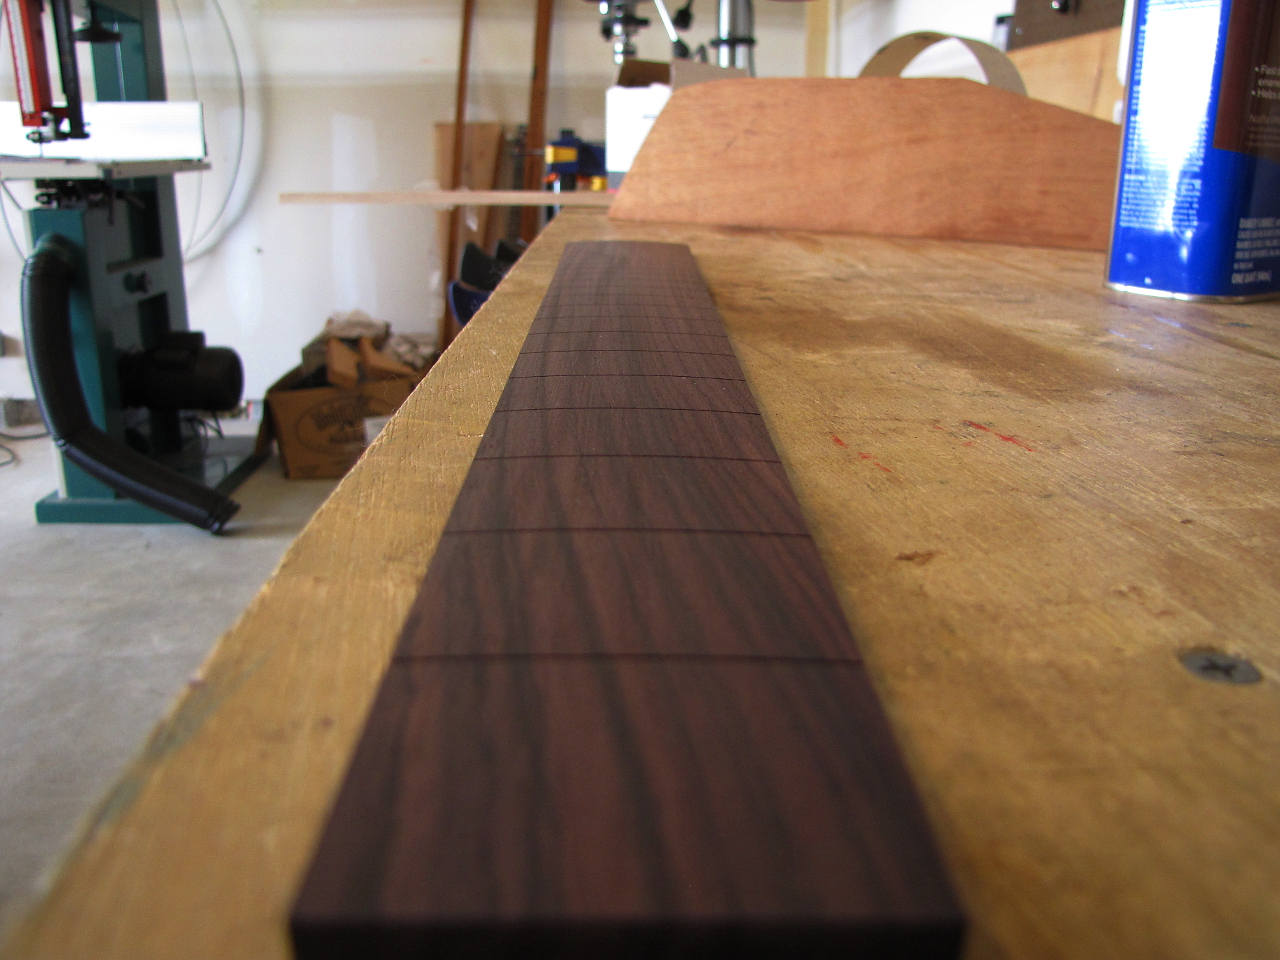
OK, the fretboard is made from our slab of East Indian Rosewood. This is then rough sawn into "blanks" roughly 1/3 of an inch thick, 20 inches long, and 3 inches wide piece. I use the band saw for this. The board yields about 6 blanks. I'll use one for this guitar and save the rest for other builds. I take this blank and flatten one side on the jointer and plane the top to clean it up and make it a perfectly even thickness about .223 inches thick. |
 |
We mark out the fret locations on the board and cut the slots. I use a purpose built miter box and a japanese fret saw. As you can see here all the slots are cut, but the board is totally flat which is good for aligning and cutting slots, but no good for a finished fingerboard. They need to be curved to some extent. The degree of the curve depends on personal preference, and what styles of music will be played. |
 |
The radius (12" in this case) is sanded onto the board using a sanding block with the correct radius. Radius is the curvature of the fretboard. They are slightly rounded, not flat. What is meant by radius is if you imagine that curvature continues all the way around to form a circle, the radius of that circle is the distance from the center to the edge of the circle. The smaller the radius, the more pronounced the curvature of the fretboard. |
 |
Takes a good while to get it sanded. Its a good workout :) |
 |
Here is the board after sanding |
 |
You can see the curvature from this angle. If you continued this curve all the way around to create a full circle it would be 2 feet in diameter. The radius of that circle is therefore 12 inches. This is the commonly used way of describing how curved a fretboard is. Different types of guitars can range from 9 inch to 16 inch radius. The higher the number, the flatter the board. People tend to have definite radius preferences depending on what styles they play. |
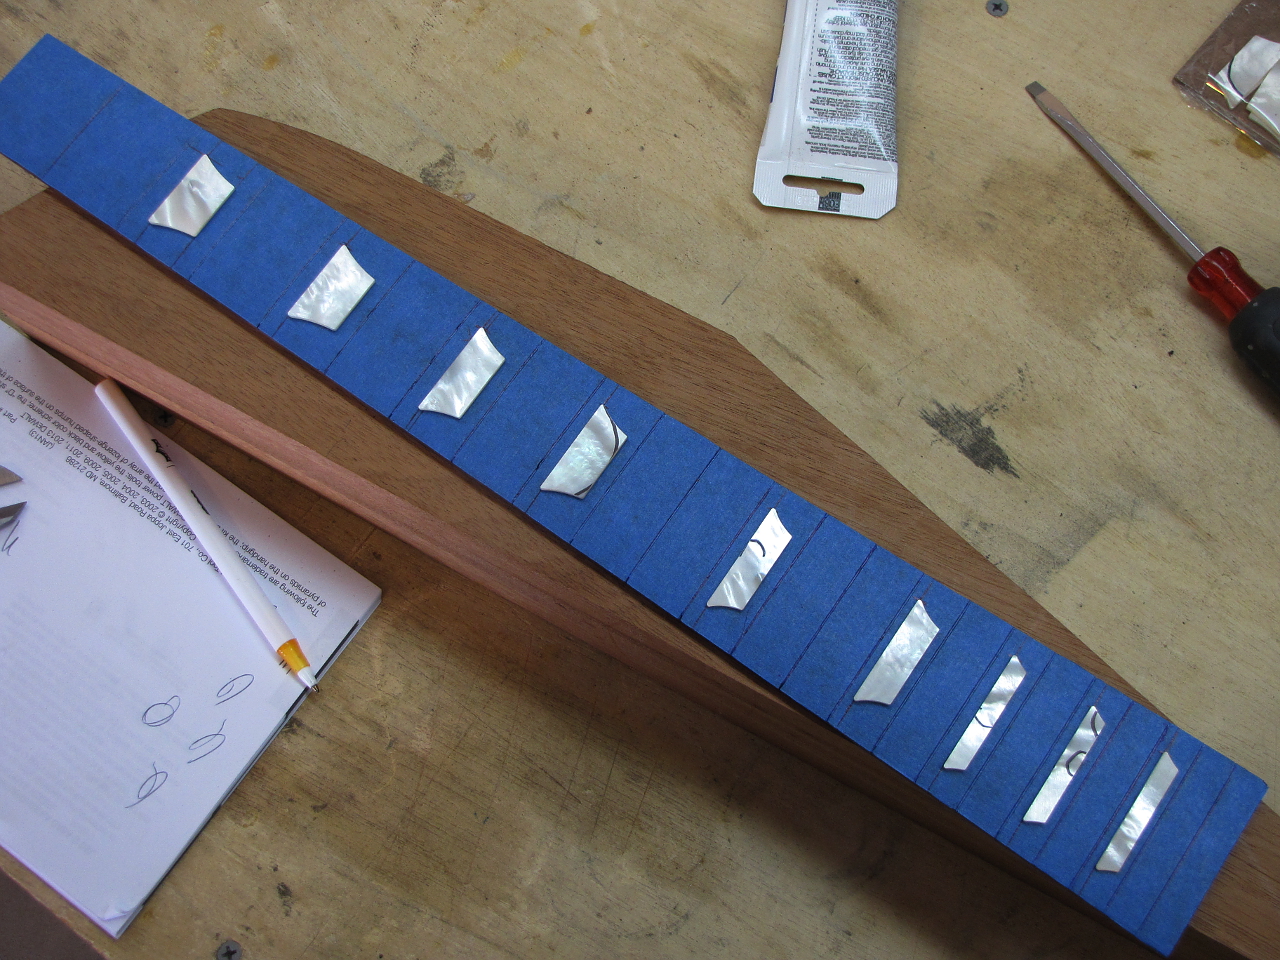 |
I then tape up the board and place the inlays where they will be and trace the outlines. These are standard trapezoid shaped inlays found on Les Pauls. Gibson uses plastic inlays on all their guitars, but I am using Mother of Pearl for my guitars. I find its harder, smoother, and much more lusterous. |
 |
Then I use a scalpel to cut out the area that will be carved out for the inlays. |
 |
Then I use my dremel to create a flat bottomed cavity that matches the thickness of the pearl in the middle. Once glued in the inlays will sit higher than the board near the edges since the board is curved. This will then be sanded flat and flush with the board. |
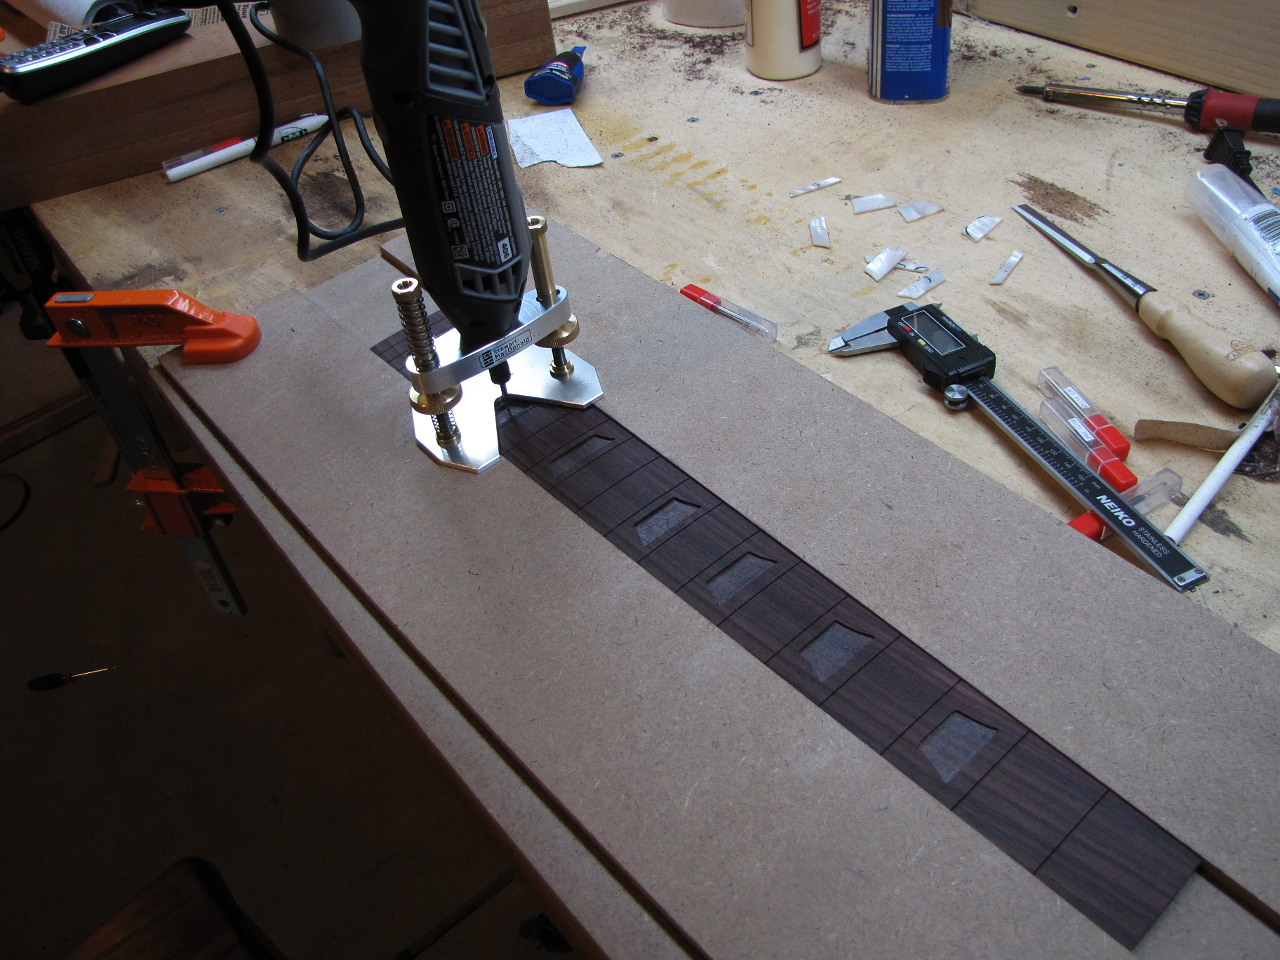 |
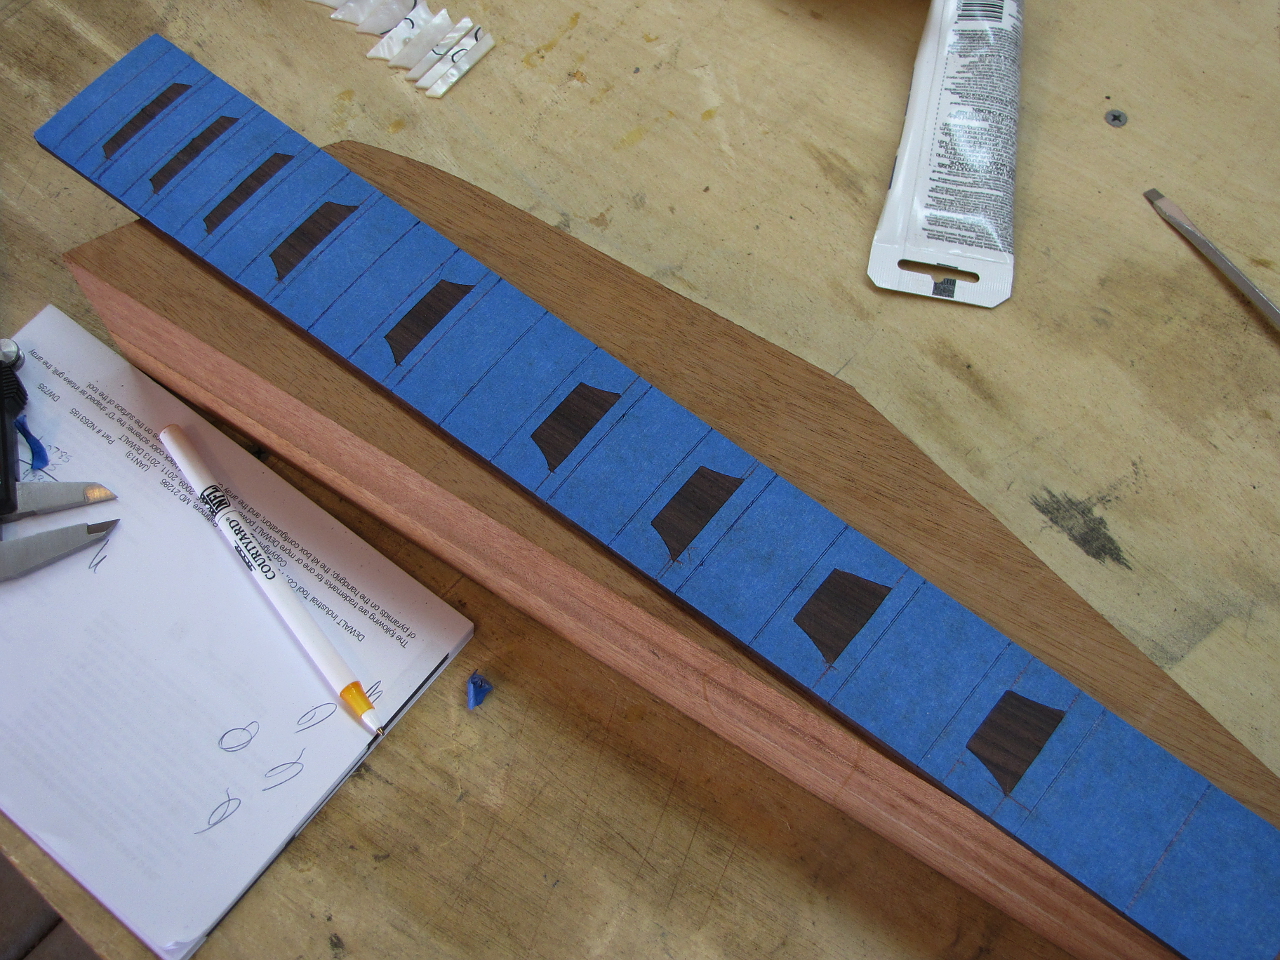
Once I have the outline well defined I remove the tape and deepen and clean up the cavities until each piece fits as precisely as possible. |
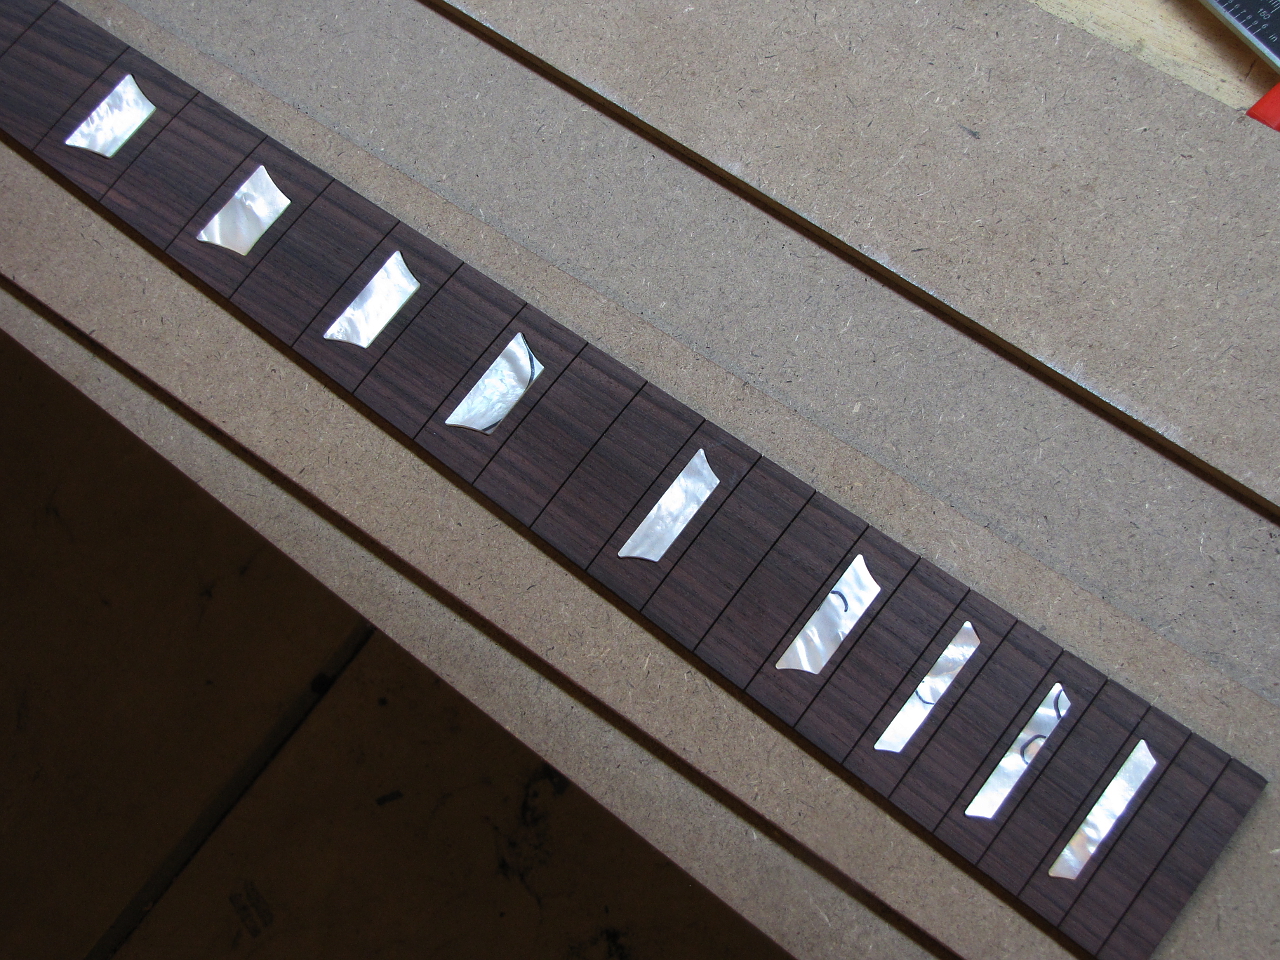 |
Once finished, I glue in the inlays using clear epoxy mixed with rosewood dust that I saved when I sanded the radius. This will color the epoxy the same shade as the wood. Sometimes you get slight gaps between the inlay and the edge of the cavity, and the rosewood colored epoxy perfectly fills them and makes them dissappear. |
 |
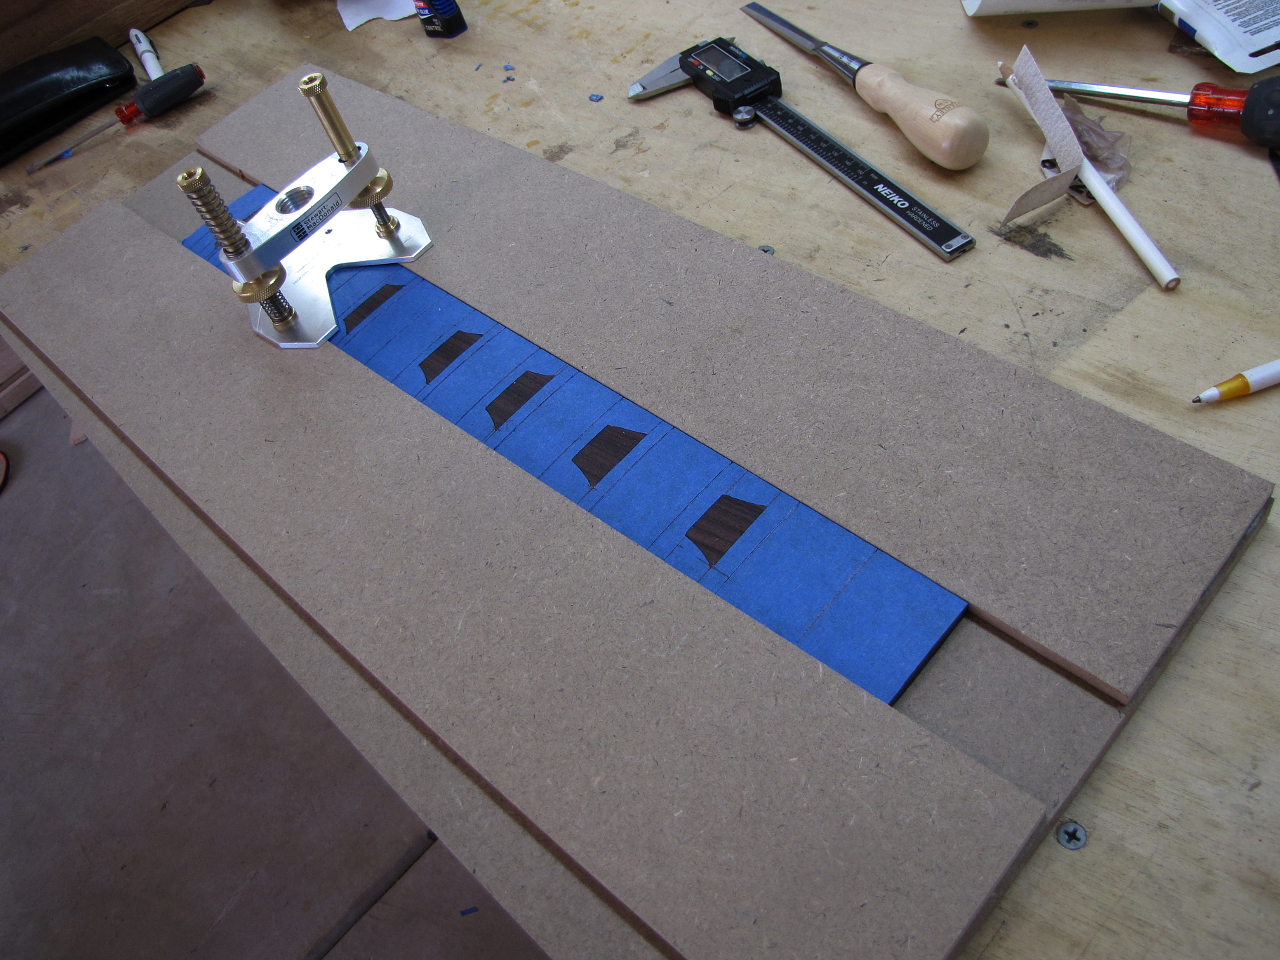
All sanded down flush using 600 grit paper. Shiny! |
 |
Ok back to the body. The tops on Les Pauls are carved to a nice smooth curvature. Some call these "Archtop" guitars. To do this I made a series of templates to use with the router to cut concentric steps on the top. |
 |
These give me the basic shape to follow. the steps are then smoothed out using a curved cabinet scraper followed by a random orbital sander. |
 |
little smoother... |
 |
and a little smoother still... |
 |
Smooth! :) |
 |
Then the pickup cavities are cut. This step eliminates the dowel pegs I metioned earlier |
 |
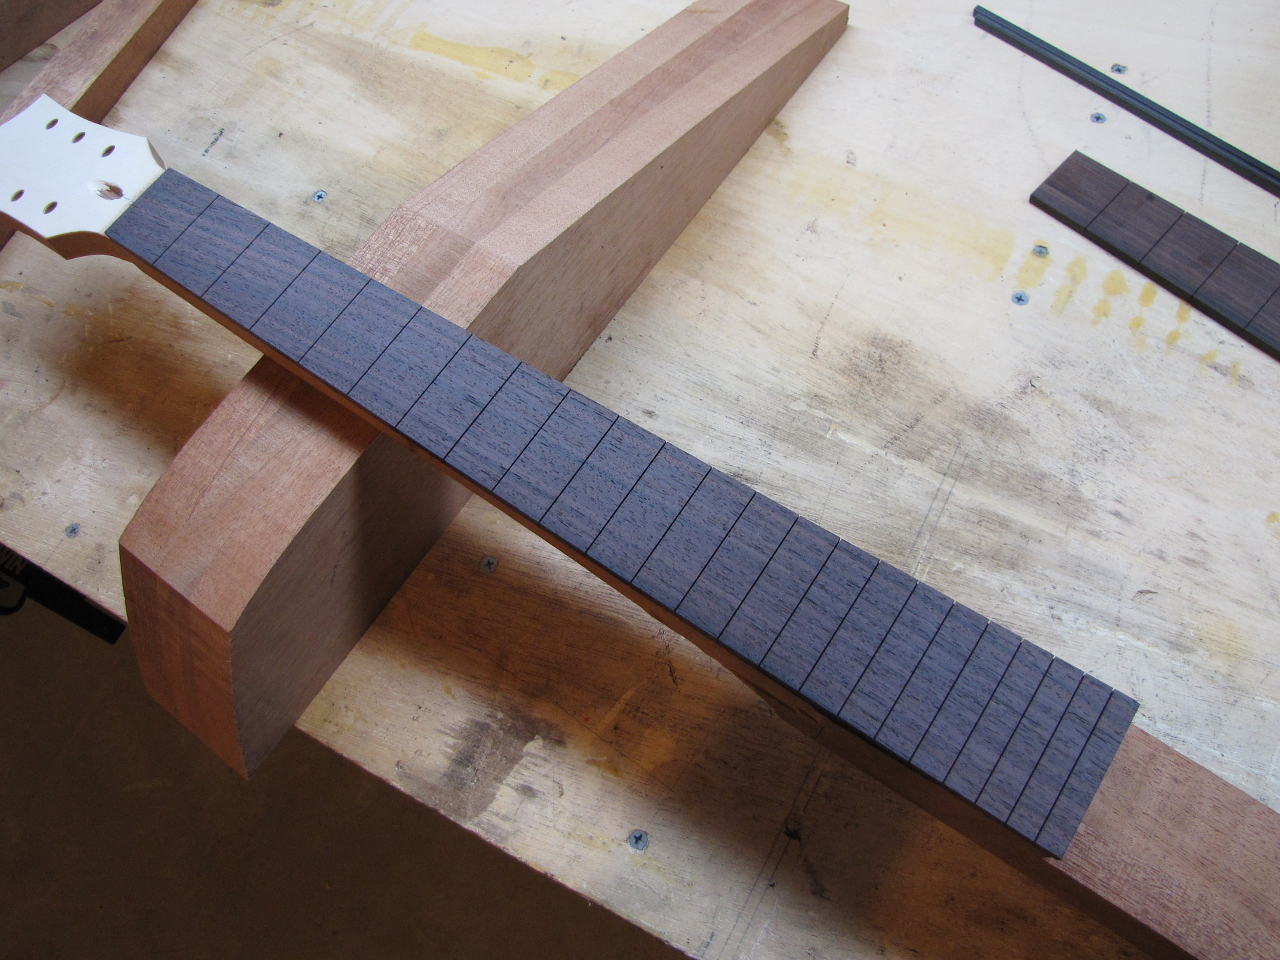
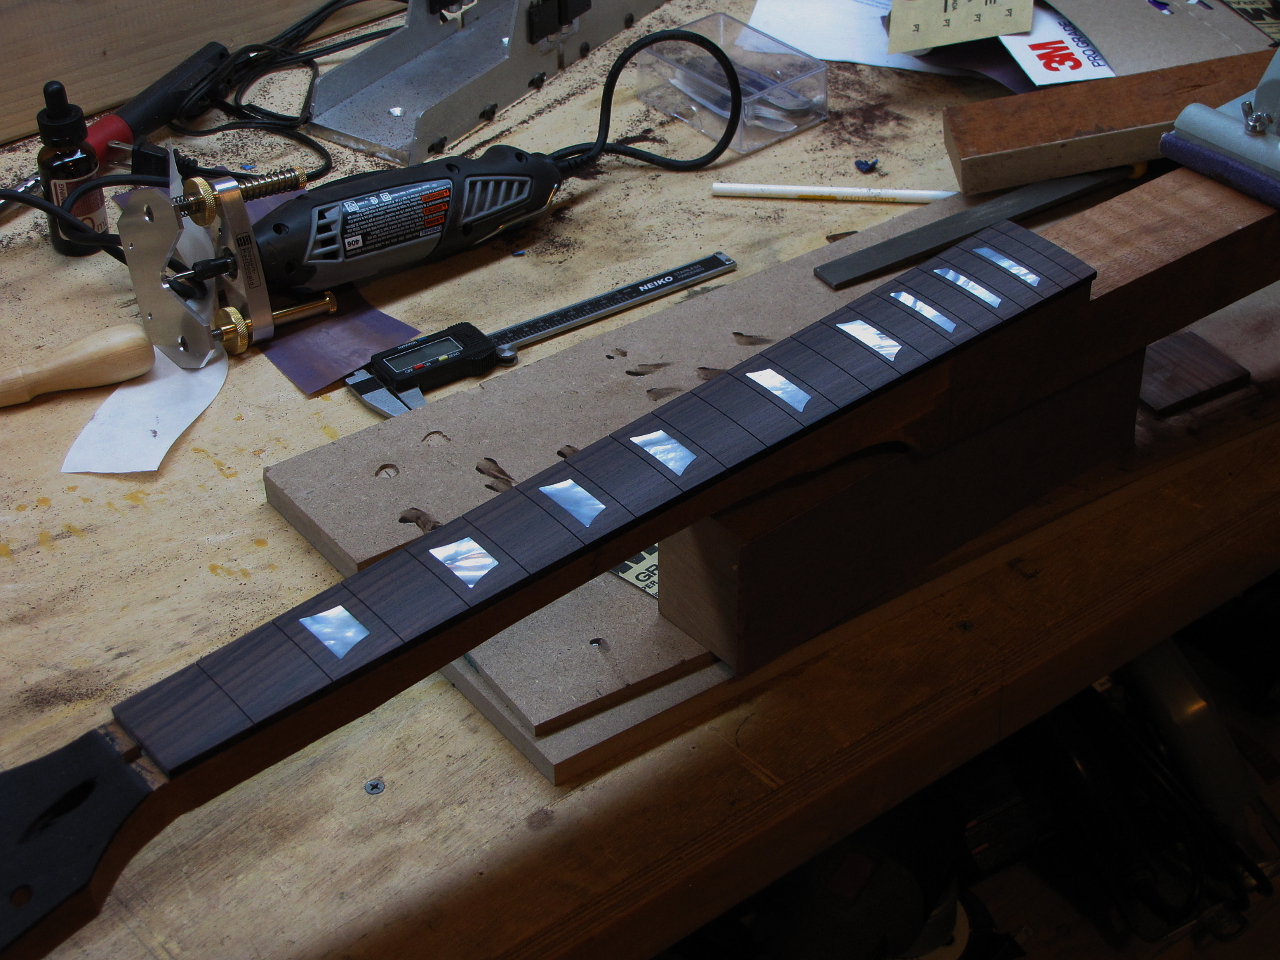
Returning to the fretboard again, I radius the fret wire using a tool for that specific purpose. the fret wire has to be curved to the same exact degree as the board. I then cut each fret to length and put them in my little fret block. This is just so I dont lose track of which piece goes in which slot. Some scrap mahogany comes in handy for this. |
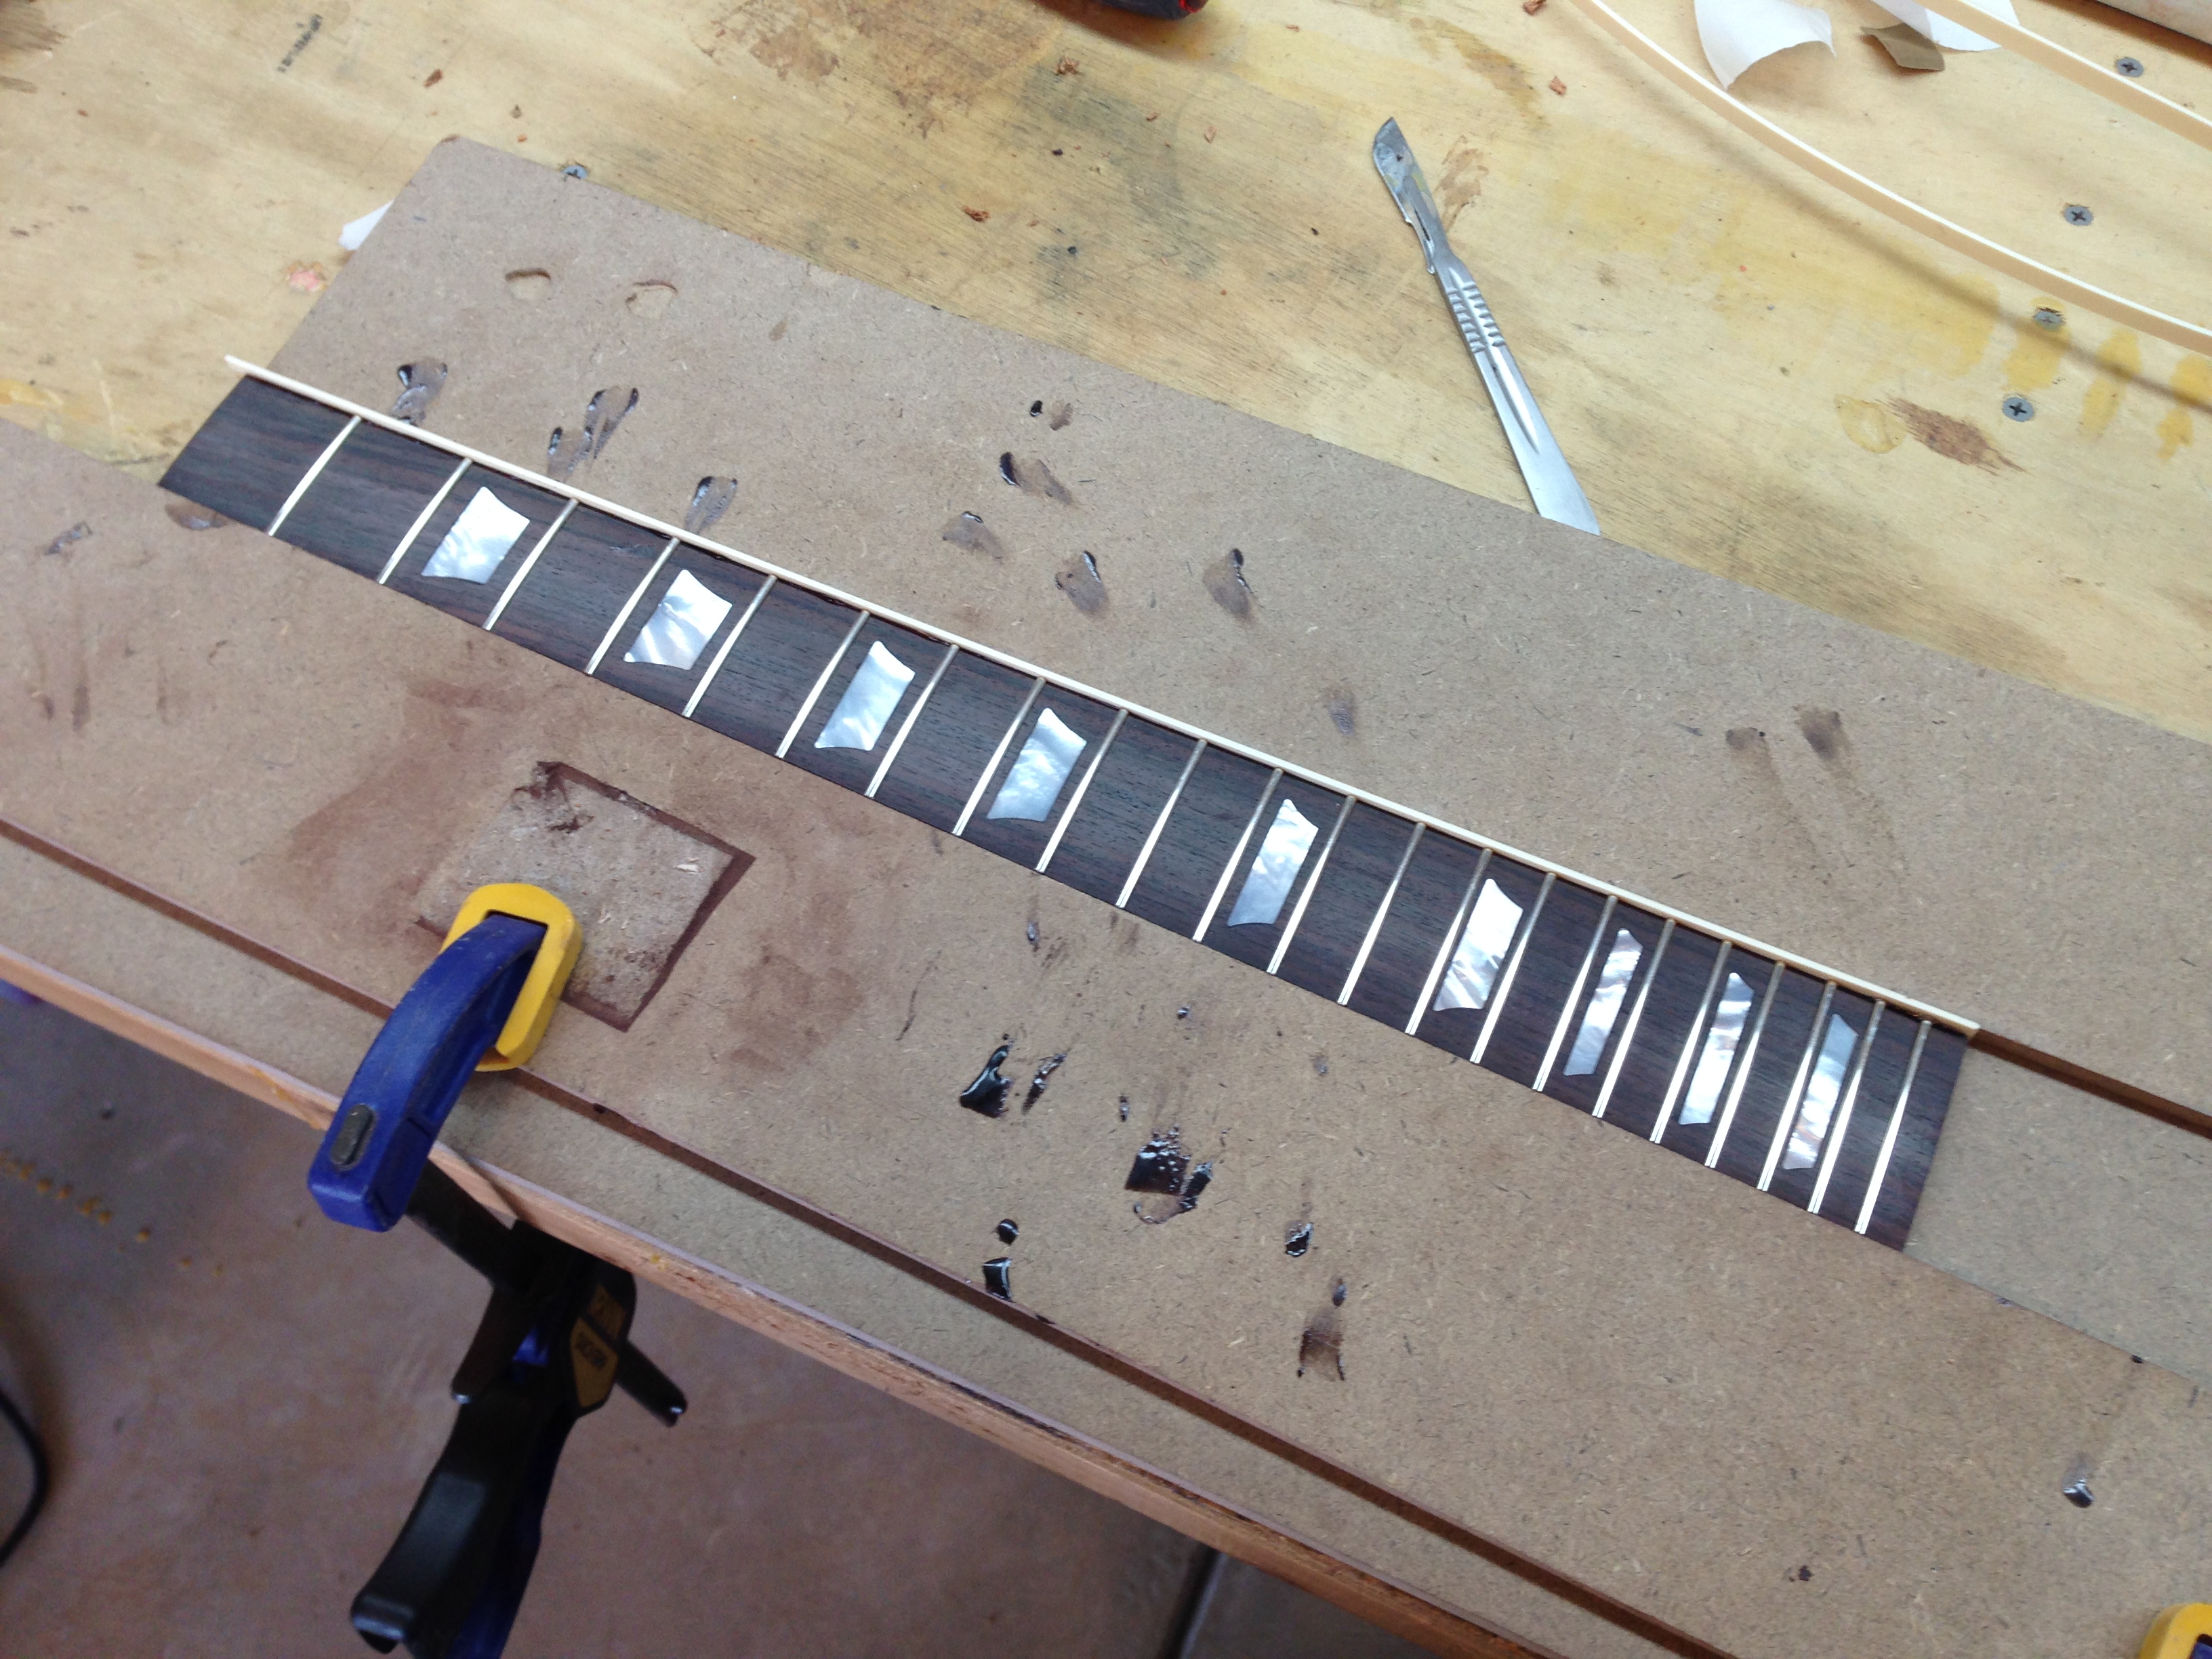 |
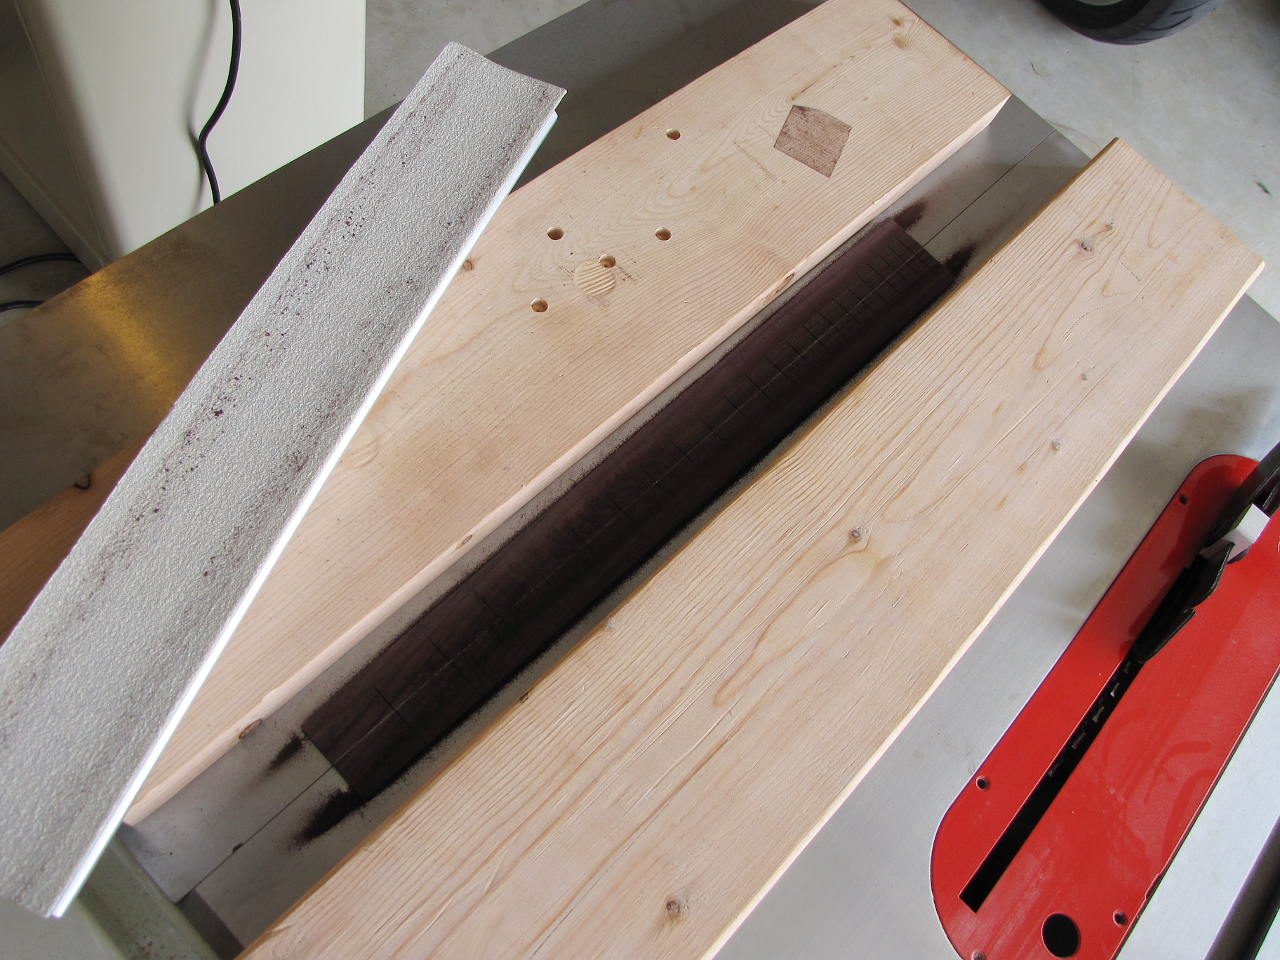
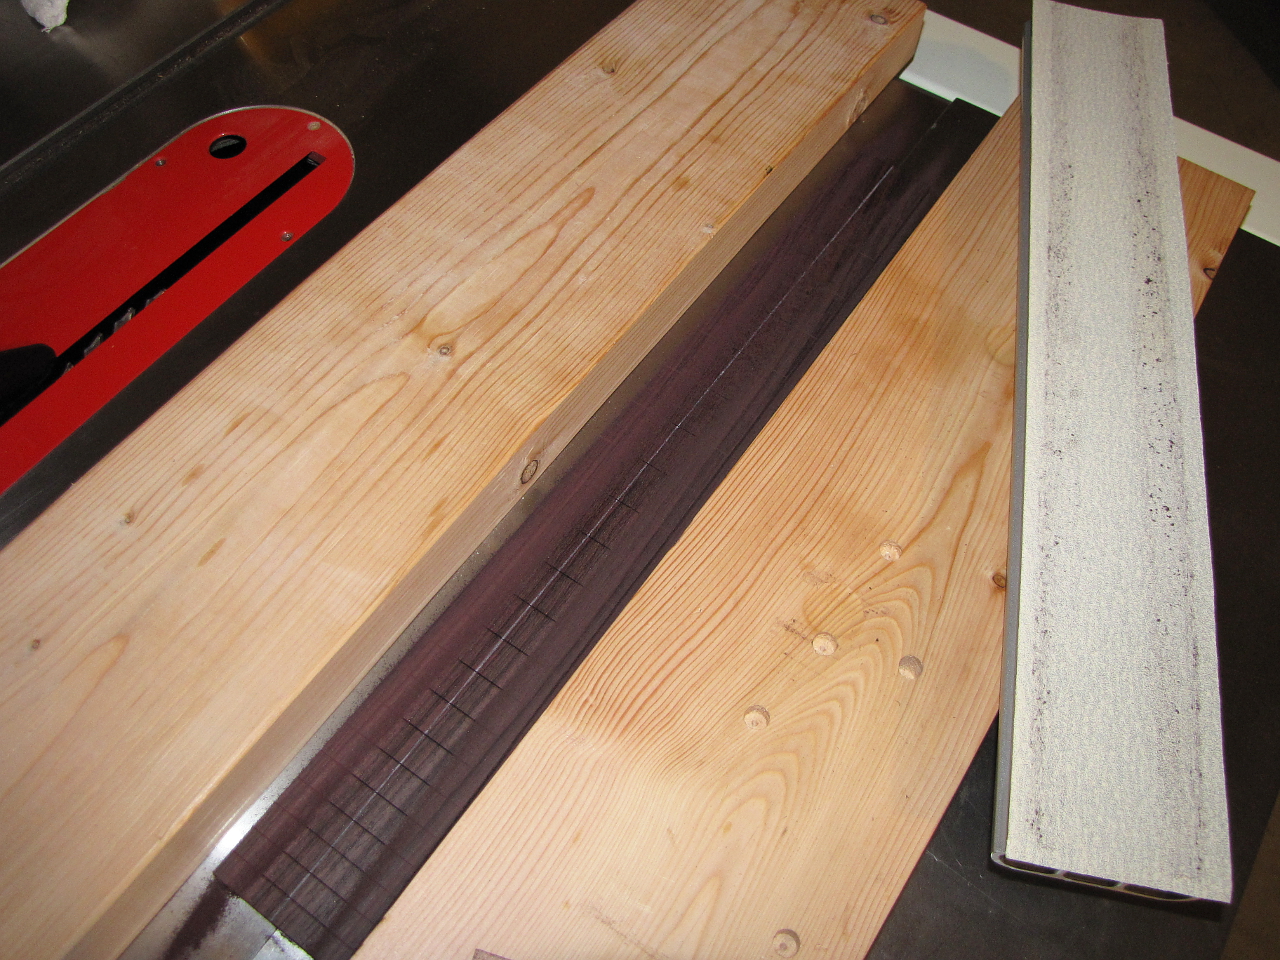
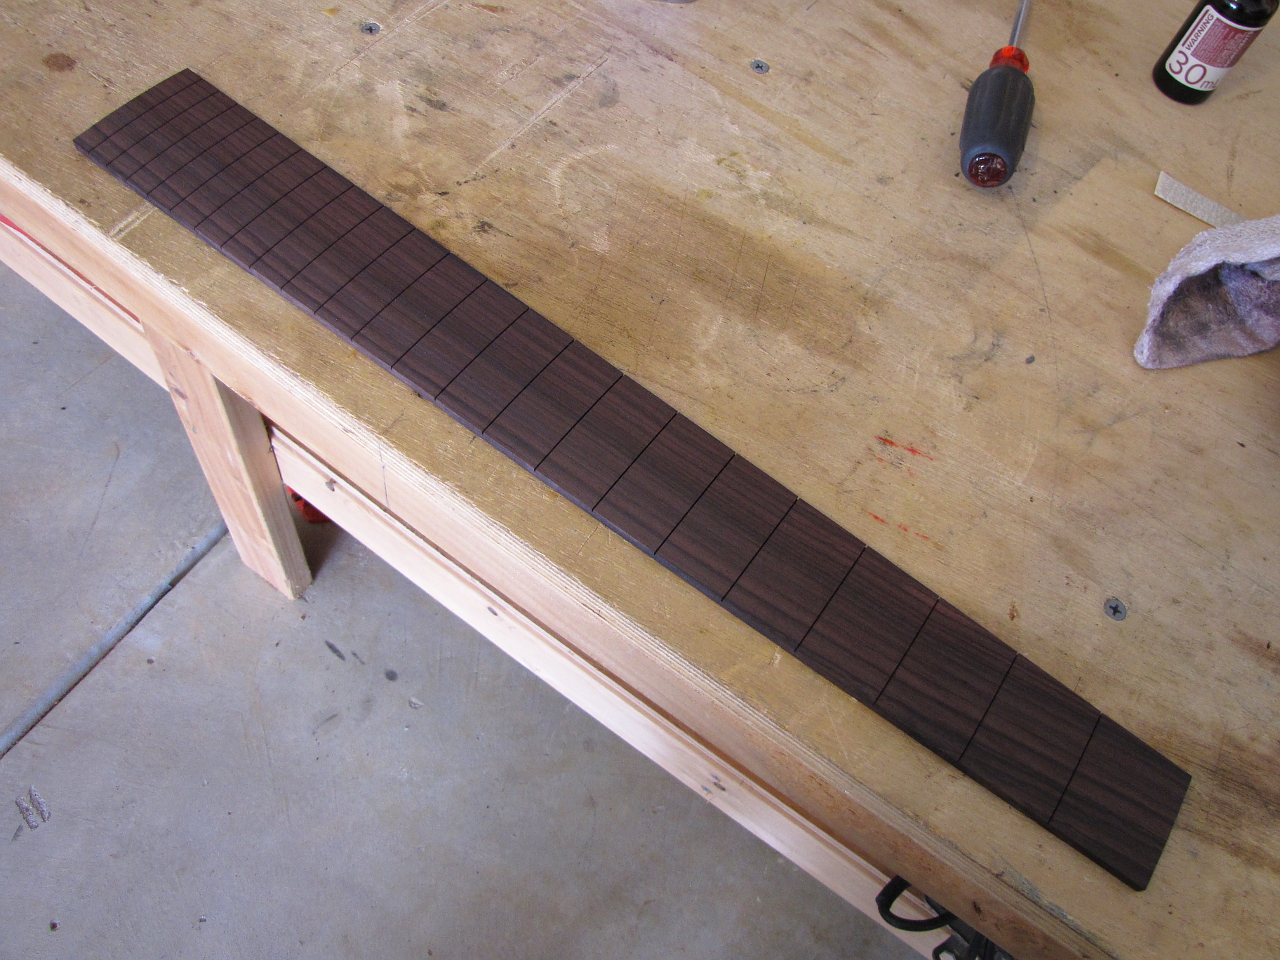
Once the frets are pressed in, I glue the binding to the edge of fretboard. In the case of a Les Paul, the fret wire is cut flush with the edge of the board, and then the binding covers the ends of the frets. The binding then needs to be cut and sanded down flush with the top of the board, and little "nibs" of the binding stick up where each fret ends. Its very tedious work, but it looks really nice when finished. |
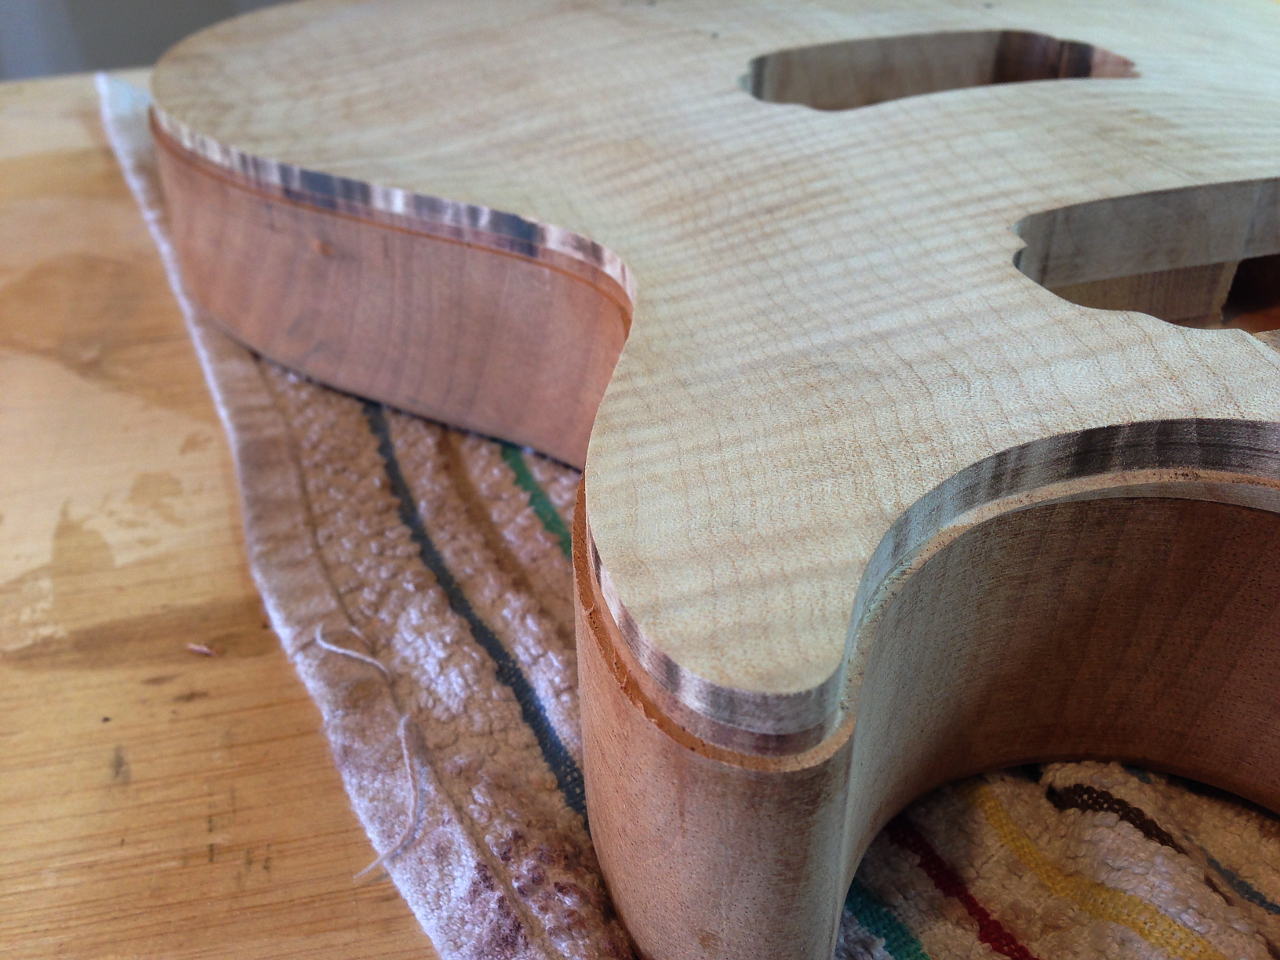 |
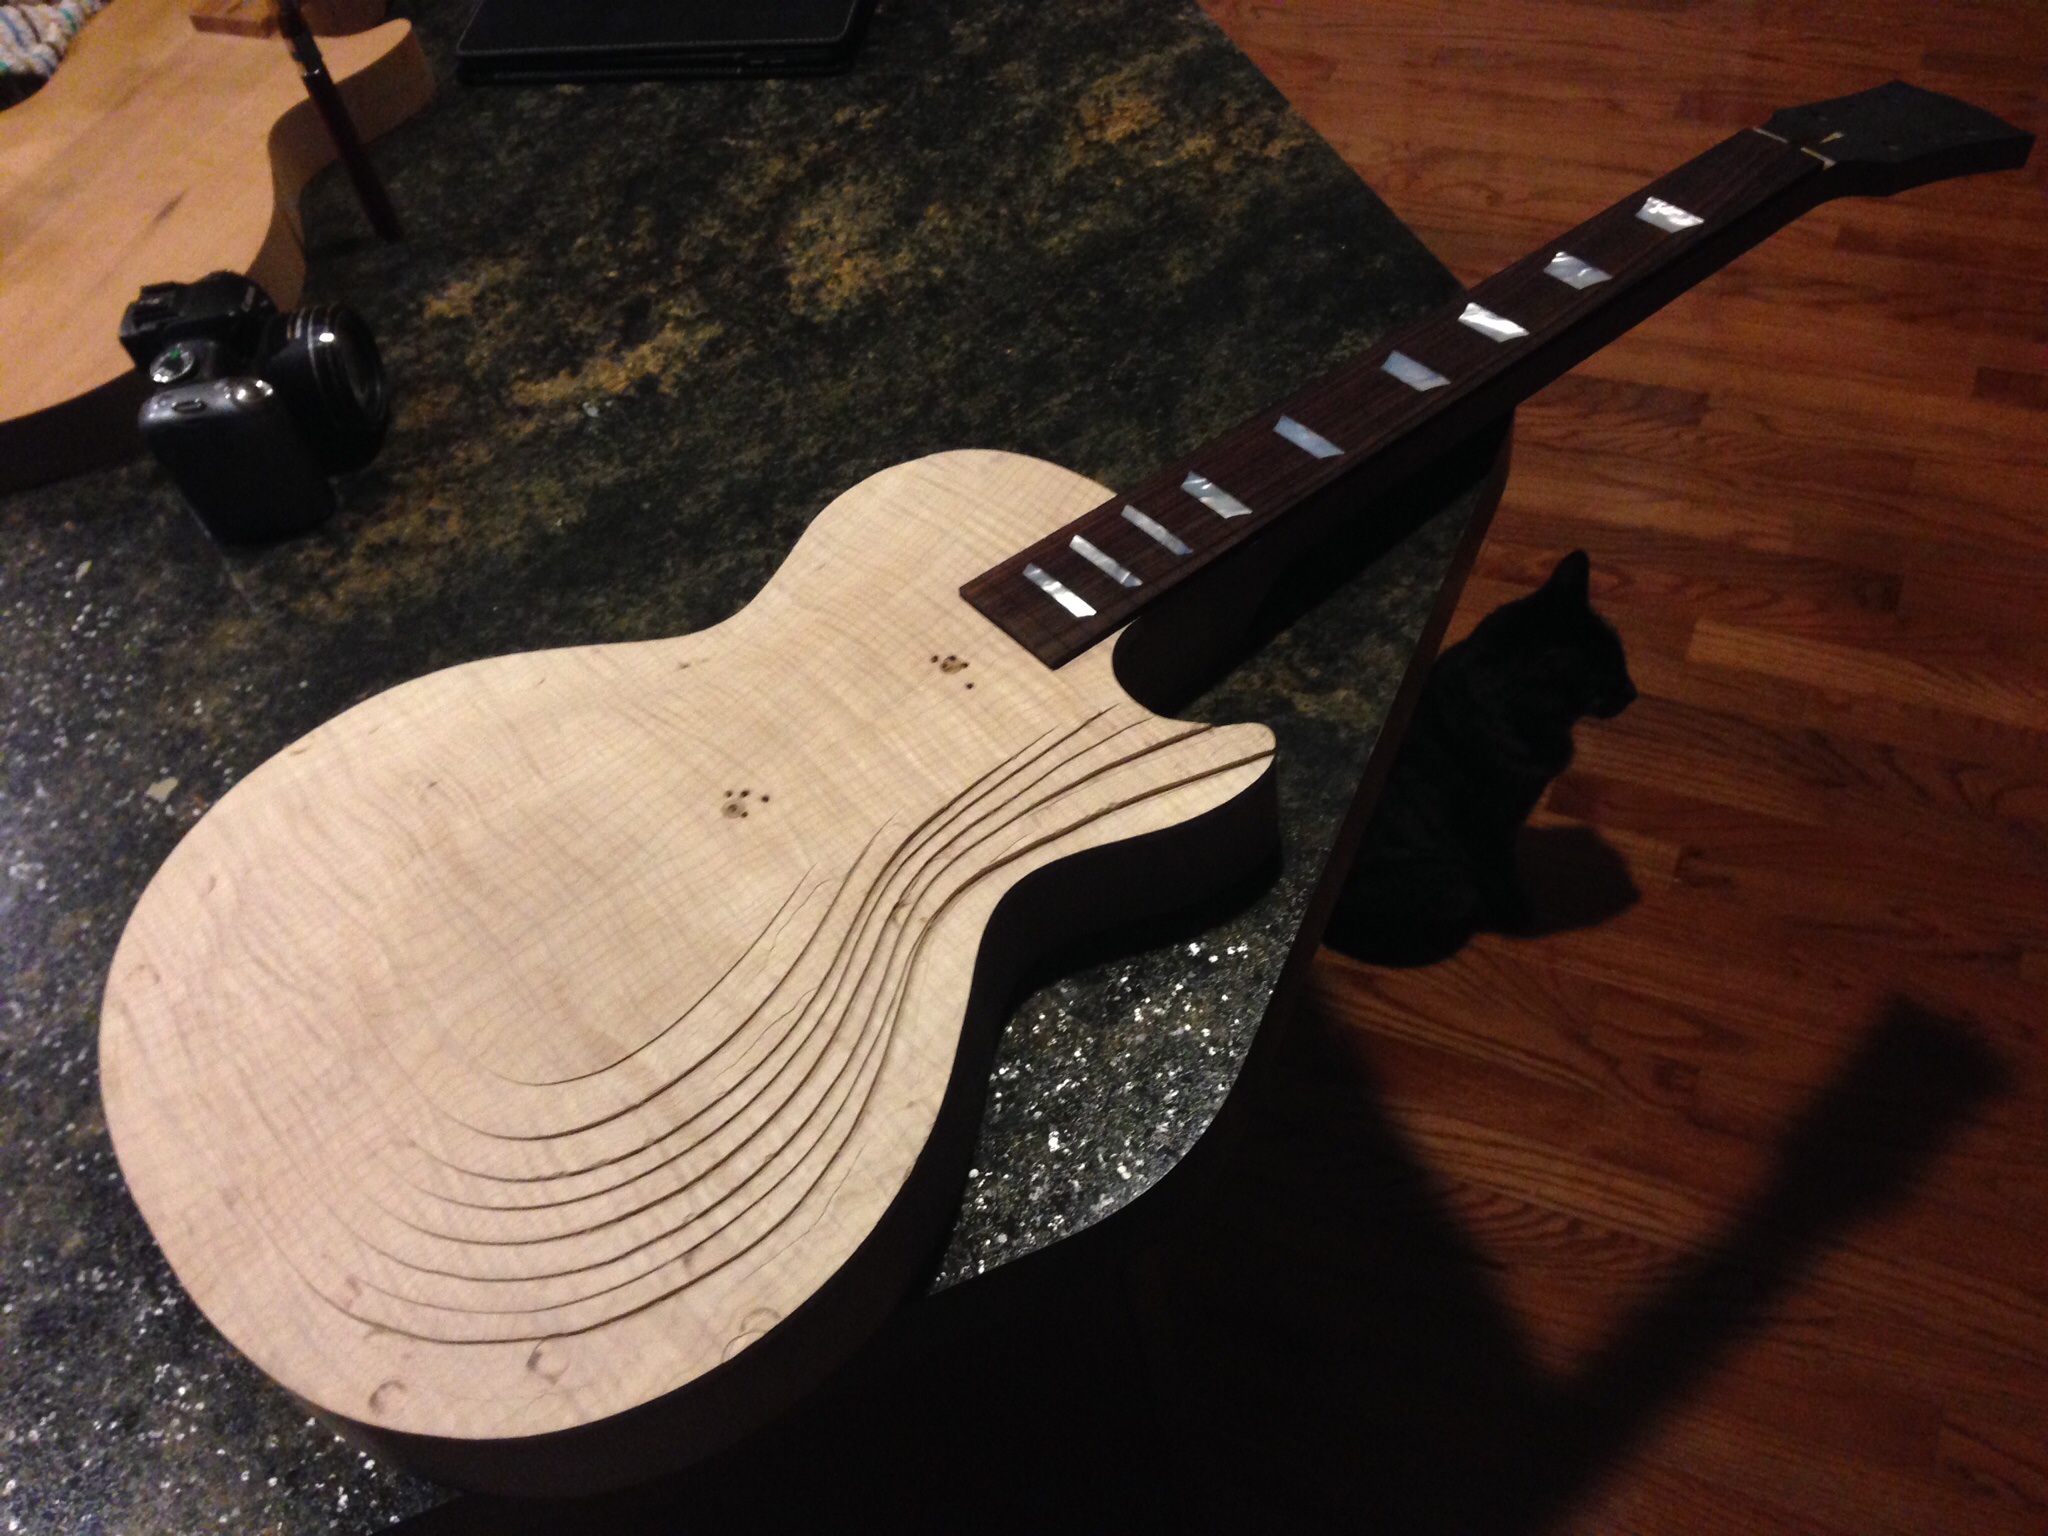
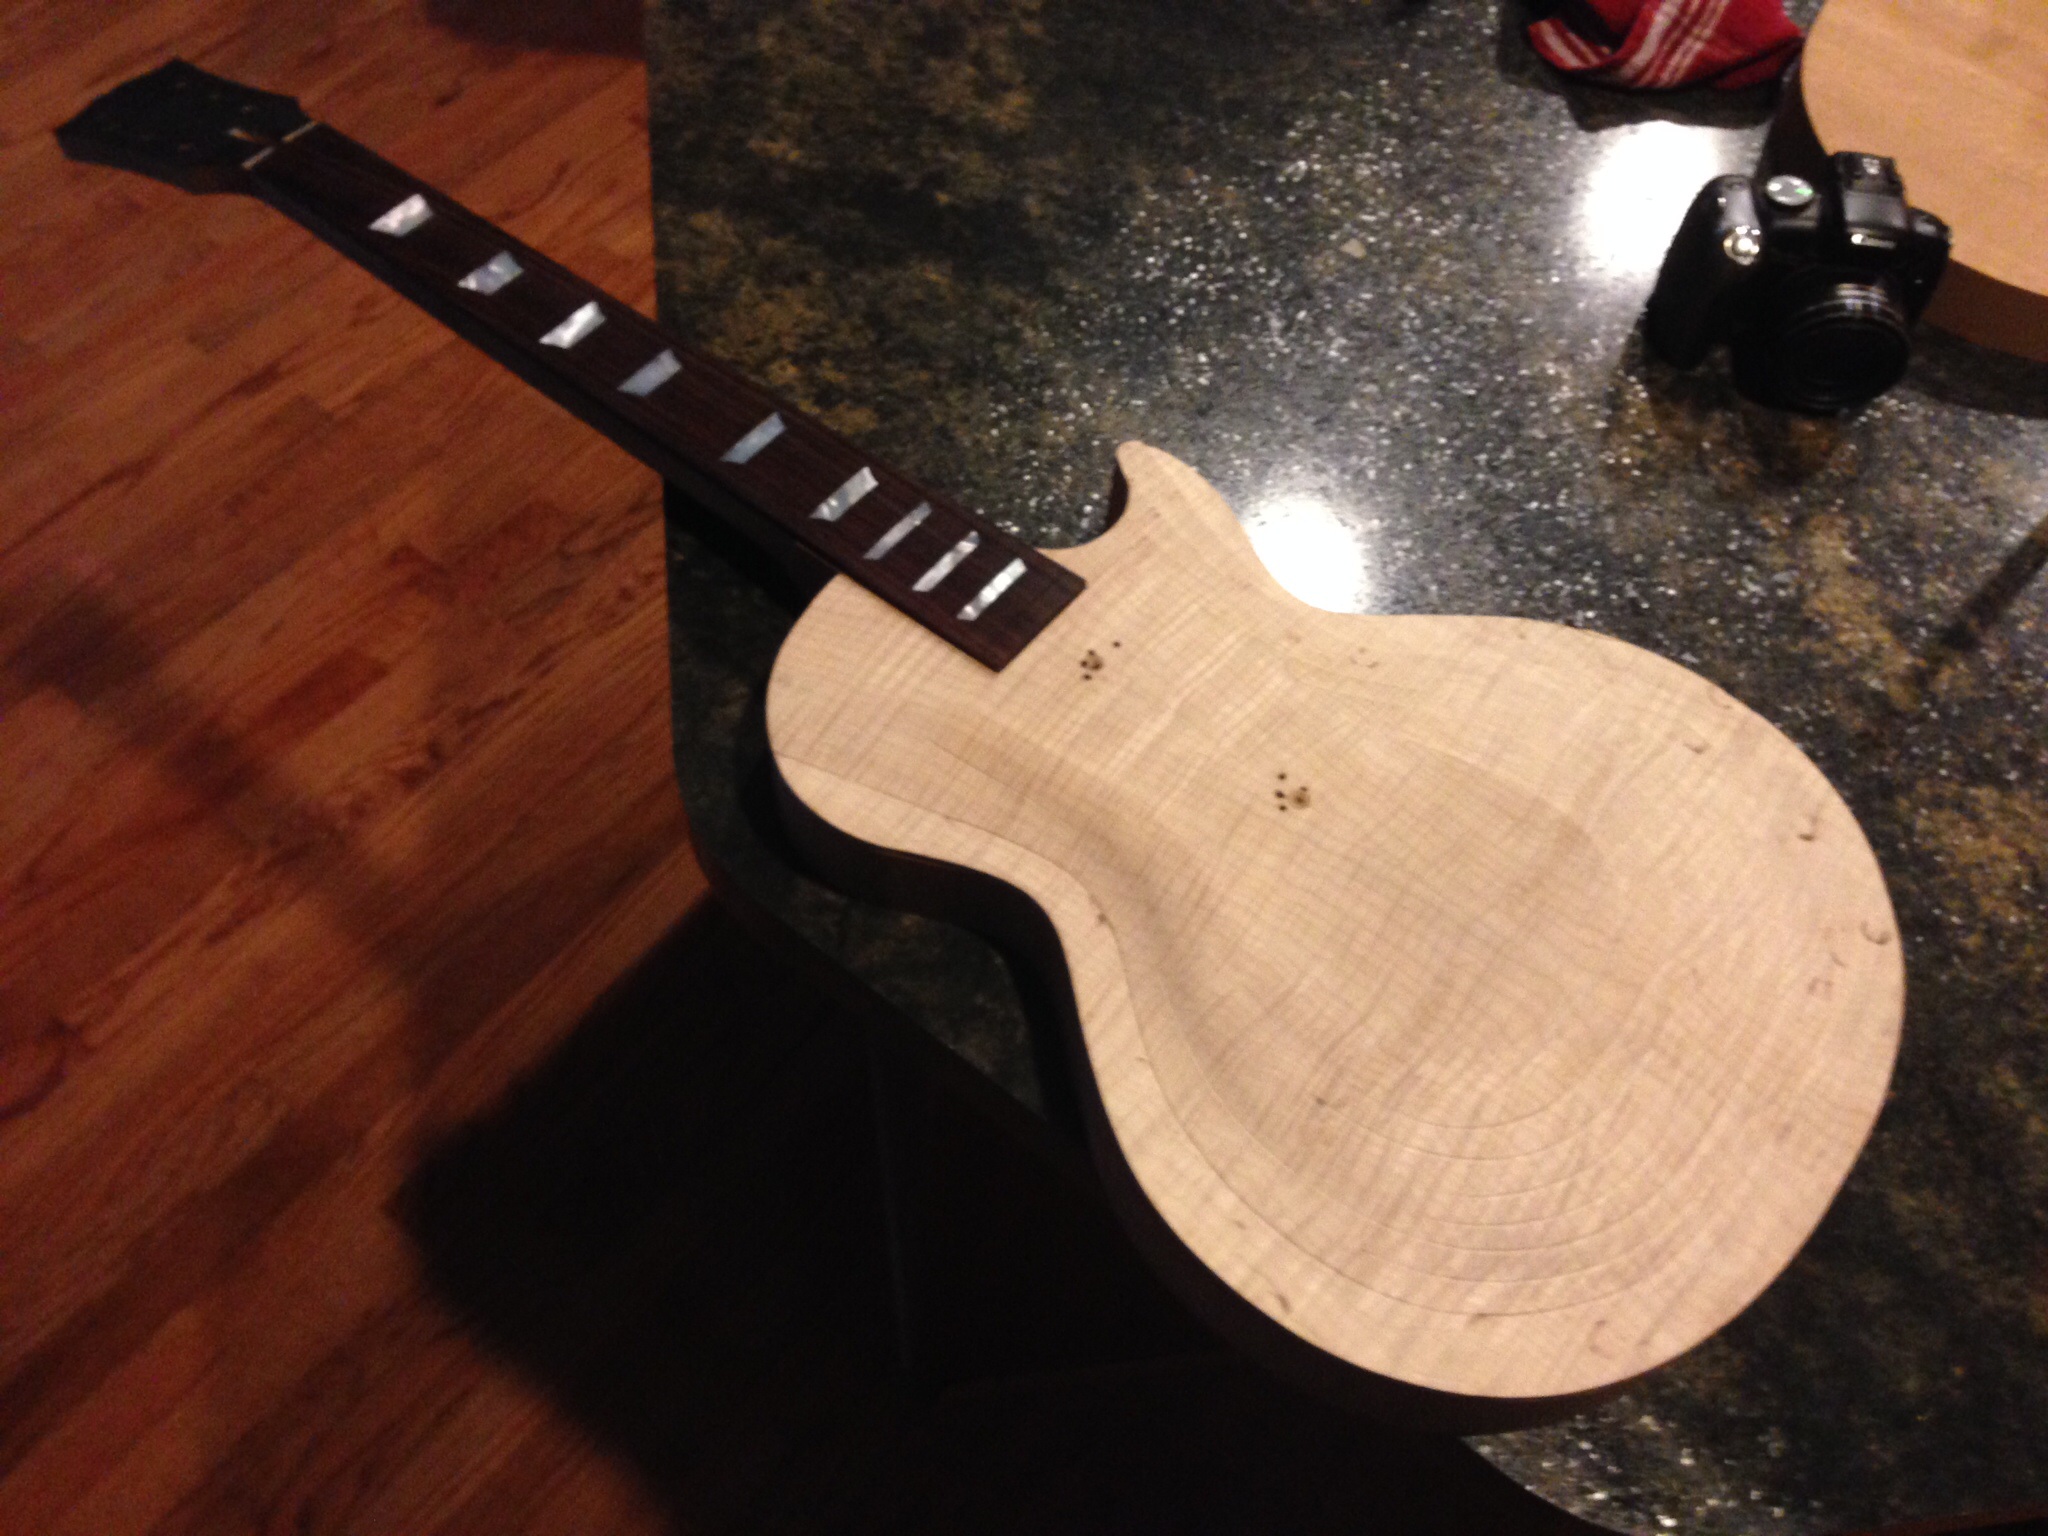
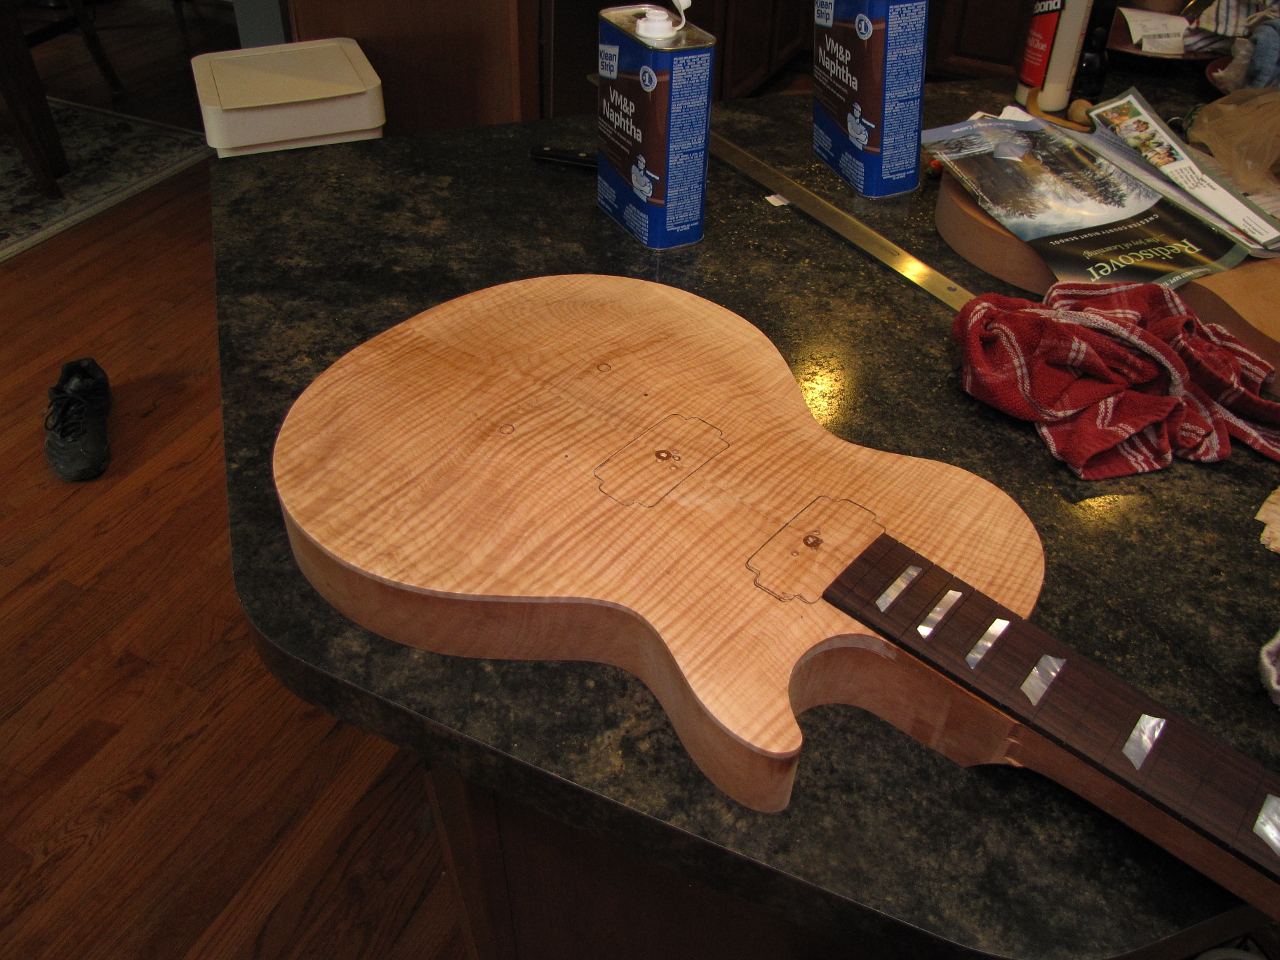
So a Les Paul also has binding around the body. To do this we cut a channel around the whole body using a router. the channel will be a touch narrower and shorter than the binding. Once the binding is glued on it is sanded and scraped down flush and smooth. |
 |
Now its finally starting to look like a guitar! |
 |
OK, so nobody wants to play a guitar with a neck that looks and feels like this one. We have to do something about that. |
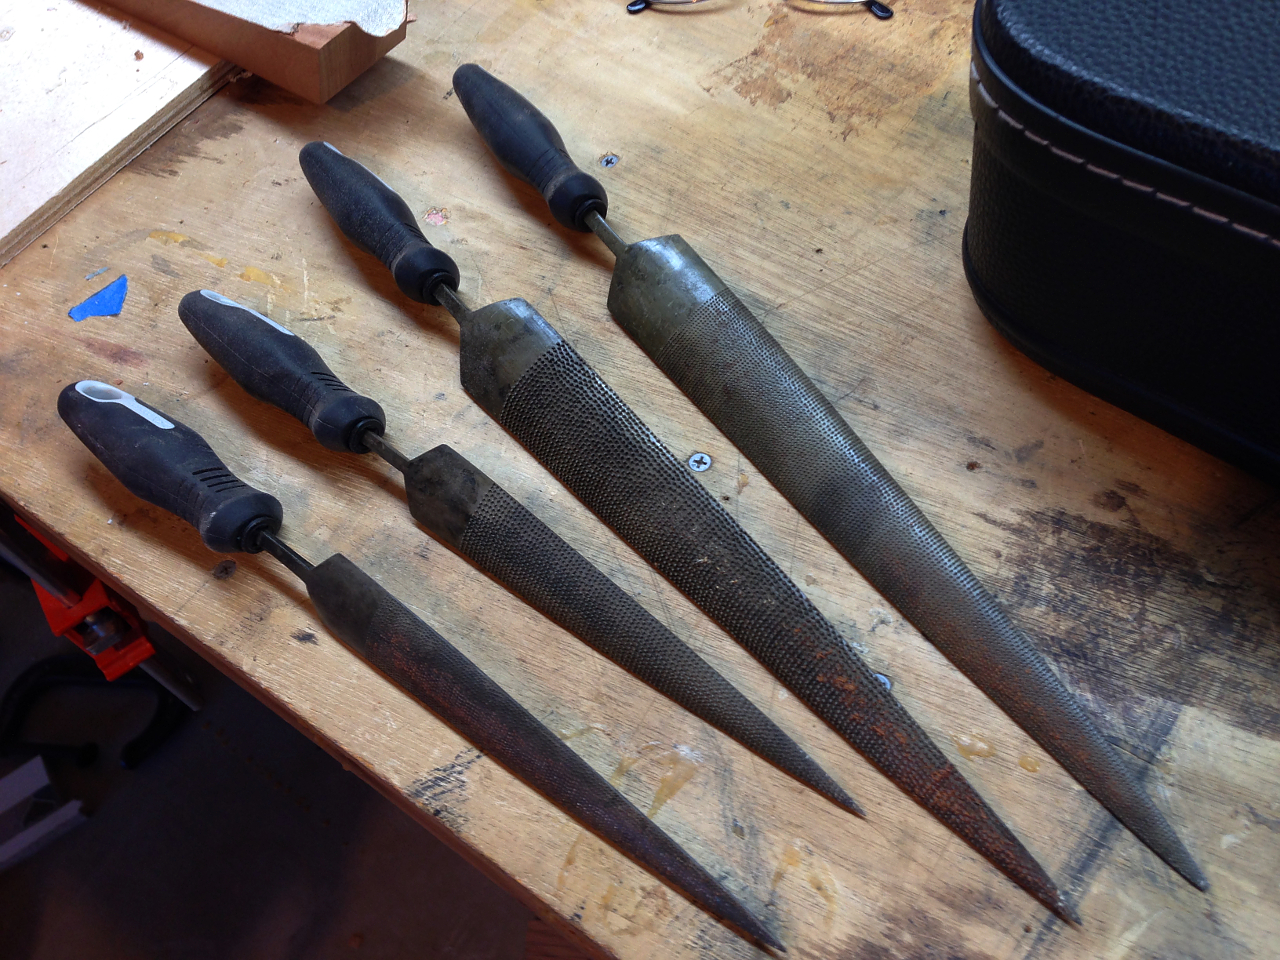 |
These are the weapons of choice. They look ugly but they are the best damn rasps I own. They chew through wood like its butter. |
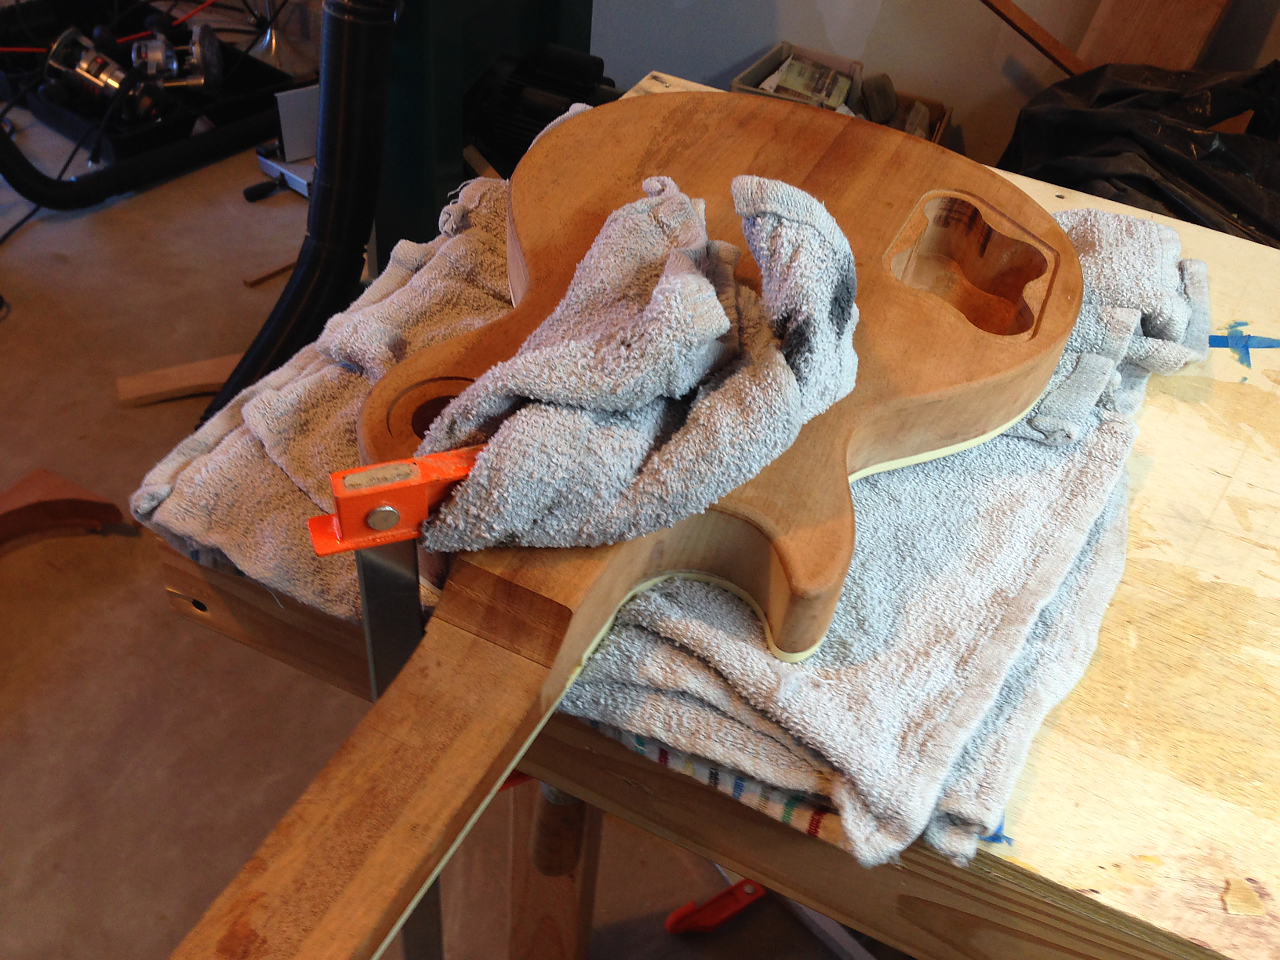 |
Start my carefully clamping the guitar face down on clean towels. The towels are just padding so the top doesnt get scratched and dented. I think next time I'll carve the neck before I carve the top. This would have made carving the neck a hell of a lot easier. Live and learn. Diverging from the "normal" way of building a Les Paul leaves one figuring some stuff out on ones own. Sometimes that means making mistakes :) |
 |
I carefully mark out lines to use as guides and start carving the corners off with the rasp. Its much better than just indiscriminately hacking away at the neck :) |
 |
Little bit at a time. This part is done very cslowly and carefully, stopping frequently to check and measure. |
 |
Starting to round off the facets. |
 |
More rounding |
 |
Still more. |
 |
Viola! OK, this isnt the finished shape yet actually, but I stopped to clean all the sawdust off with naphtha so I can see clearly where it still needs work... |
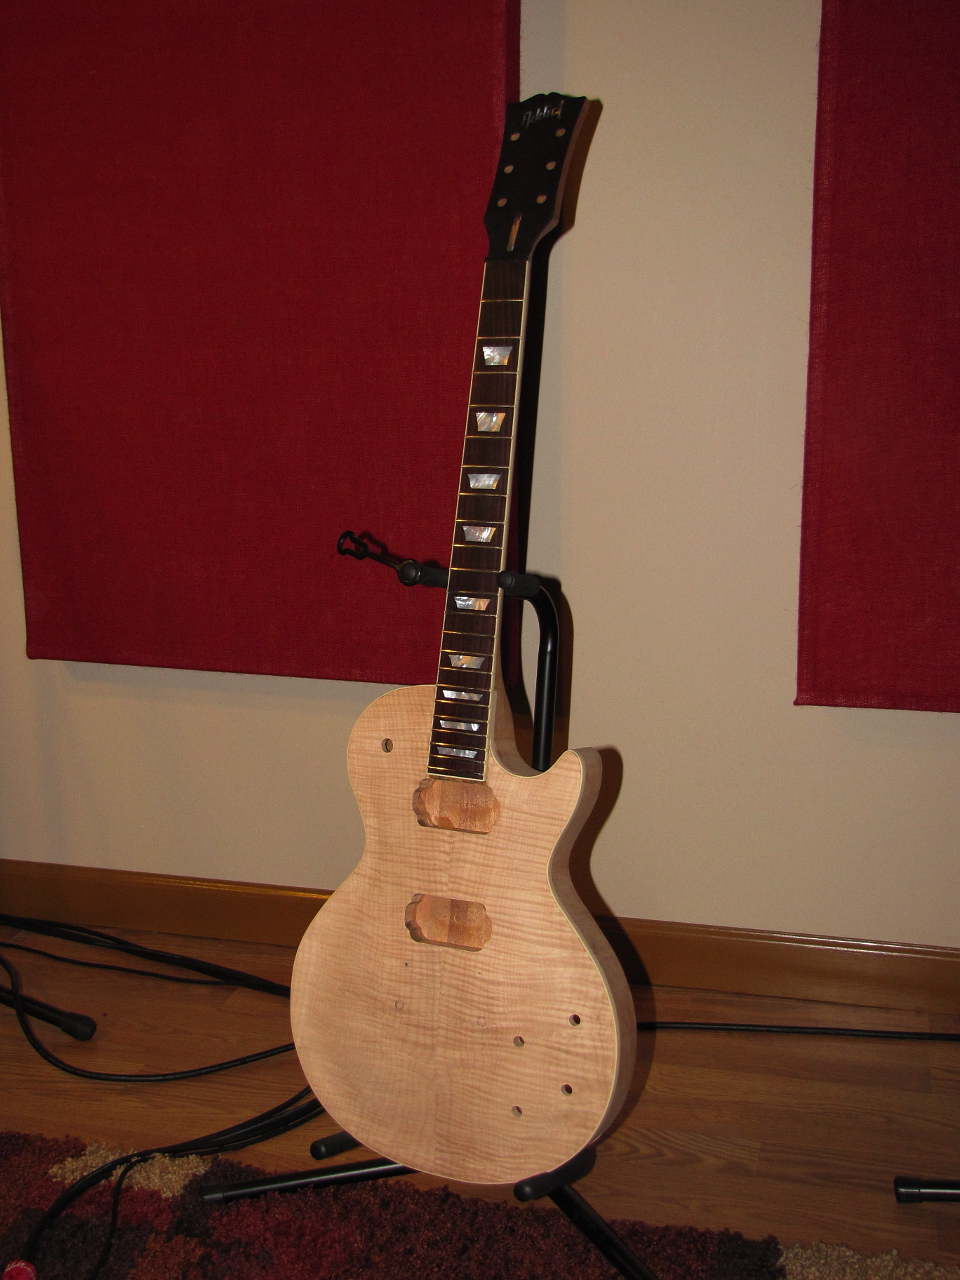 |
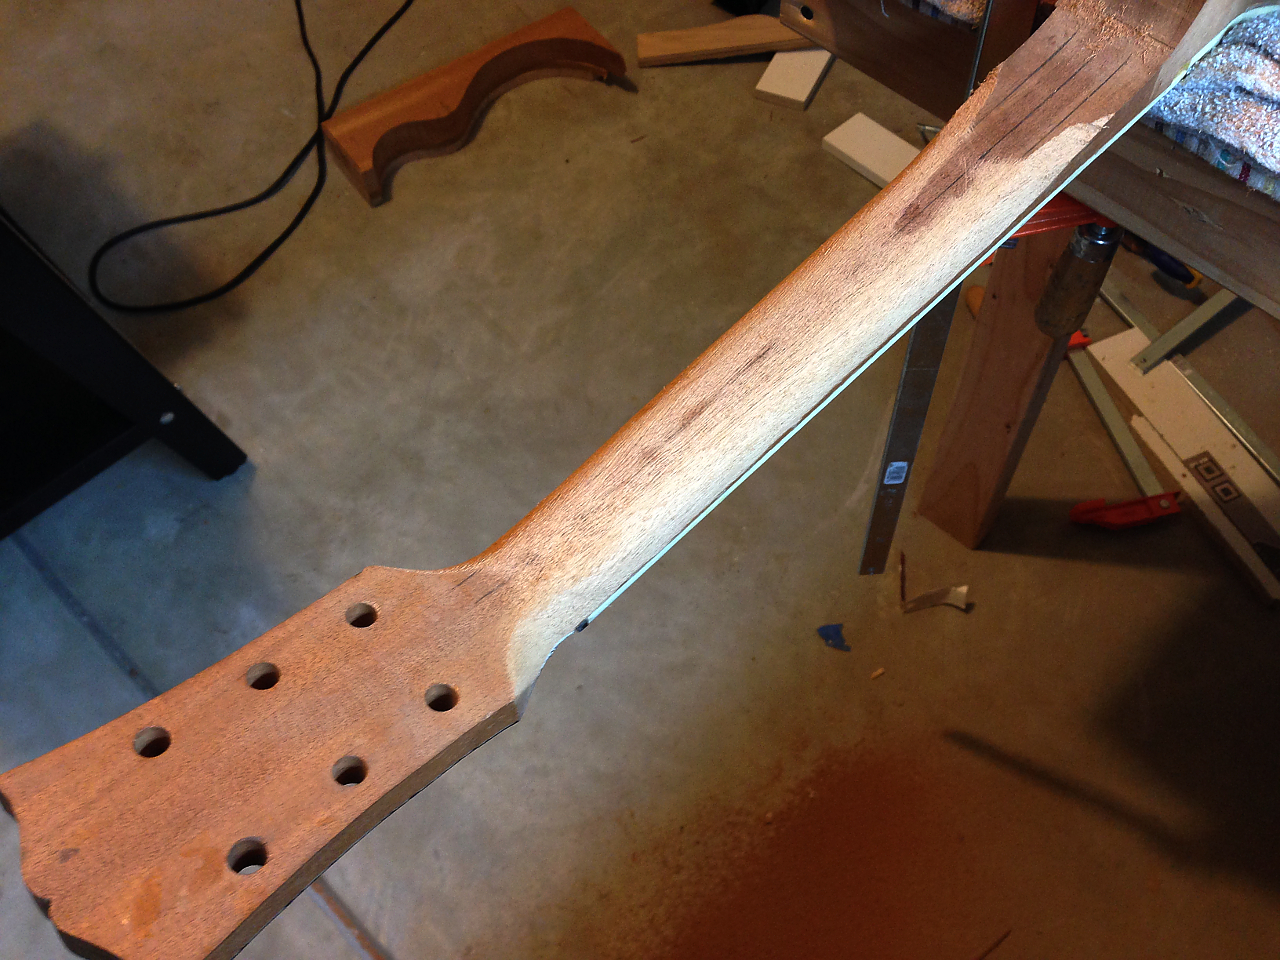
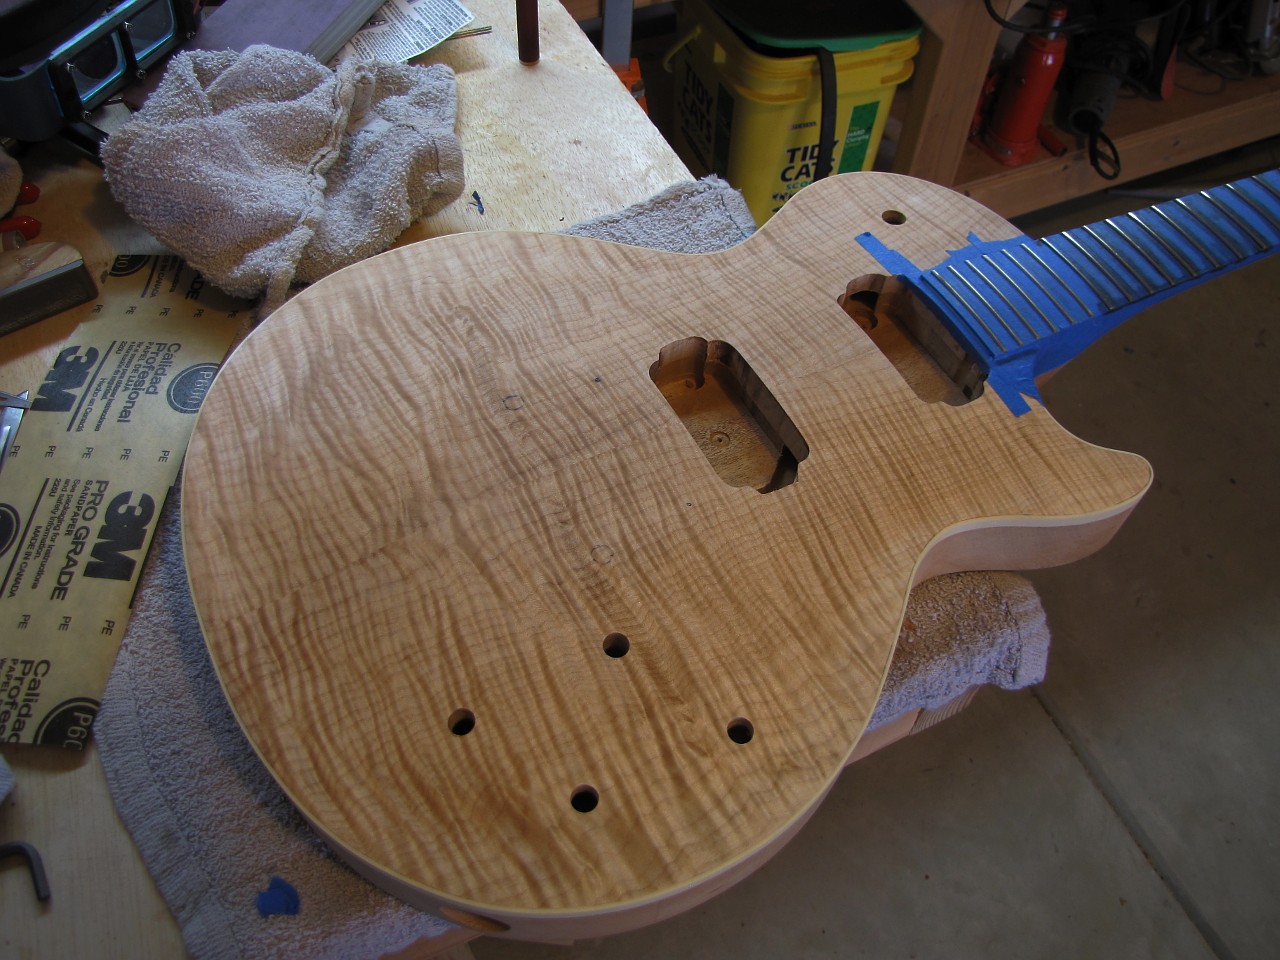
Some more carving, sanding, and shaping. Drilled holes for the volume and tone pots, and the pickup selector toggle, as well as the output jack. |
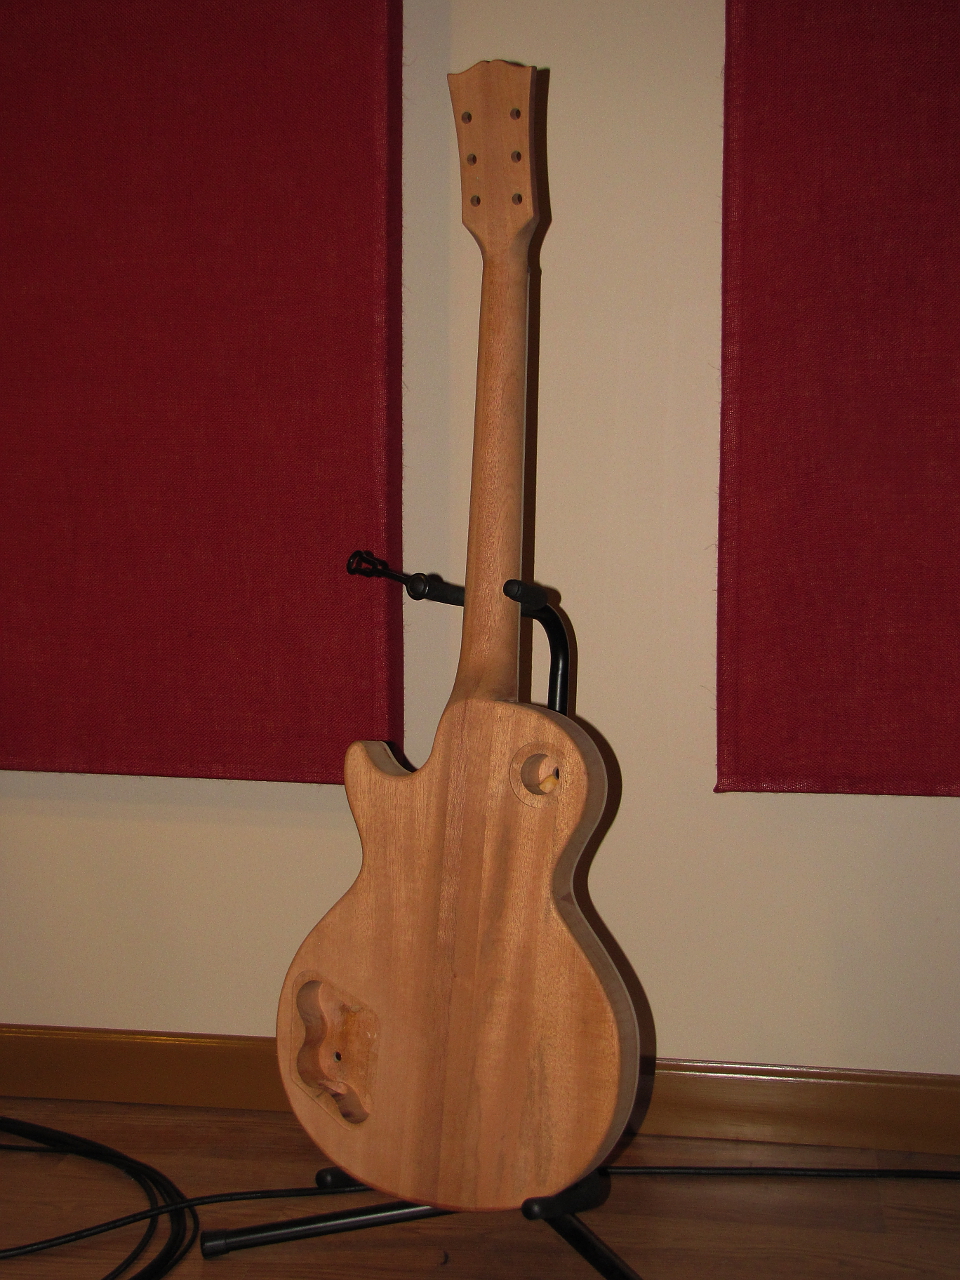 |
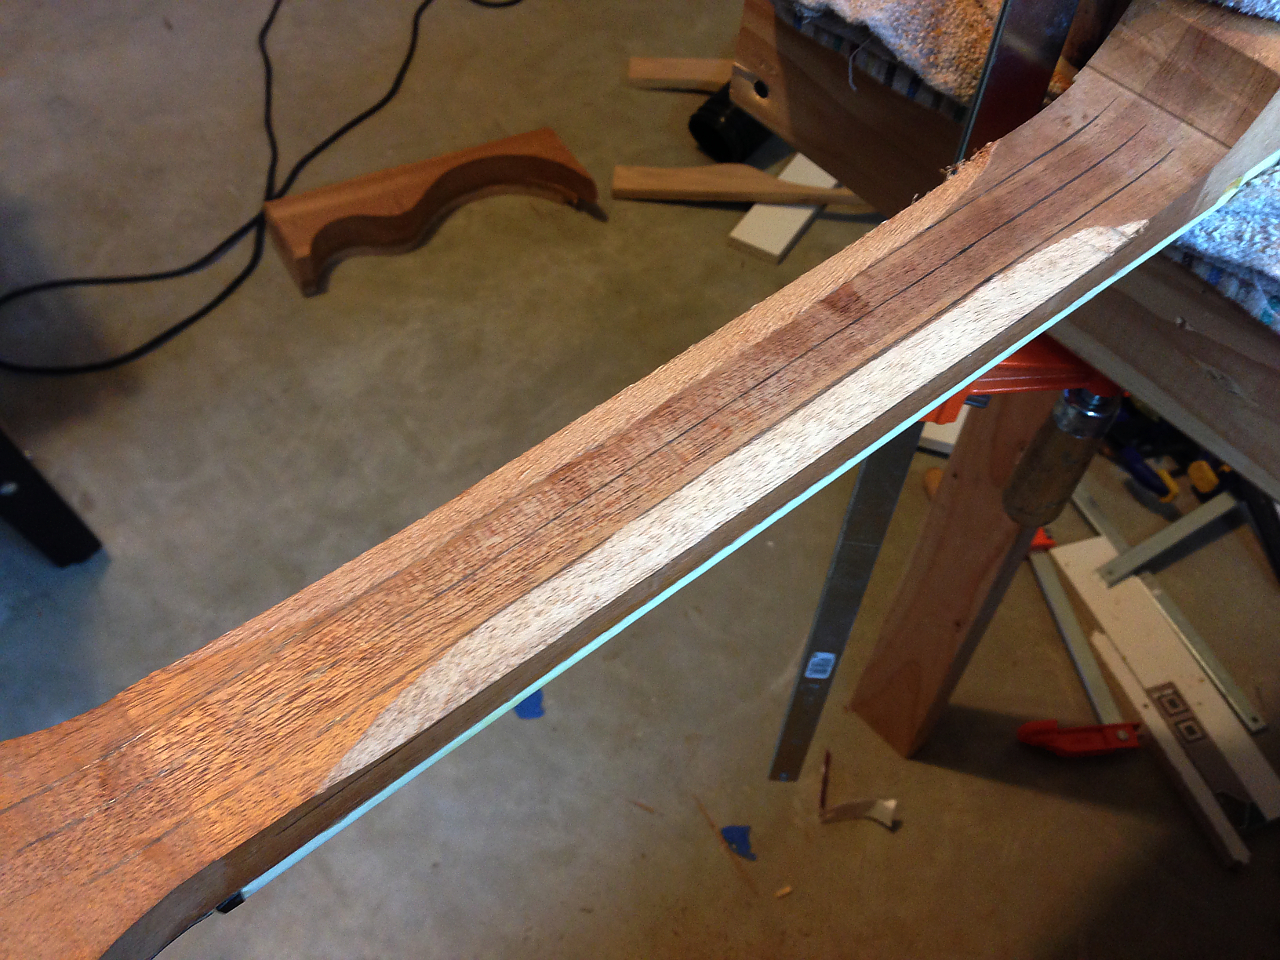
Heres the back with the NON-final neck profile. |
 |
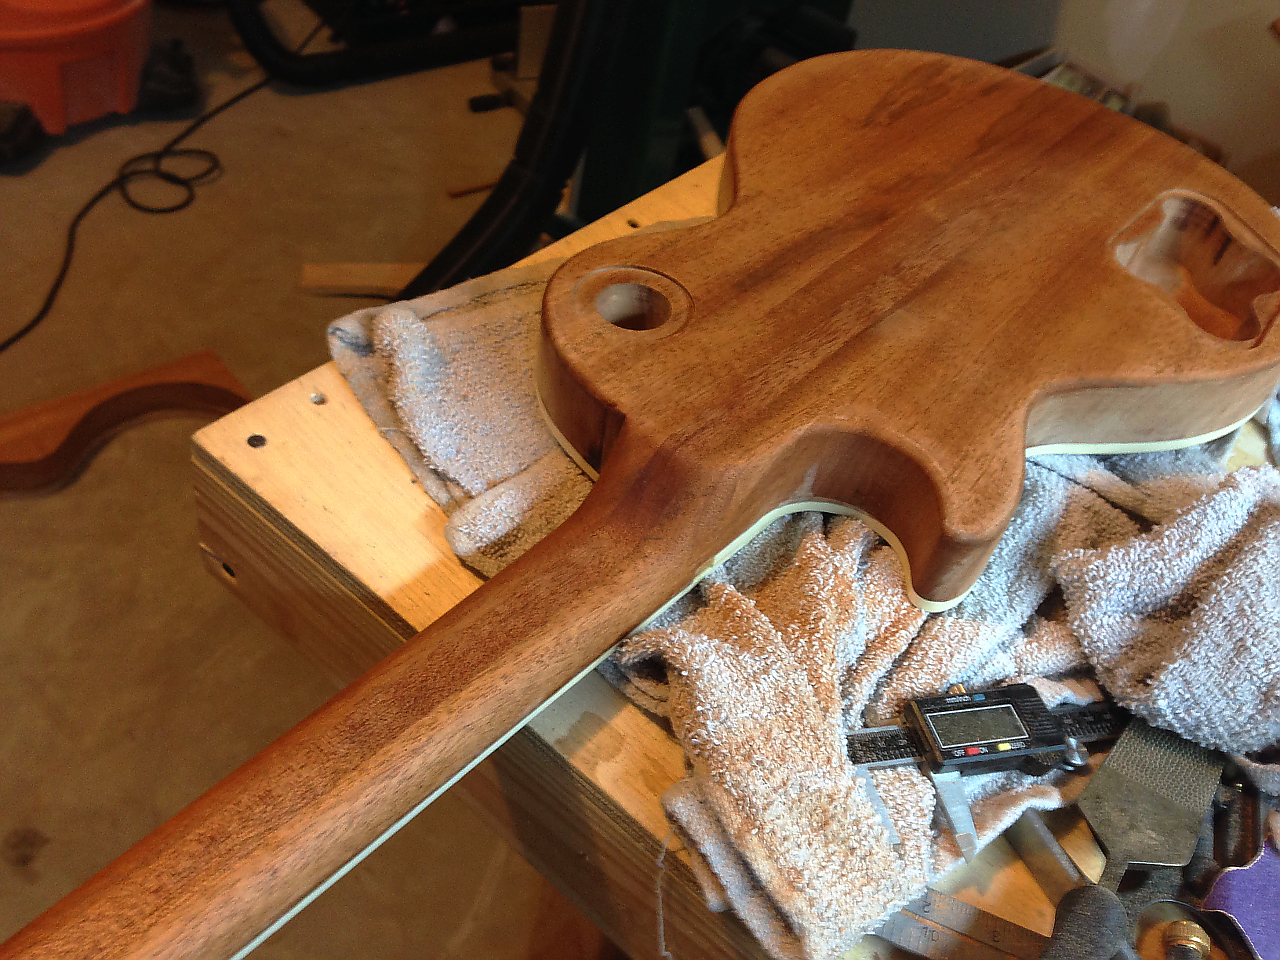
Just a gratuitous shot that shows off the figure in the top with a bit of naphtha to bring it out |
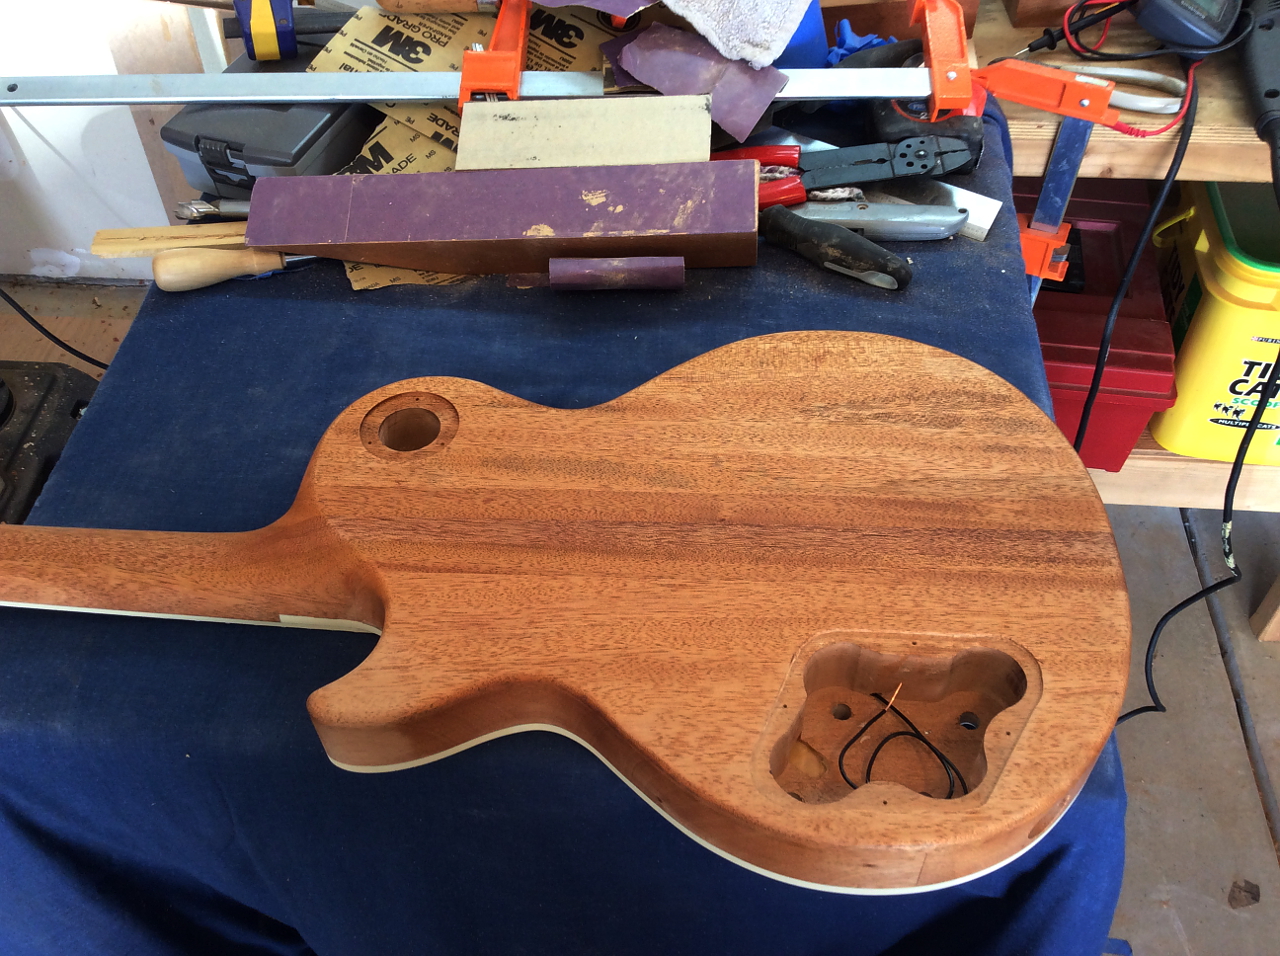 |
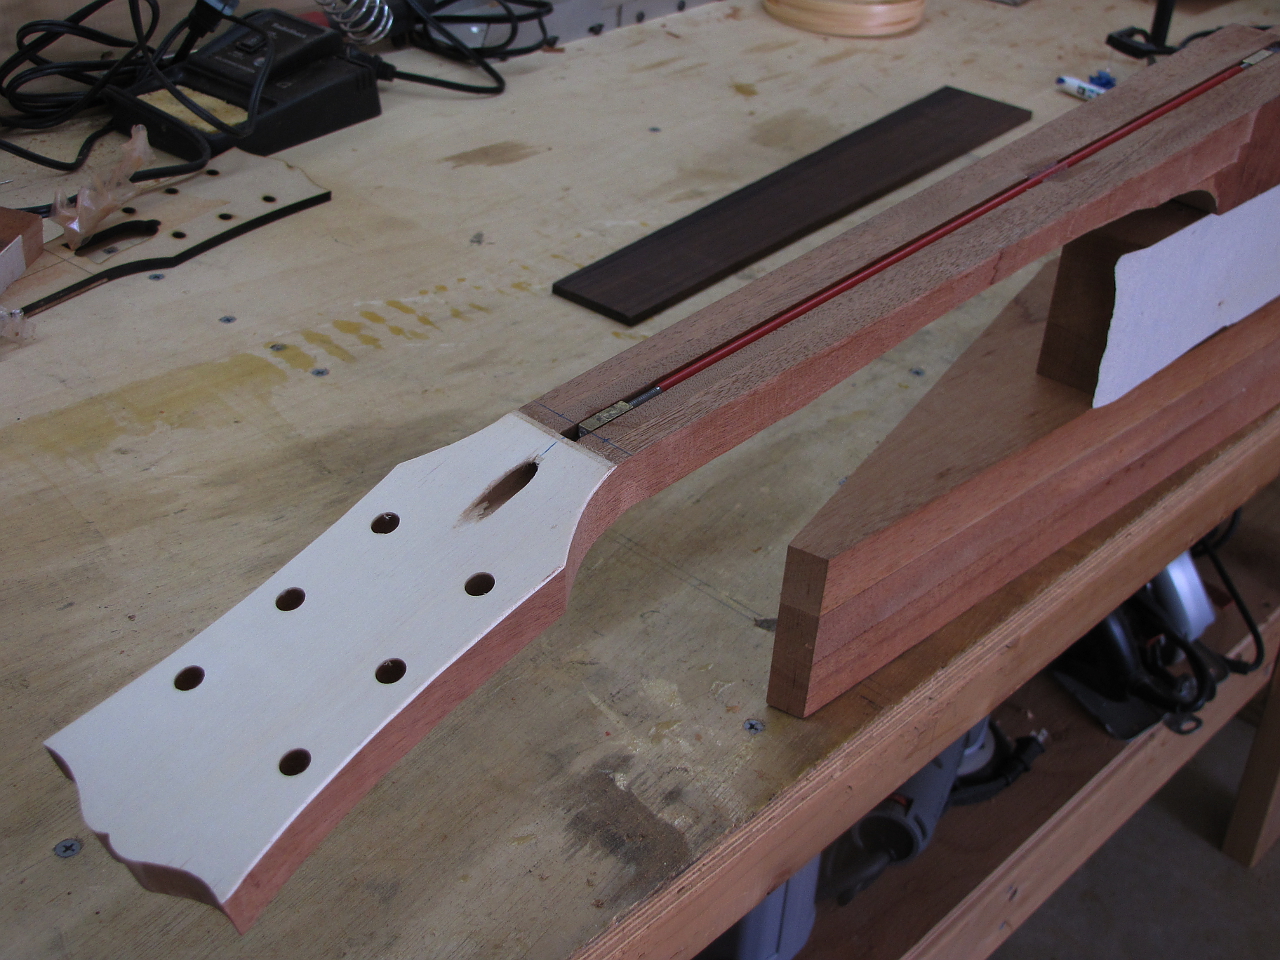
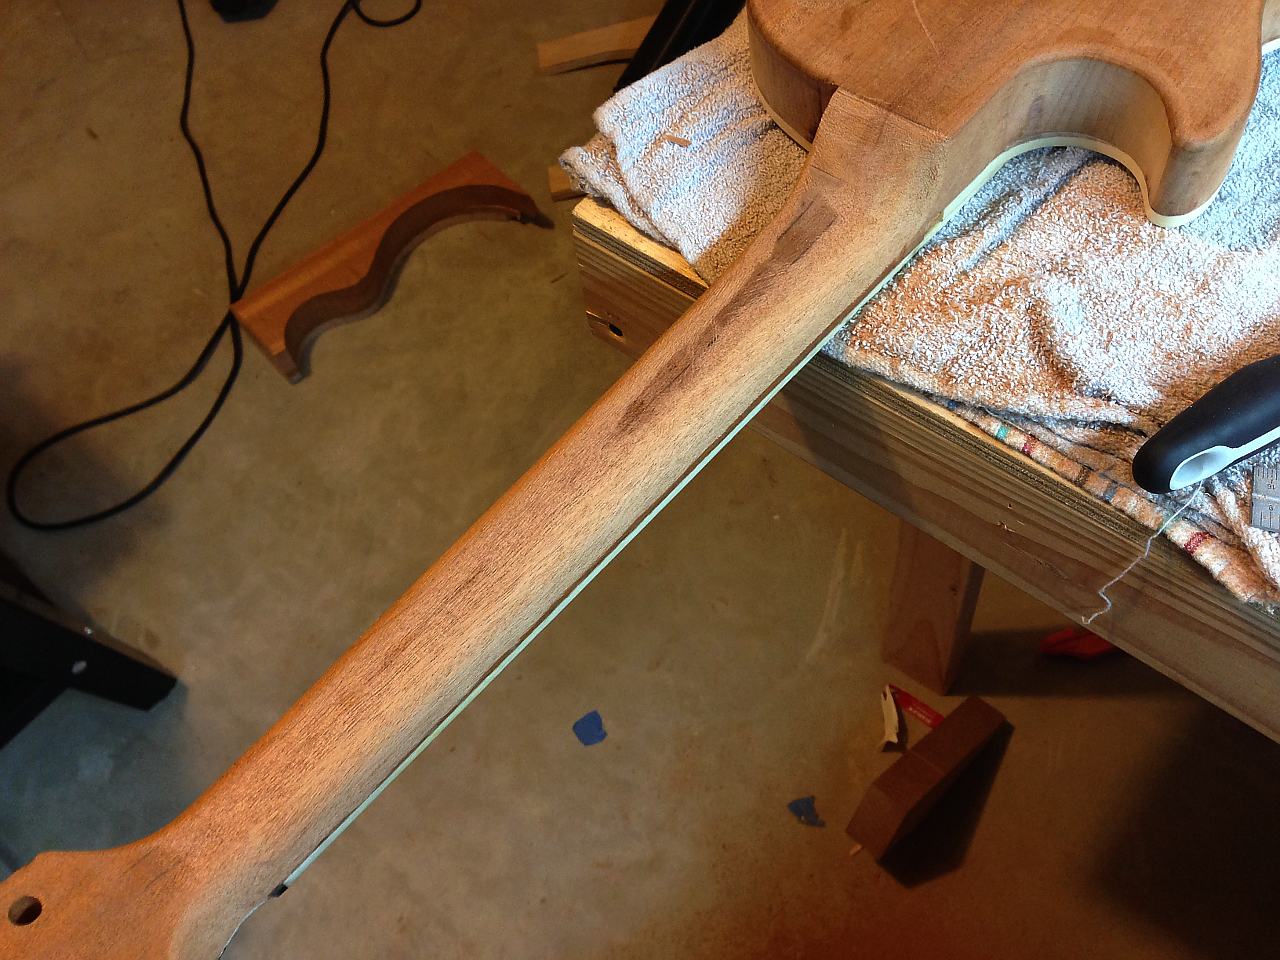
Heres the final coutour for the neck/body join area. Some folks suggested I should get more radical removing wood here, as that it one advantage of the neck-through design. I stopped at this point because taking away any more wood was not going to further increase my ability to easily reach the upper frets and the more wood in the neck, the more stable it will be. This was a good balance. In point of fact the access is FAR superior to my Gibby LP. The wire you see in there is the ground wire for the bridge. It goes in at a much earlier stage than the rest of the wiring. When the holes for the tail piece get drilled a little side channel gets drilled from inside that hole into the control cavity. A wire is run from there into the cavity, and then when you press the bushing for the tailpiece into the hole the wire is pressed against the bushing which holds it tightly in place, and then when you hook up the rest of the electronics you solder that ground wire to the common ground. Once the tailpiece, bridge, strings, and tuners are attached they are all connected and grounded via that wire. |
 |
The side dot markers are installed by drilling small holes in the binding and gluing in a 3/32" black plastic rod. then the rod is cut off and scraped flush with the binding. Another "learning" moment too. Note to self: Next time put in the dots before gluing the fretboard on! |
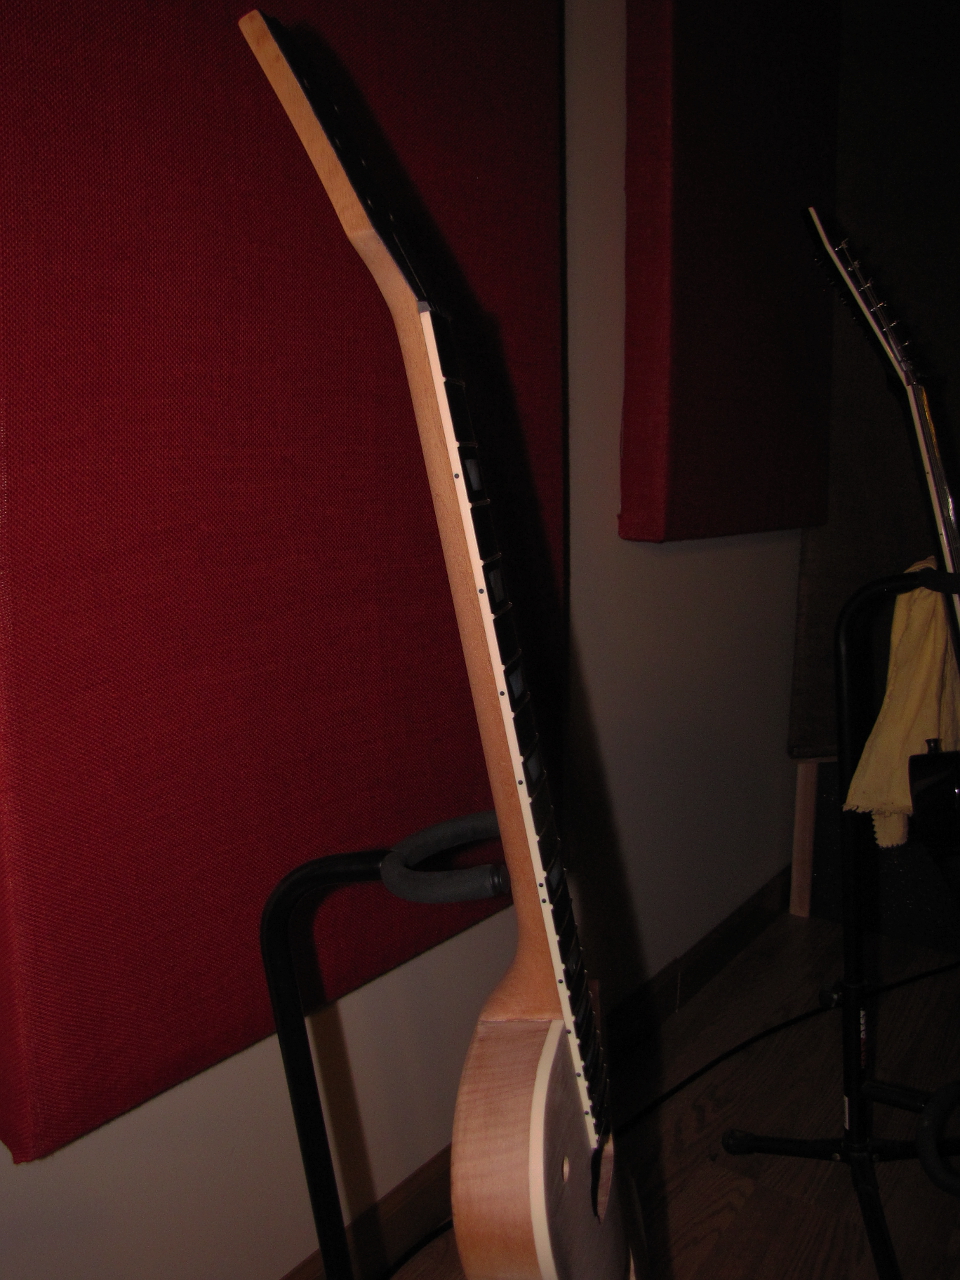
| Headstock logo. The flash makes it appearoverly bright and blotchy. In real life it looks more subtle :) | |
 |
Here I have bolted on all the hardware for final fitment adjustments if needed, checking everything from frets to neck profile to make sure everything works and fits. I got to plug it in and rock out for the first time and its everything I had hoped. Next step is finishing :) |
 |
Alrighty. The "Build" is done, but we arent done. We still have to put a finish on it. I'm going to use the traditional Nitrocellulose lacquer for my finish. First thing we need to do before we start spraying is to do some grain filling. In this case the back and the neck are made of mahogany which is an open grain wood. Lots of teeny holes. These need to be filled before we spray lacquer or it will look like an adult that used to have a real bad case of acne. |
 |
I'm using Behlen Pore-O-Pac grain filler. After thoroughly cleaning the wood this glop gets smeared on like frosting on a cake. Then its pushed into the pores with a plastic squeegy, and the excess gets squeegied off, then the remainder is wiped off with burlap. Burlap because it has very stiff fibers that wont bulge down into the pores and scoope the filler back out when you wipe it off. |
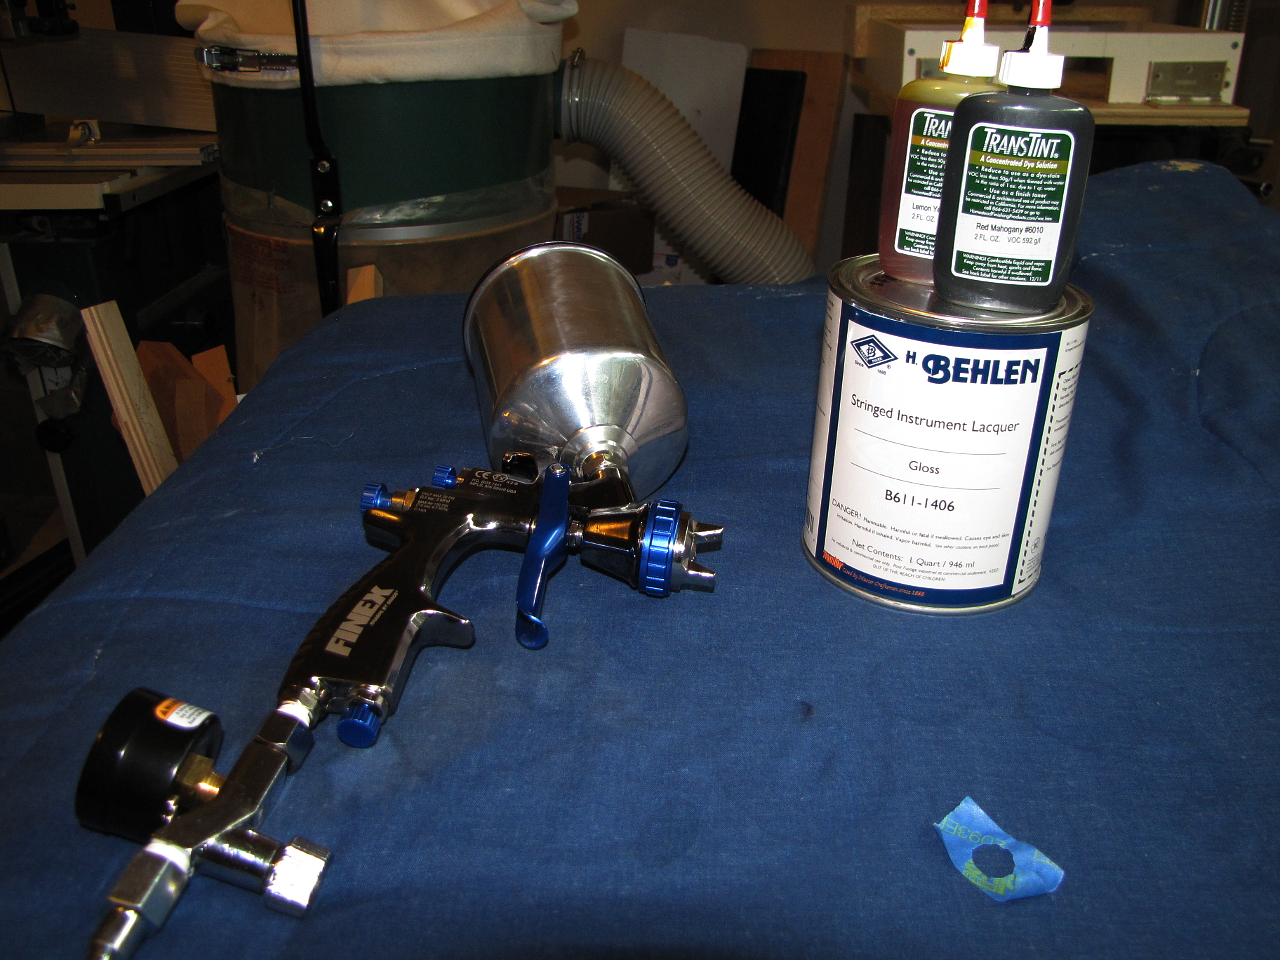 |
Here are the weapons at my disposal. An HVLP spray gun, Behlen String instrument lacquer, and sone transtint dyes. |
 |
An HVLP gun is useless without a compresser. I have a 20 gal 150 PSI compresser. Good to go, lets start spraying! |
 |
Here we are after two coats of clear lacquer. Its really bringing out the figure in the maple top. The slight amber hue is due to the honey amber dye I applied directly to the top, and then sanded it off once dry. It causes the figure to pop more when the lacquer is sprayed over it... |
 |
Another view |
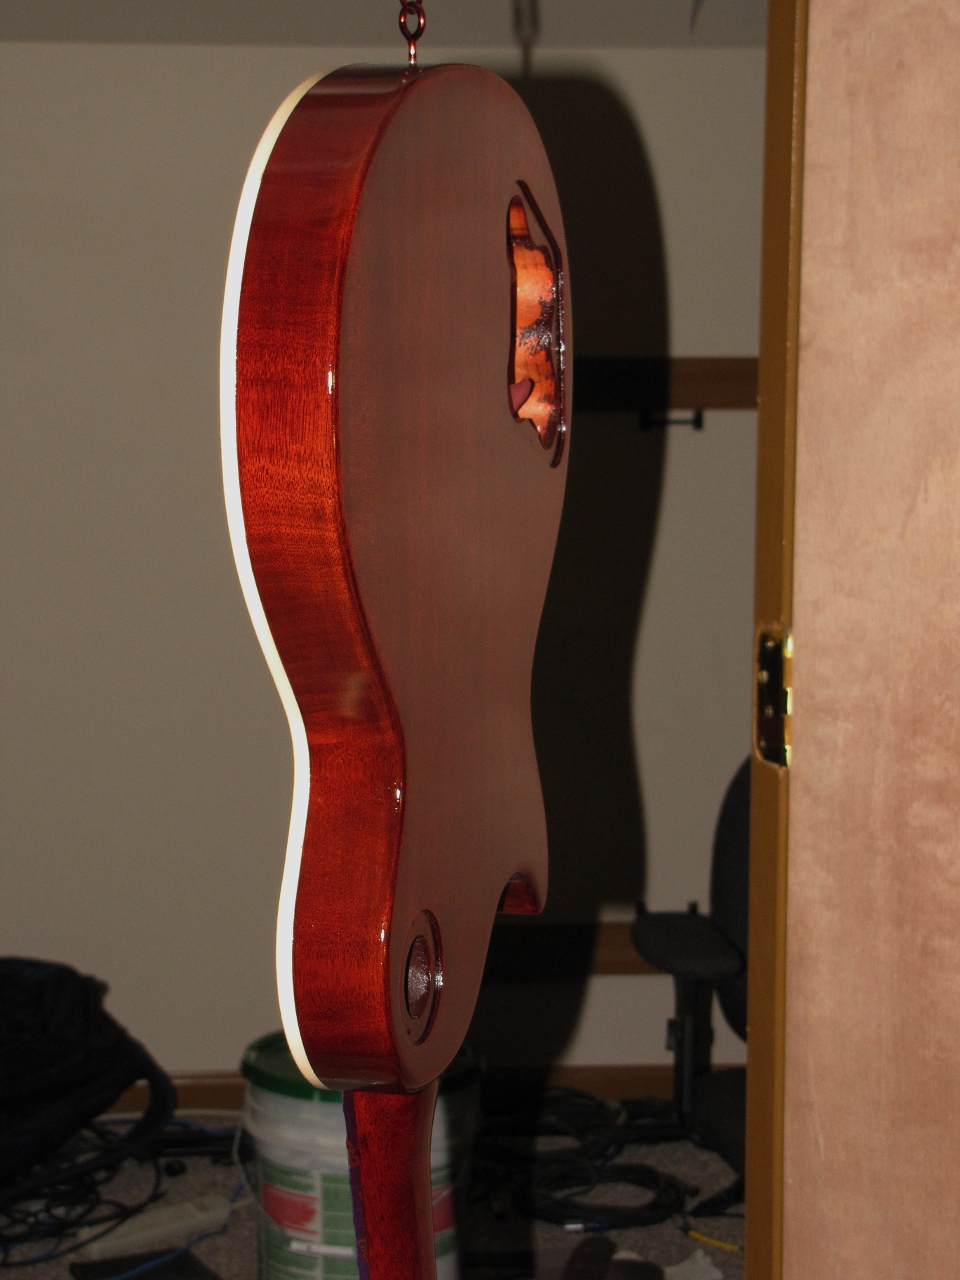 |
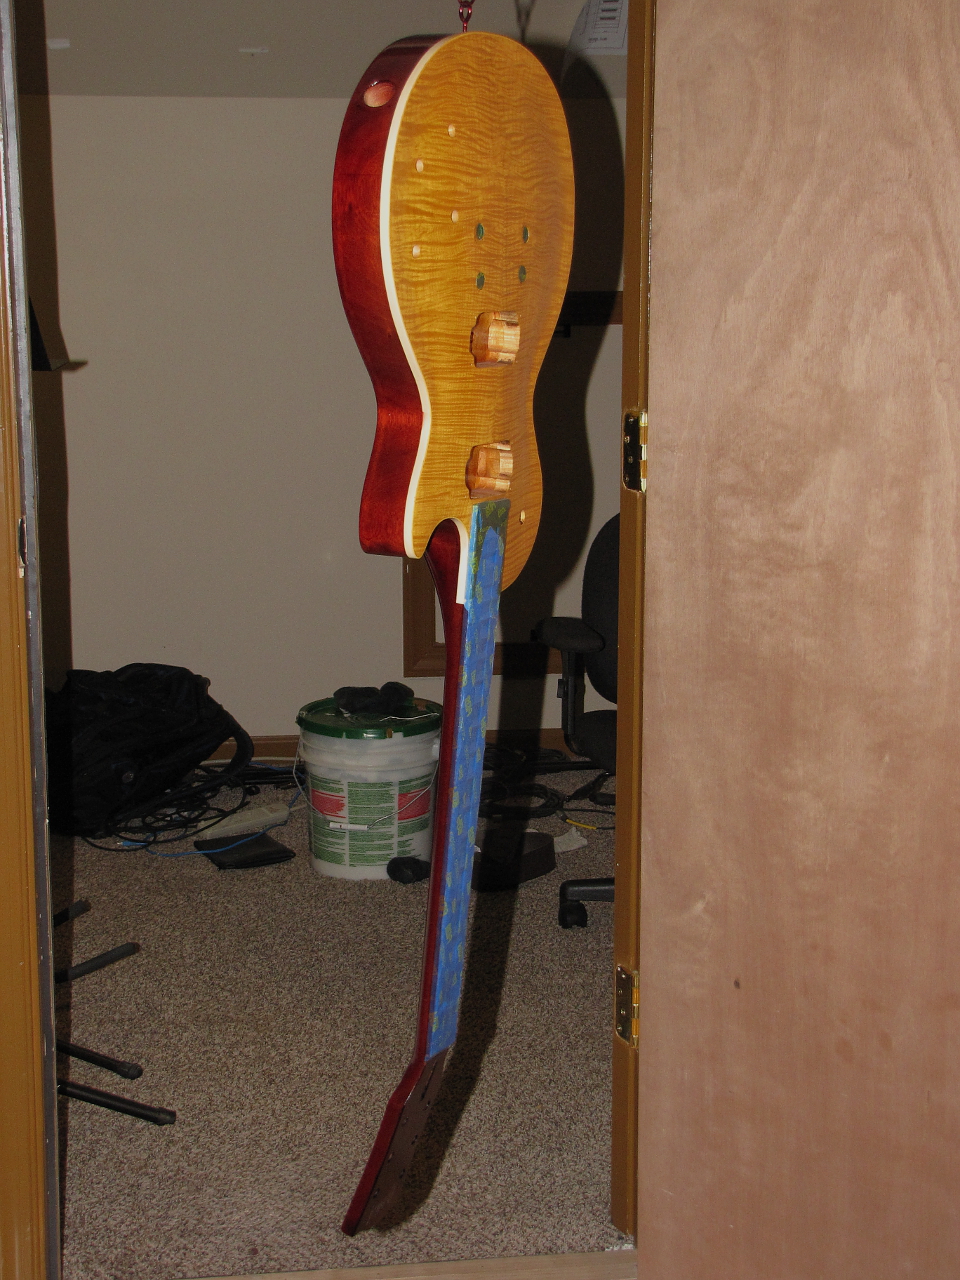
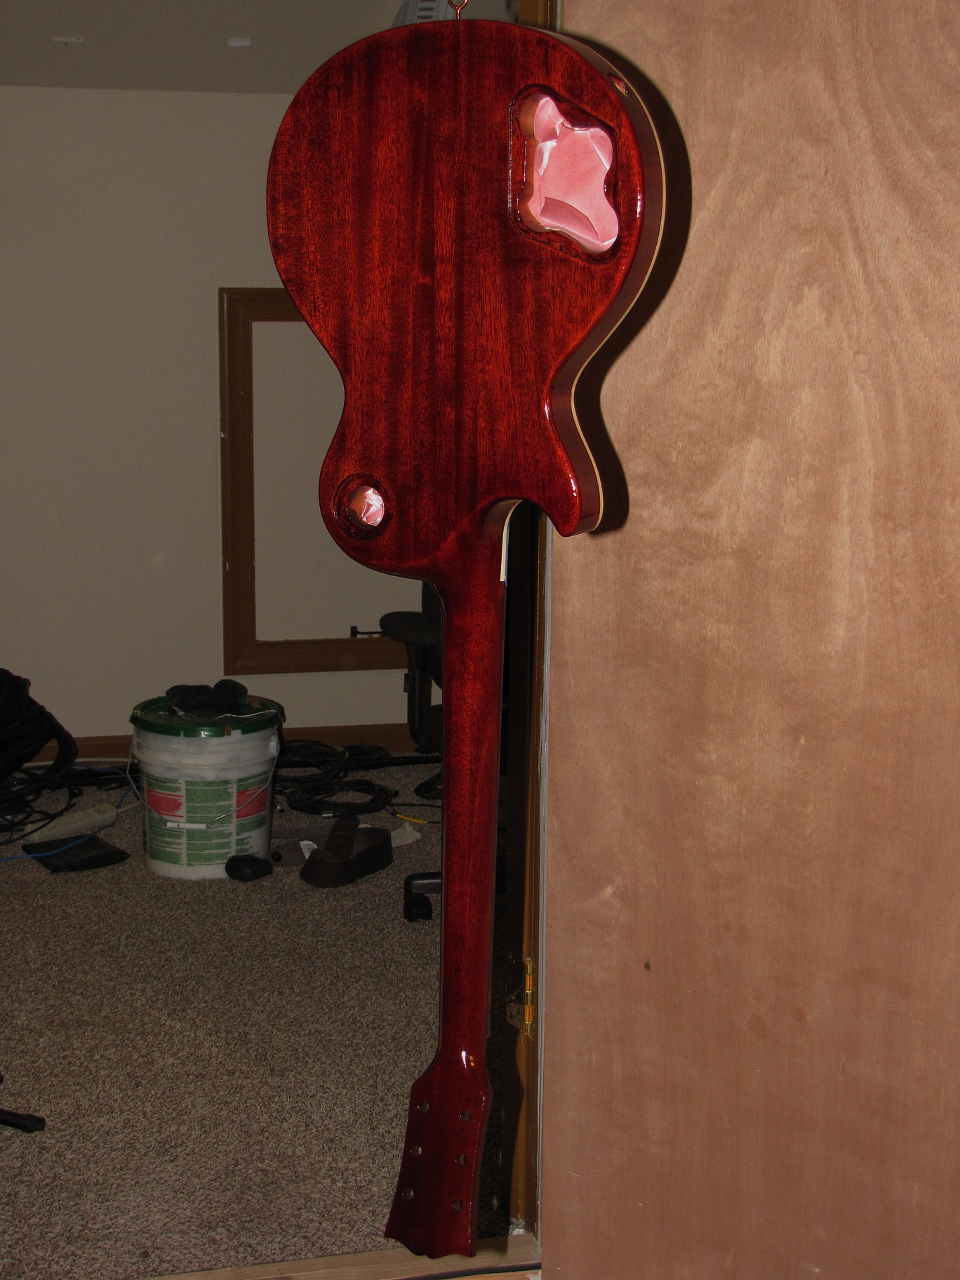
OK. Another day gone by and I have all the color coats completed...Heres 5 views to show all sides. All thats left is a bunch of coats of clear. Then it sits for a month to harden. Then more hard work. Wet sand the entire guitar through several grits of increasing fineness up to about 2400 grit to level off all the orange peel, then buff to a mirror shine..View 1 |
 |
View 2 |
 |
View 3 |
 |
View 4 |
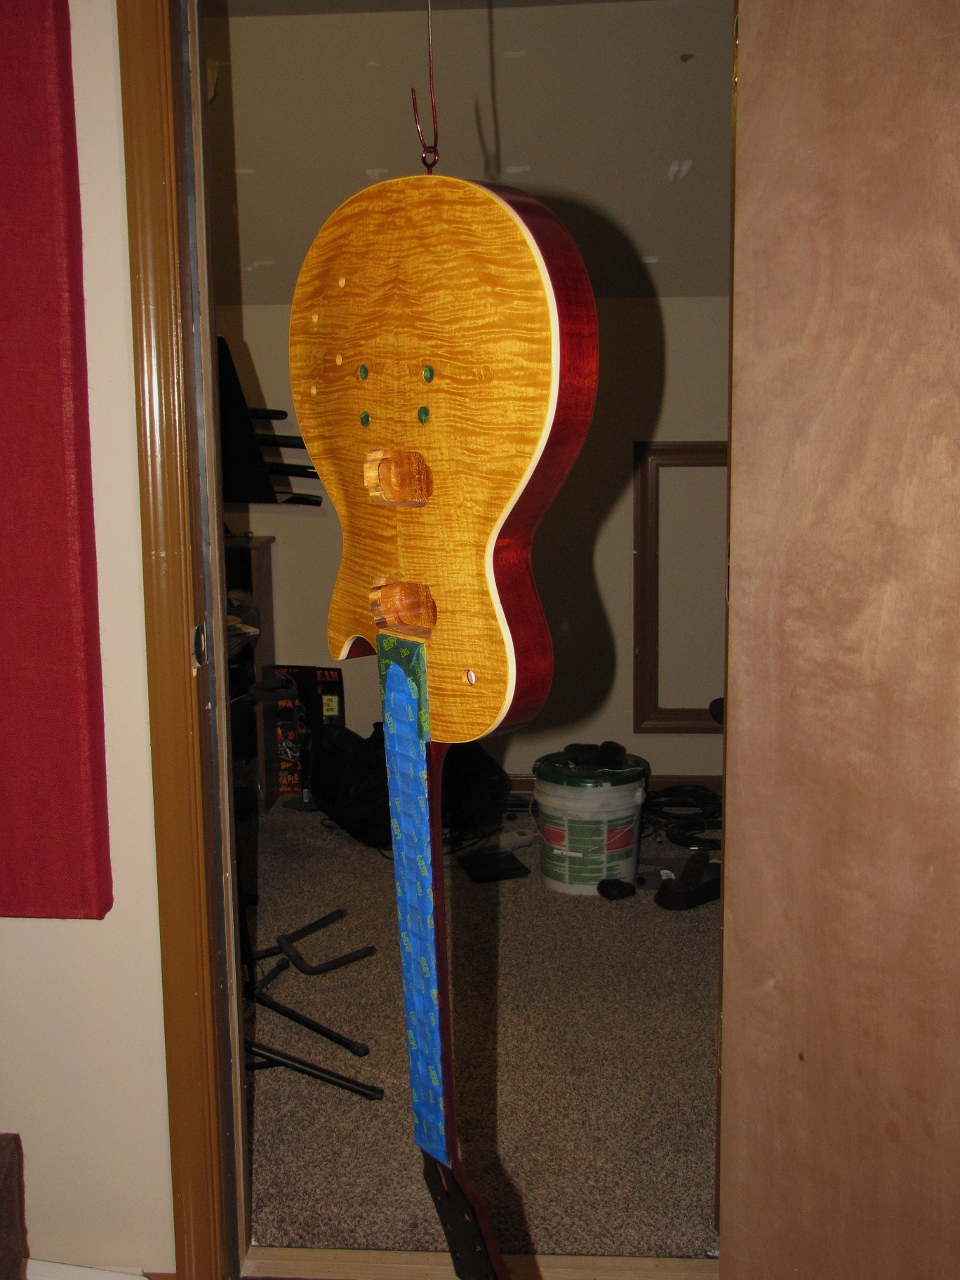 |
View 5 |
 |
So here is the end of the build. All thats left is to wet sand and buff to a high gloss, and then bolt on all the hardware again, and then rock out :) Sadly I have to wait a month for the lacquer to harden before I can sand and buff :) |
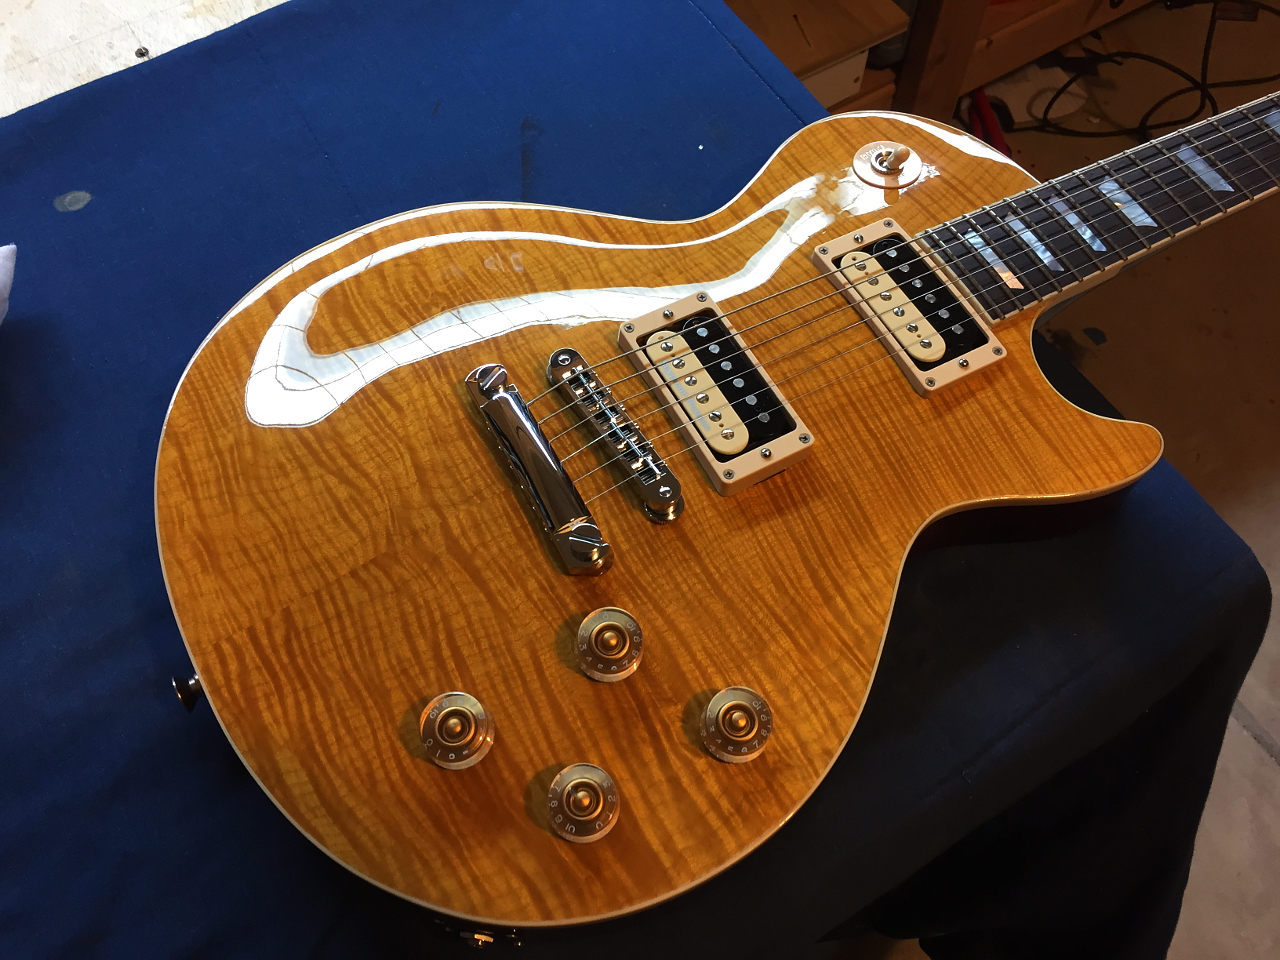
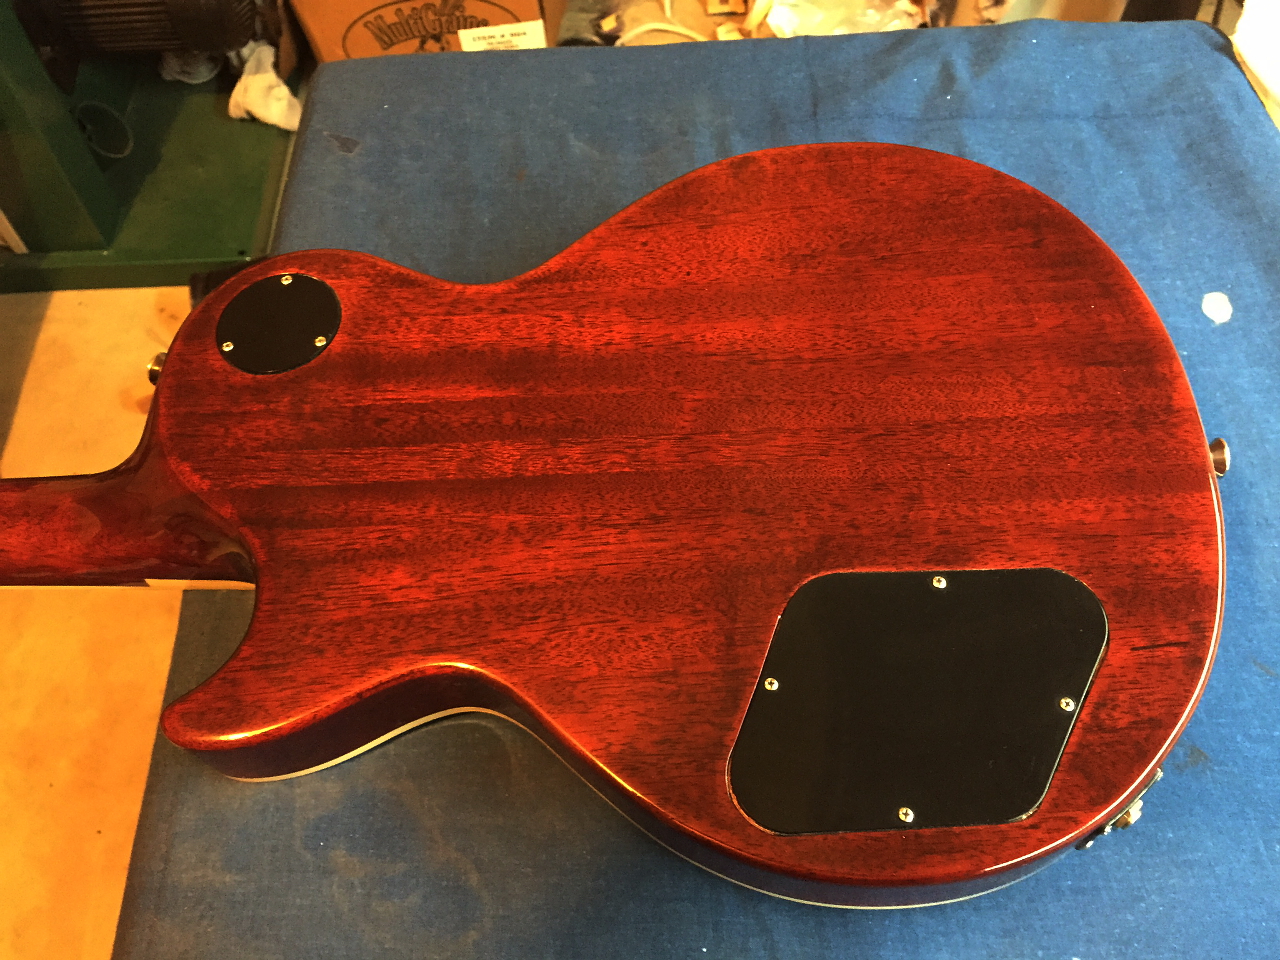
Well, here it is. I waited full month for the lacquer to harden, and after a day of wet sanding and buffing, and another day of attaching tuners, soldering in pots and pickups, etc., we have finally arrived at the end of the adventure. And yes, I did use an actual gibson "Standard" truss rod cover. I doubt they will sue me for it! I think if you compare this shot to the sample I used in the beginning I pretty much hit the nail on the head. Aside from the differences in hardware (which were planned and mentioned above) and differences in the figure of the top wood (which was predictable as no two pieces of figured wood are alike) we came damn close to our example. I'm well pleased and feeling pretty smug :).